Android Studio Tutorial For Beginners
If you are starting Android Development, then this is the best blog that you should read before diving into the vast field of Android Development. After reading this blog, you will get more familiar with the Android Studio i.e. the tool that is used for developing Android applications. It is rightly said that:
If you give me six hours to chop down a tree then I will spend the first four hours in sharpening the axe
So, in our case, if Android Development is our tree then Android Studio should be our axe. In this blog, we will learn about Android Studio i.e. what is Android Studio, how to install Android Studio, some of the tips and tricks of Android Studio and many more interesting things that can be used to make Android applications faster than before. So, let’s get started.
What is Android Studio?
To write some code for your Android application, you need some kind of environment or code editor that will make your task easy. No doubt, you can write the same code by using any normal text editor but that will increase your workload. You can use that energy in developing some cool logic in your Android application.
So, Android Studio is an Integrated Development Environment (IDE) for Android app development. It is based on Intellij IDEA. To enhance productivity while building Android application, Android Studio provides a number of features, some of these are:
- Instant run on your mobile device or any virtual device to check the working of the application
- Extensive testing tools that can be used for better testing before launching your application on the Play Store
- Flexible Gradle-based build system
- Code autocomplete
- Provides predefined templates that can be used in our Project
- Emulator support, that can be used to have a virtual feel of the Android device
- It provides C++ and NDK support
- Support for Github and other Version Control Systems
How to install Android Studio?
In order to install Android Studio in your system, make sure to download the latest version of the Android Studio from Android Studio website . Also, check the system requirements of Android Studio here .
To install Android Studio, you can follow the steps mentioned in the Android Developer website for Android Studio Installation .
Writing your first Android Studio application
By default, Android Studio provides you a number of templates that you can use while making your very first Android Studio project.
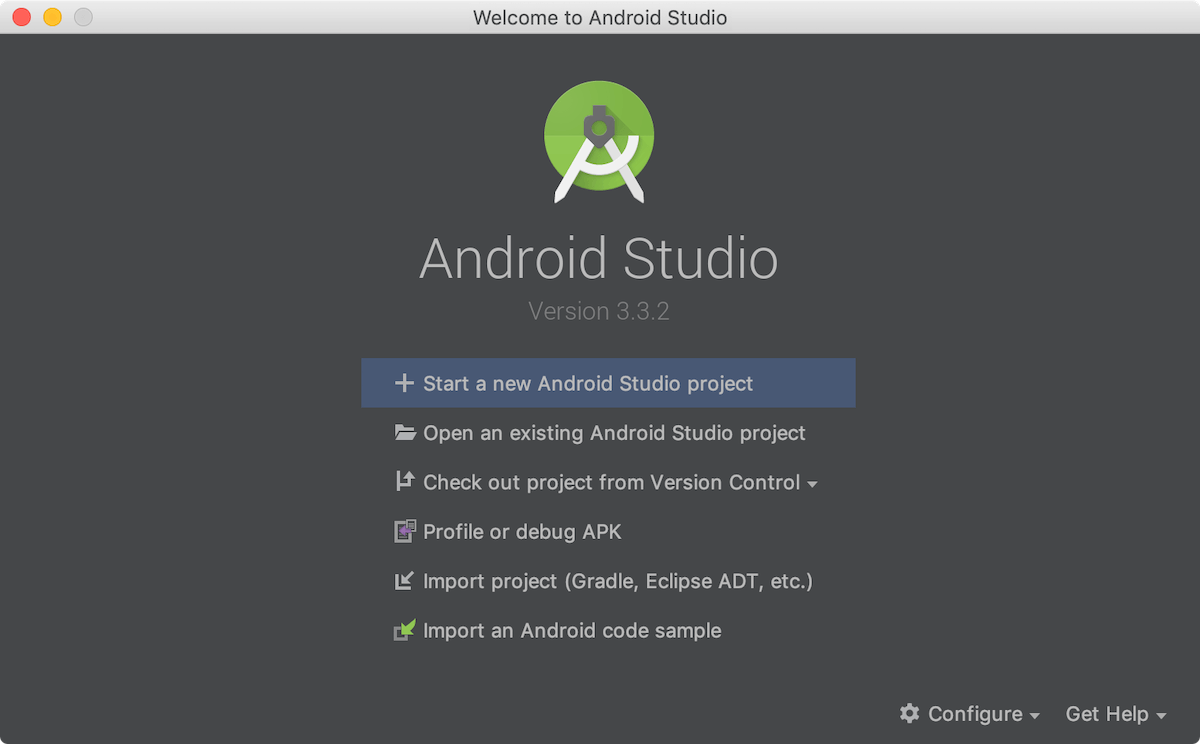
To create a new project in Android Studio, click on Start a new Android Studio project:
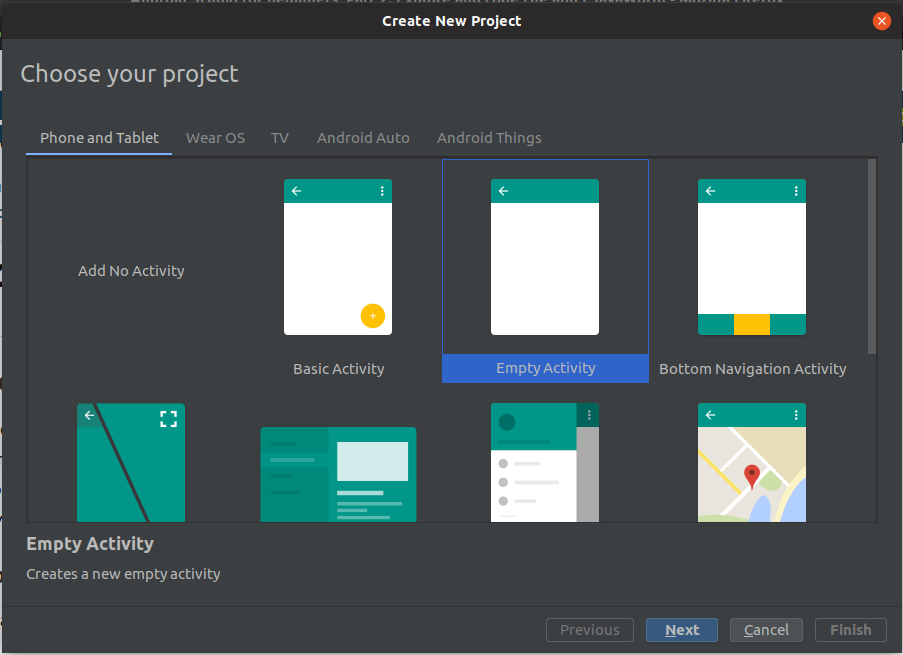
After that, select from the number of predefined templates that you can use in your project without coding for the same. If the desired template is not present then you can select Basic or Empty Activity template.
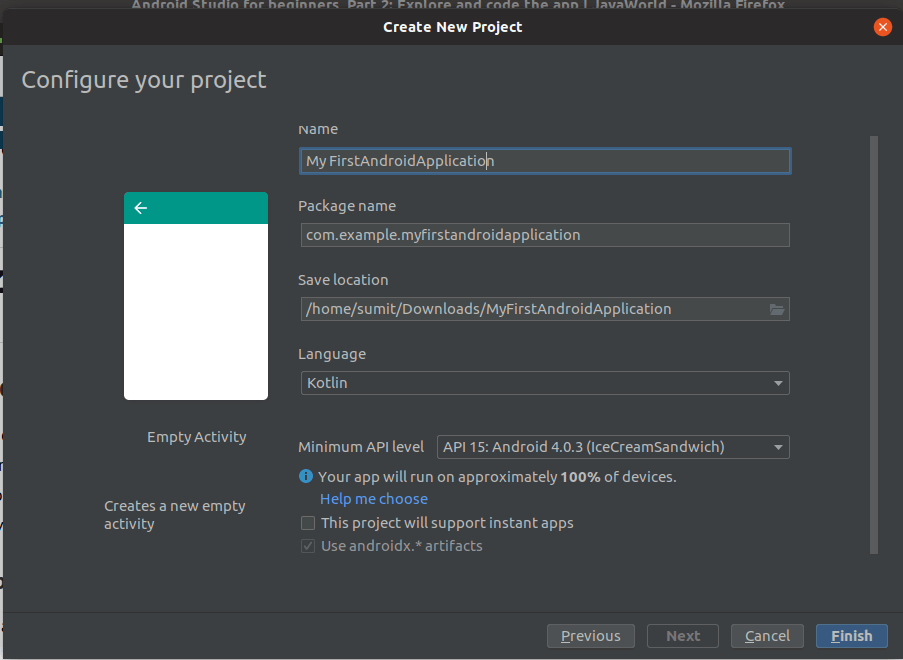
After selecting the desired template, click on next and then enter the name of the application, package name of the application, save location, language and minimum API level (this is the minimum API level supported by your app). After selecting these, click on Finish .
Congrats, your first Android Studio project is ready. You can run your project on your device by connecting the device with USB and then run your Hello World application :) But, before that, get familiar with the Android Studio. Below screen will be opened whenever you create a project in Android Studio:
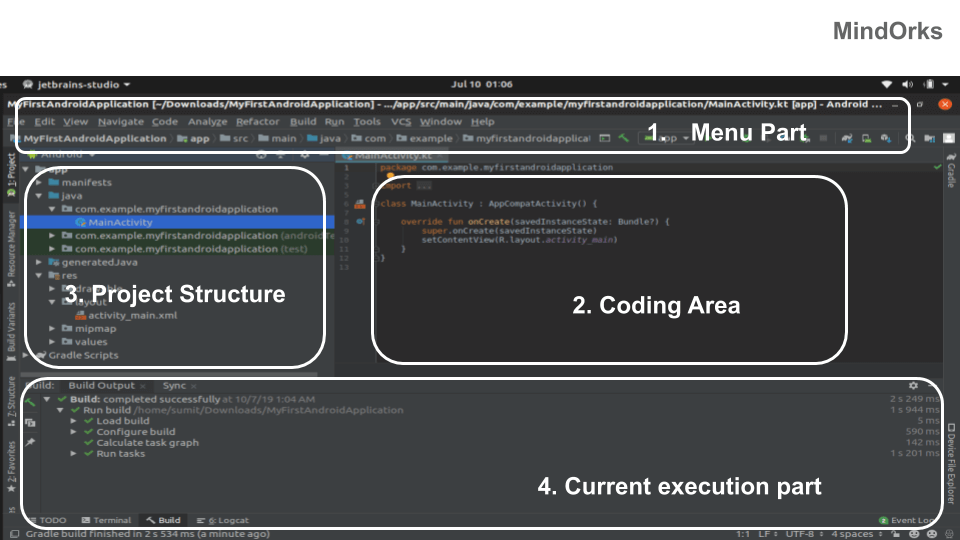
To understand in a better way, we can divide the Android Studio screen into four parts:
- Menu part: Here, you will get various options like creating a new project, opening a project, running your project on the desired device, build your project and many other options.
- Coding area: This is the area where you can actually write code for your .kt or .java or .xml file. You can open a number of files at a time in different tabs, but the editing can be done in only one at a particular instant of time.
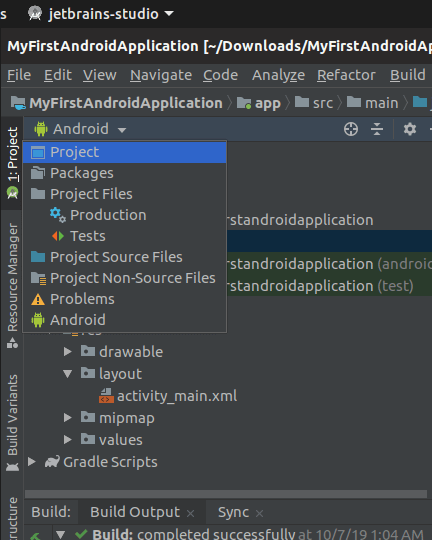
- Project structure: This is the part from where you can access all your files present in your project. There are various views of the project structure in Android Studio. You can use the below views:
- Current execution part: This part is the most important part of the Android Studio. Here, you can see the currently executing process or activity. You can detect the error if any in your Android application. Here, you will get all your build outputs and actions, logcat results, todos and also, you can use terminal here in your Android Studio.
Understanding the Designing part
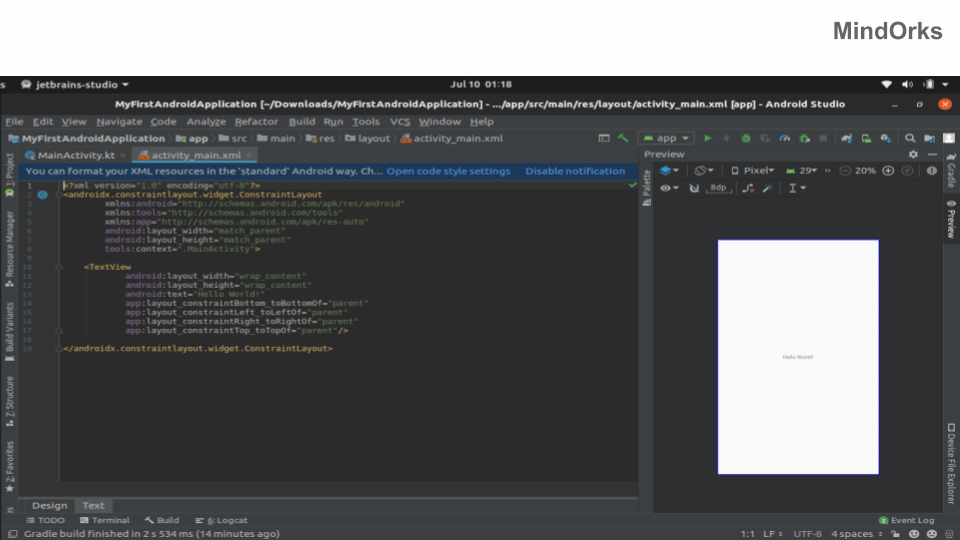
You can create the UI of your Android application by writing codes in your .xml file. You can find your .xml from in the res/layout directory. Here, you will be having two options of designing the UI for your application i.e. the Text way or the Design way.
In the Text way, you can write the xml code for your Android application and at the same time, you can see the preview on some mobile device. Below is a representation of the Text way of writing the UI:
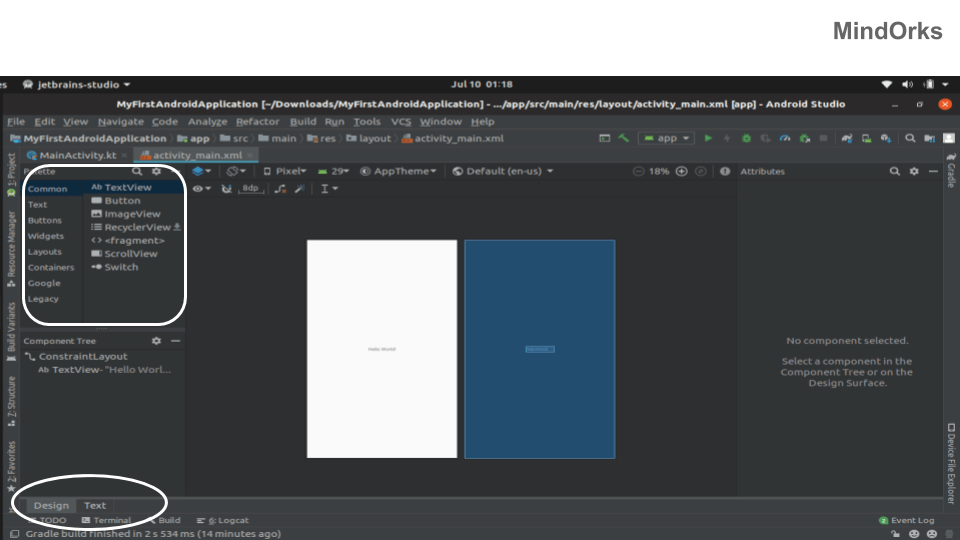
Android Studio, provides a way to drag and drop various widgets and use it in your application. You will be having a list of Palette and you can use any of them in your application. Following is the view of the design part of the Android studio:
Run your app
In Android Studio, you can run your application in two ways, either you can use your mobile device to run the app or you can create a virtual device called emulator and run the app on it. The virtual device will perform the same as that of a normal device but it will require some RAM and storage.
To run an app on your device, follow the below steps:
- Use a USB cable to connect your device with your PC.
- Then open the Settings of your device.
- (Only on Android 8.0 or higher) Select System .
- Scroll to the bottom and select About phone .
- Scroll to the bottom and tap Build number 7 times.
- Return to the previous screen to find Developer options near the bottom.
- Open Developer options , and then scroll down to find and enable USB debugging .
- After that, in your Android Studio, click on Run to run your application by selecting the connected device
To run your app on Emulator, follow the below steps:
- In Android Studio, click on Run
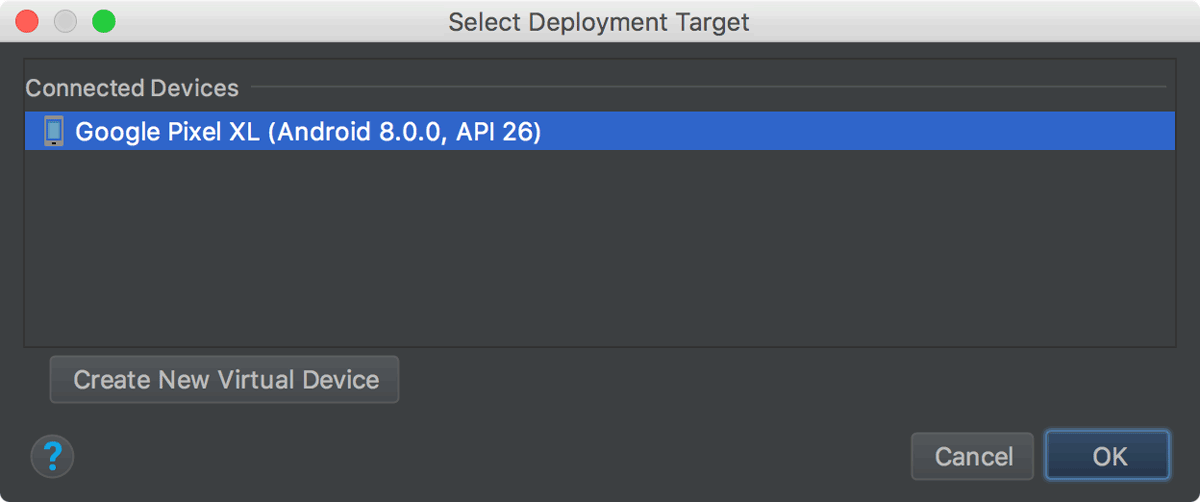
- In the Select Deployment Target window, click on Create New Virtual Device.
- In the Select Hardware screen, select a phone device from a list of Phones and click on Next.
- In the System Image screen, select the version with the highest API level and click Next.
- On the Android Virtual Device (AVD) screen, leave all the settings alone and click Finish .
- Back in the Select Deployment Target dialog, select the device you just created and click OK .
Keyboard Shortcuts
You can use keyboard shortcuts in Android Studio to perform number of operations in a faster way. Some of these shortcuts are:
- Find: ctrl + F in Windows/Linux and cmd + F in Mac
- Replace: ctrl + R in Windows/Linux and cmd + R in Mac
- Find class: ctrl + N in Windows/Linux and cmd + O in Mac
- Find file: ctrl + shift+ N in Windows/Linux and cmd + shift+ N in Mac
- Zoom in/out: ctrl + plus/minus in Windows/Linux and cmd + plus/minus in Mac
- Fit to screen: ctrl + 0 in Windows/Linux and cmd + 0 in Mac
- Go to xml: ctrl + B in Windows/Linux and cmd + B in Mac
- Toggle device: D in Windows/Linux and D in Mac
- Override methods: ctrl + O in Windows/Linux and cmd + O in Mac
- Implement methods: ctrl + I in Windows/Linux and cmd + I in Mac
- Generate code: alt + ins in Windows/Linux and cmd + N in Mac
- Start new line: shift + enter in Windows/Linux and shift + enter in Mac
- Debug: shift + F9 in Windows/Linux and ctrl + D in Mac
- Copy: F5 in Windows/Linux and F5 in Mac
- Commit project in VCS: ctrl + K in Windows/Linux and cmd + K in Mac
You can find some more shortcuts of Android Studio form here .
Some Tips and Tricks
There are some tips and tricks that can be used to master Android development using Android Studio. These tips and tricks are:
- Setting the theme
- Changing color of Logcat
- Fast Searching
- Split Screen
- Distraction free mode
- Code completion
- Multi cursor feature and many more
We have a separate blog on Android Studio Tips and Tricks . You can find in detail about the above-mentioned points from here .
Conclusion
In this blog, we looked at the view of Android Studio and also learned some of the shortcut keys that can be used in Android Studio. Finally, we saw some of the tips and tricks of Android Studio. Hope you liked this blog.
Keep Learning :)
Team MindOrks!