Tips and Tricks of Android Studio

Being an Android Developer, we use a number of IDE for writing the code for our Application. For example, Android Studio, Eclipse, Visual Studio (in some cases), etc. But the most famous and the recommended one among these IDEs is the Android Studio. Nowadays, every Android Developer uses Android Studio to write codes for their Application because Android Studio gives us a lot of functionalities and features, that make our speed of writing codes fast. Also, we get an organized way to manage our project in Android Studio.
No prizes for guessing! In this blog, we will look upon some of the Tips and Tricks of Android Studio that will speed up your work even faster. It is rightly said that:
A sword never kills anybody; it is a tool in the killer’s hand.
No no, we are not going to kill anyone :)) I mean to say that we all know that Android Studio provides a number of features that can be used for faster Application development but do we use all those features? The answer is NO. But if you want to write codes in a faster and convenient way, then you must know all the features that Android Studio provides. So, let’s look upon some of the Tips and Tricks of Android Studio.
1. Setting the Theme
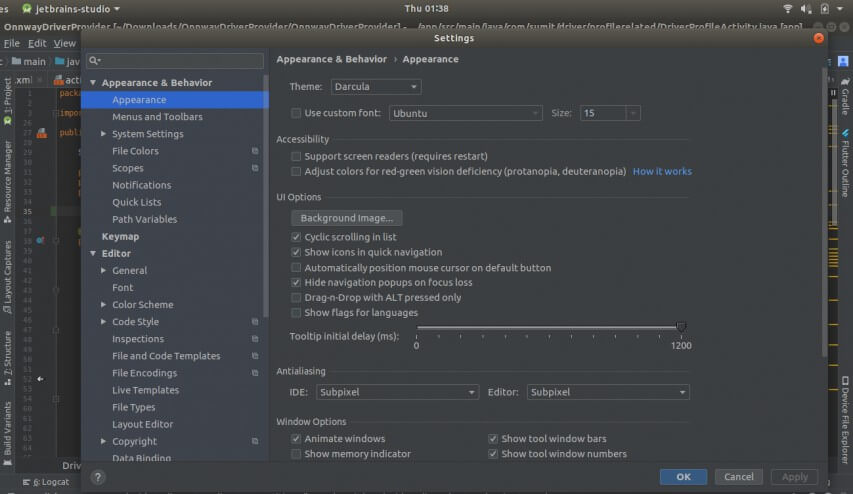
The theme of the IDE plays an important role in determining the time that we can spend on Android Studio to write code. So, a good and eye-soothing theme must be there. To change the Theme and color of the Android Studio, go to:
- For Windows: File > Settings > Appearance & Behavior >Appearance > Theme and then choose the desired Theme. To change the color of the editor text, you can go to File > Settings > Editor and change the desired property.
- For Mac: Android Studio > Preferences > Appearance & Behavior > Appearance > Theme and then choose the desired option. For the color of the text, go to Android Studio > Preferences > Editor and then change the desired property according to you.
2. Changing Color of Logcat
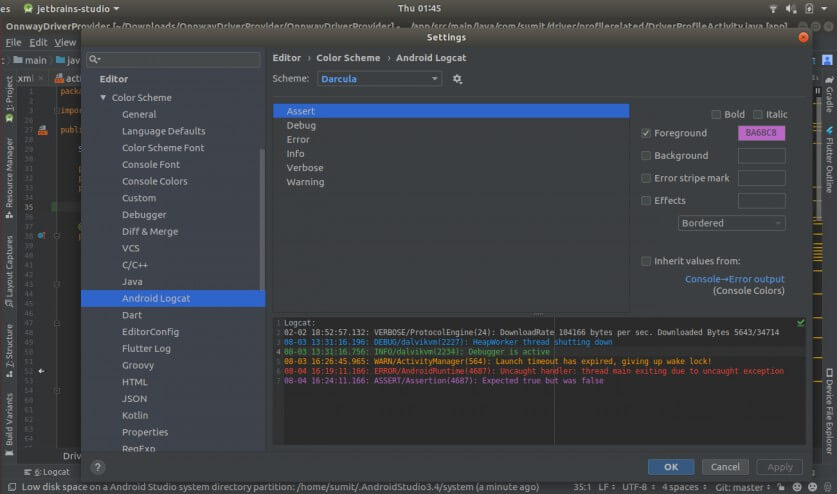
Logcat is the best way to find any bug present in the application. On the Logcat, we can see each and every event going on with a particular Android Application. It is better to have our Logcat personalised i.e. you can set the message color for different messages like error or warning. You can change the color of various options available in Logcat by going to:
- For Windows: File > Settings > Editor >Color Scheme > Android Logcat and change the default color by unchecking the “Inherit values from” option.
- For Mac: Android Studio > Preferences > Editor > Color Scheme > Android Logcat and change the default color by unchecking the “Inherit values from” option.
3. Profiler tip
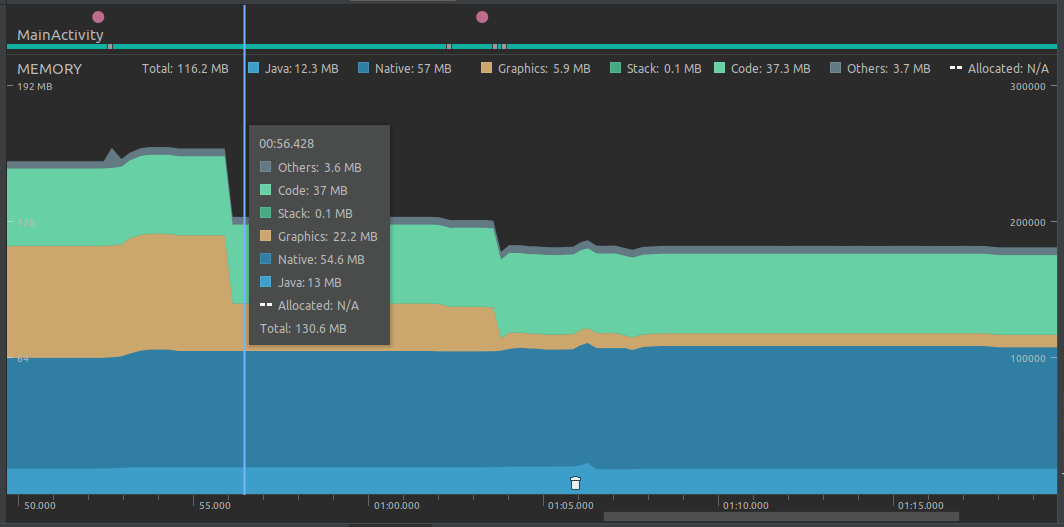
You can check the CPU, Memory, Network, and Energy usage of your application in the Android Studio. All you need to do is run your application on your device or emulator and then click on the Profiler button. (You can find the Profiler button in the right of the Run button)
After pressing the button you will get a window at the bottom of the Android Studio that will show a graph which describes the usage of CPU, Memory, Network, and Energy by your application. The window is super small. So, you can increase the size of the window by pressing the:
- For Windows: ctrl + shift + up arrow
- For Mac: cmd + shift + up arrow
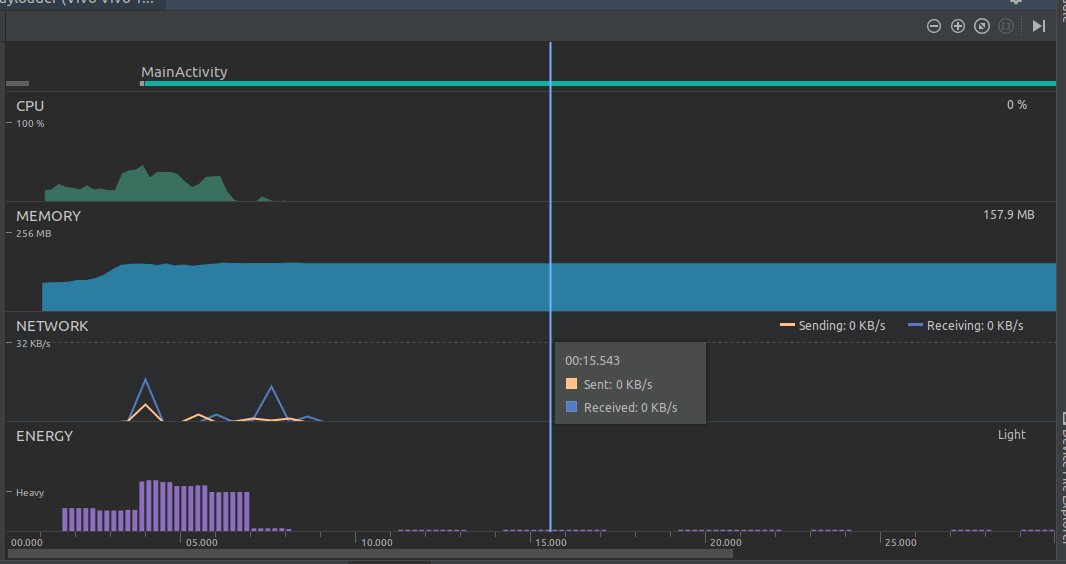
Also, you can open any of the four options available to you i.e. CPU, Memory, Network, and Energy to have a piece of detailed information about the same. For example, you can check if there is some memory leakage by analysing the Memory graph.
4. Opening Tool window
In Android Studio, there are various tool windows for different tasks like Project, Logcat, Run, Todo, etc. You can open these windows by simply clicking on the small buttons corresponding to these windows. But to open it with the help of keyboard you need to note the underlined number that is present on the small button to open that window.

In the above image we can see that to open Logcat we have to use the number 6. So, to open Logcat press:
- For Windows: alt + 6
- For Mac: cmd + 6
Similarly, you can use alt/cmd + underlined number combination to open other windows.
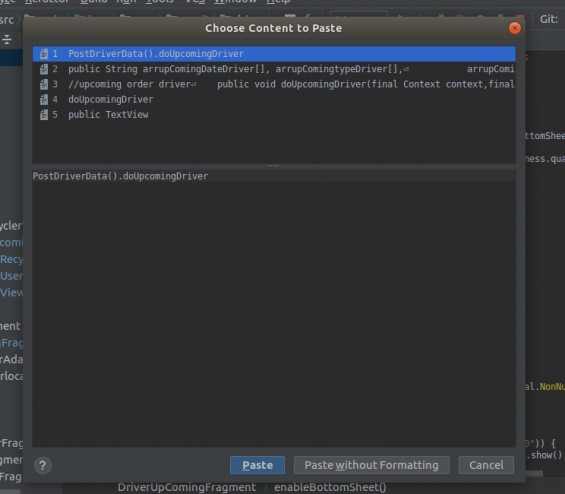
In many cases, we don't have any underlined number for a window. For example, to open Gradle, we don't have any underlined number. So, in that case, you can take the help of switcher . Press ctrl + tab (for both Windows and Mac) and then release the tab and keep on pressing the ctrl button. You will see the below image:
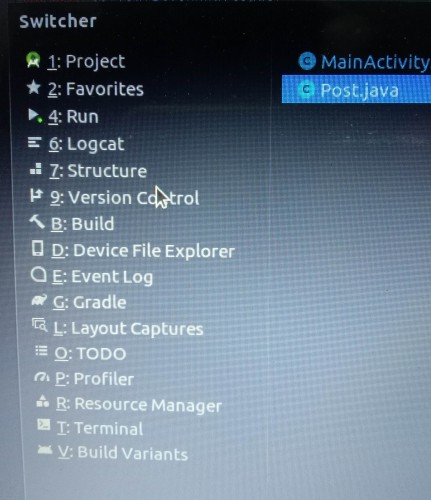
Here, you can see that G is underlined in case of Gradle. So, now you can press G to open the Gradle(the switcher is open here).
You can close the recently opened tool window by pressing the shift + esc (For both Windows and Mac)button. To get back the window again, you can press f12 anytime.
To close or hide all the opened tool window and to get the maximum space available for the editor, you can use ctrl + shift + f12 .
5. Find everything
While developing an Android application, we make many files and in those files, there are many classes and symbols. So, it becomes a harder task to find which file is located where. Don't worry, by pressing shift (two times) (both in Windows and Mac) you will get a window to search anything you want to find.
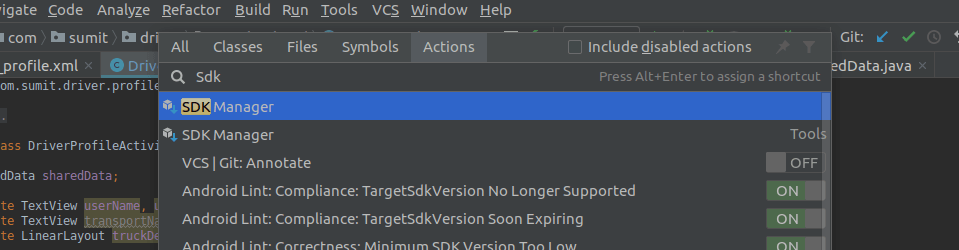
6. Finding Actions
Android Studio contains a number of features and it is impossible to remember the place from where a particular feature can be used or activated. So, in order to search these features in a very fast manner, you can use:
- For Windows: ctrl + shift + a
- For Mac: cmd + shift + a
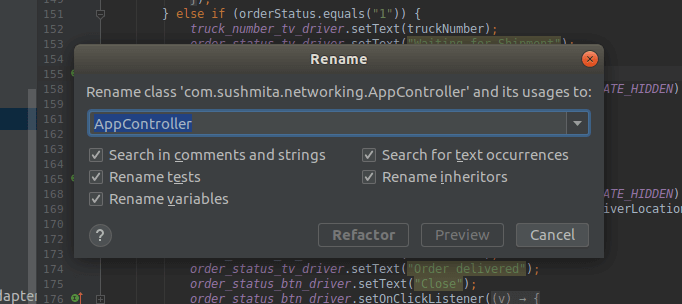
7. Rename file/variable
There are many cases when you want to change the name of a file or a variable, but in order to do so, you have to change the name at all places where these files or variables are used in the project. Don’t worry, Android Studio provides a better way of doing this. All you need to do is select a file and then right-click on it and then click on Refractor > Rename or simply shift + f6 (for both Windows and Mac) and then enter the new name Refract the changes. This will change the file name throughout the project.
8. Camel Hump Navigation
We know that by pressing the ctrl + left (in Windows) and option + left (in Mac) we directly move to the next word in our code and by using shift + left arrow we select a particular word. So, by using ctrl + shift + left arrow (in Windows) and option + shift + left arrow (in Mac), we can directly select the next word. But what if we want to change some part of a variable name that is following the camel case notation. For example, if our variable name is myVarName and we want to change it to myVariableName. Should we traverse one by one character to reach to Var and change it to Variable? NO.
Press shift two times and search for "CamelHumps". Then, set the "Use Camel Humps words" option to ON.
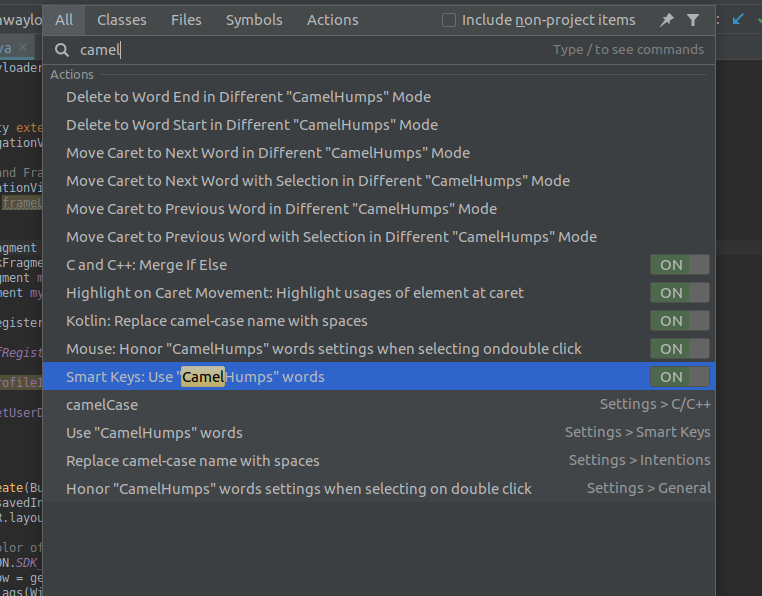
Now, by pressing ctrl + left (in Windows) or option + left (in Mac) arrow, we will directly move to the next capital letter i.e. if the variable name is myVarName and the cursor is at m then after pressing the ctrl + left(or option + left) arrow the cursor will move to V . You can select the Var by pressing ctrl + shift + left arrow (in Windows) or option + shift + left (in Mac) and change it to Variable.
9. Split Screen
Split Screen is a new feature that is provided by almost every modern day’s IDE. By using Split Screen, you can use two screens at a time i.e. the same window will be split into two parts, either vertically or horizontally. In order to split the window, right-click on the tab of the file that you want to split and then choose Split Vertically/Horizontally .
10. Distraction Free Mode
You can use the Distraction Free Mode of Android Studio to remove the editor tabs and tool-windows buttons. By doing so, your focus will be on the coding part and nothing else. To enable the Distraction Free Mode, go to View > Enter Distraction Free Mode (in Windows) or View > Appearance > Enter Distraction Free Mode (in Mac) .
11. Adding Macros
Macros are very beneficial when you want to perform more than one action by just pressing one key(or a combination). For example, if you want to remove the unwanted imports, then arrange the code and finally save the code, then you have to perform three operations through a keyboard. But with the help of Macros, you can perform all these just by pressing ctrl + s or any key combination of your choice.
To make a macro, go to Edit > Macros > Start Macro Recording and then the macro recording will be started. Now, do the desired operations by pressing the keys. For example, press ctrl + alt + o (in Windows) or ctrl + option + o (in Mac) and then ctrl + s . After that, stop the Macro recording by pressing the Macro recording button(in the bottom right corner of Android Studio) and then give the name and key combination to your macro. Now, whenever you press your key combination, the above 2 operations will be performed.
12. Code Completion
You can use the Postfix Code Completion to write the code in a faster way. All you need to do is press ctrl + j (in Windows) or cmd + j (in Mac) and Android Studio will give you a number of possible codes. For example, if you want to write the code for a Toast, then just write “T” and press ctrl + j (or cmd + j) , you will be given a list of possible items. Select Toast and click Enter.
13. Navigate through methods
In an Android file, there are various methods and it becomes a harder task to navigate from one method to other as a method can be very large and you need to scroll to move on to the next method. So, to do it quickly, we can press alt + down arrow to move to the next method in the downward direction and alt + up arrow to move to the next method in the upward direction.
14. Find information about methods and parameters
You can find the information related to a method by putting the cursor on the required method and then pressing the ctrl + q (in Windows) or ctrl + j (in Mac).
To get the information about the parameters of the methods, you can press ctrl + p (in both Windows and Mac).
15. Extended Selection
There are various blocks present in a file. For example, in a method block, there can be one or more if block, for block, while block, etc. So, to select some lines together we can use the approach of extended selection. Press ctrl + w (in Windows) or option + up arrow (in Mac) and the desired lines will be selected. To select more lines, keep on pressing ctrl + w . (Try this in Android Studio for better understanding).
16. Move Statements up/ down
Inside a function, you can select one or move lines of code and collectively move all the selected statements to up or down by pressing ctrl + shift + up arrow (to move up) and ctrl + shift + down arrow (to move down) in Windows. For Mac, you can use option + shift + up/down
17. Find all occurrences
Sometimes we use a variable many times in our code and at a certain time we may need to change the variable name. To find all the occurrences of something, press ctrl + f (in Windows) and cmd + f (in Mac) and enter the name of the variable.
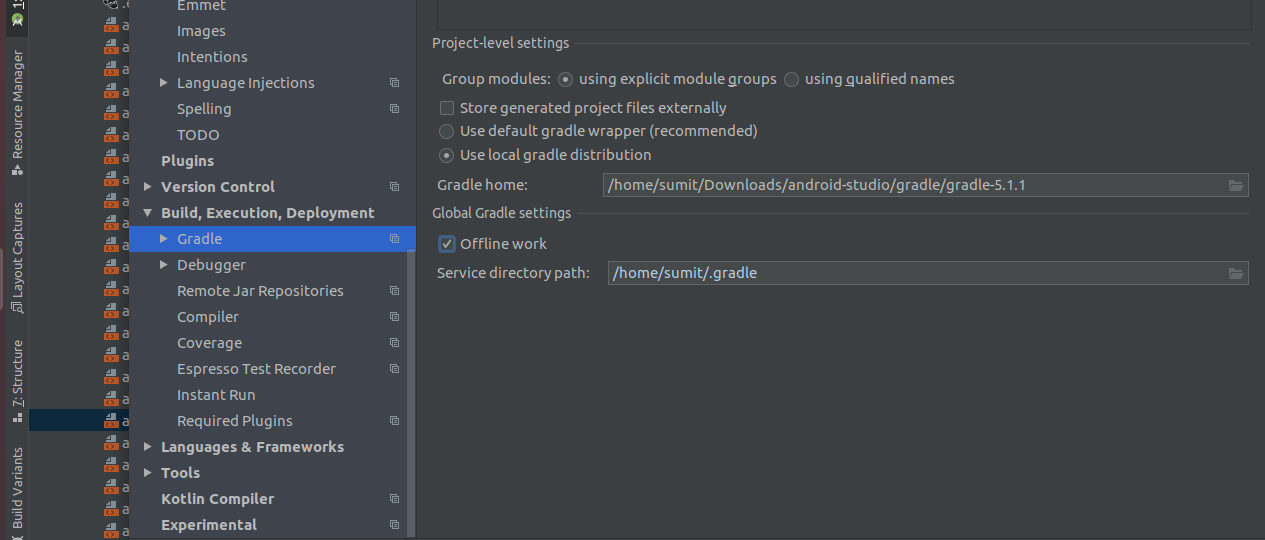
18. Working Offline
If you want your Android Studio to run faster, then you can use the Offline mode of Android Studio. To start Offline mode, Open the Preferences window by clicking File > Settings (in Windows) or Android Studio > Preferences (on Mac) and in the left pane, click Build, Execution, Deployment > Gradle . After that check, the Offline work checkbox and click Apply or OK .
19. Line Number and Method Separator
You can put line numbers to your code and method separator also. This will make your code more readable. All you need to do is click on File > Settings > Editor > General > Appearance > Select Line Number/Select Method Separators .
For Mac, you can find this in Android Studio > Preferences > Editor .
20. Multi cursor Feature
You can edit to more than one lines at a particular instant of time. For doing so, go to a particular word and click alt + j (in Windows) or ctrl + g (in Mac). This will select the next appearance of that word in the file. Now you have to write only once.
21. Last Copy & Paste
You can choose from your last 5 Copy/Paste operations by clicking ctrl + shift + v (in Windows) or cmd + shift + v (in Mac).
22. Open Class
In order to open a class in Android Studio, press ctrl + n (in Windows) or cmd + o (in Mac) and then type the class name.

23. Open File
To open file press ctrl + shift + n (in Windows) or cmd + shift + o (in Mac).

24. Find Declaration
You can find the declaration of any class and its method by clicking on that class and pressing ctrl + b (in windows and Linux) or cmd + b (in Mac).
25. Move between tabs
You can move between tabs by pressing alt + left/right arrow (in Windows) or cmd + shift + [ (left) and cmd + shift + ] (right) (in Mac).
26. Last tab
You can switch between last tabs by using ctrl + tab (in Windows) or cmd + tab (in Mac).
27. Format your code
You can format your code by using ctrl + alt + l (in windows) or cmd + option + l (in Mac). Formatting means rearranging the declaration of attributes. For example, “id” of a TextView should be written before the width and height property. This makes the code more readable.
28. Auto-indent line
You can apply indentation by using ctrl + alt + i (in Windows) or control + option + i (in Mac).
29. Find
You can find something in a file by using ctrl + f (in Windows) or cmd + f (in Mac).

30. Find and Replace
You can use find and replace feature by pressing ctrl + r (in Windows ) or cmd + r (in Mac).

31. Hardcoded String to resources
You can move your hardcoded string to
string.xml
file or any other resources file by just clicking on the string and pressing
alt + enter
(in Windows) or
option + return
(in Mac) and then Extract String Resource.

32. Build and Run
To build and run your app, press shift + f10 (in Windows) or control + r (in Mac).
33. Last edited location
You can directly move on to the last edited location in a particular file by pressing ctrl + shift + backspace (in Windows) or cmd + shift + delete (in Mac).
34. Close active editor tab
You can close the active editor tab by pressing ctrl + f4 (in Windows) or cmd + w (in Mac).
35. Resource Manager
Resource Manager is the newest tool in the layout editor of Android Studio. It shows every single resource that you have in your application i.e. you will see drawable, colors, layout, etc.
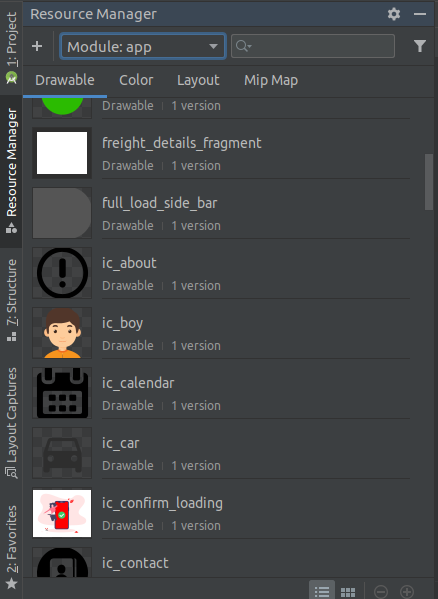
It's a very nice way to navigate through all the resources very quickly.
36. Using Plugins
You can use a number of plugins available in Android studio to improve the functionality of Android Studio. Some of these may be:
- ADB Idea: It helps to execute ADB commands to uninstall, kill, start, restart or clear an application.
- Android Material Design Icon Generator: This plugin will help you to generate Material Design Icons for your project.
- Git flow integration: This helps you to have a defined flow of version control of your project.
- Genymotion plugin: It is used to provide a smooth flow for Genymotion virtual devices.
- Key Promoter: It is used to make your own shortcut keys for a particular task.
Conclusion
Android Studio has a number of features and by using these features we can improve various things in our Android Project like Time Management, Code Formatting, Better Understanding of Code, etc. We looked upon some of these features. If you want to know more about your project in Android Studio then go to Help > Productivity Guide (Bonus tip :))
That’s it for this blog. Please let me know your favourite tips & tricks of Android Studio.
Keep Learning :)
Team MindOrks!