How to increase Push Notification Delivery Rate in Android?
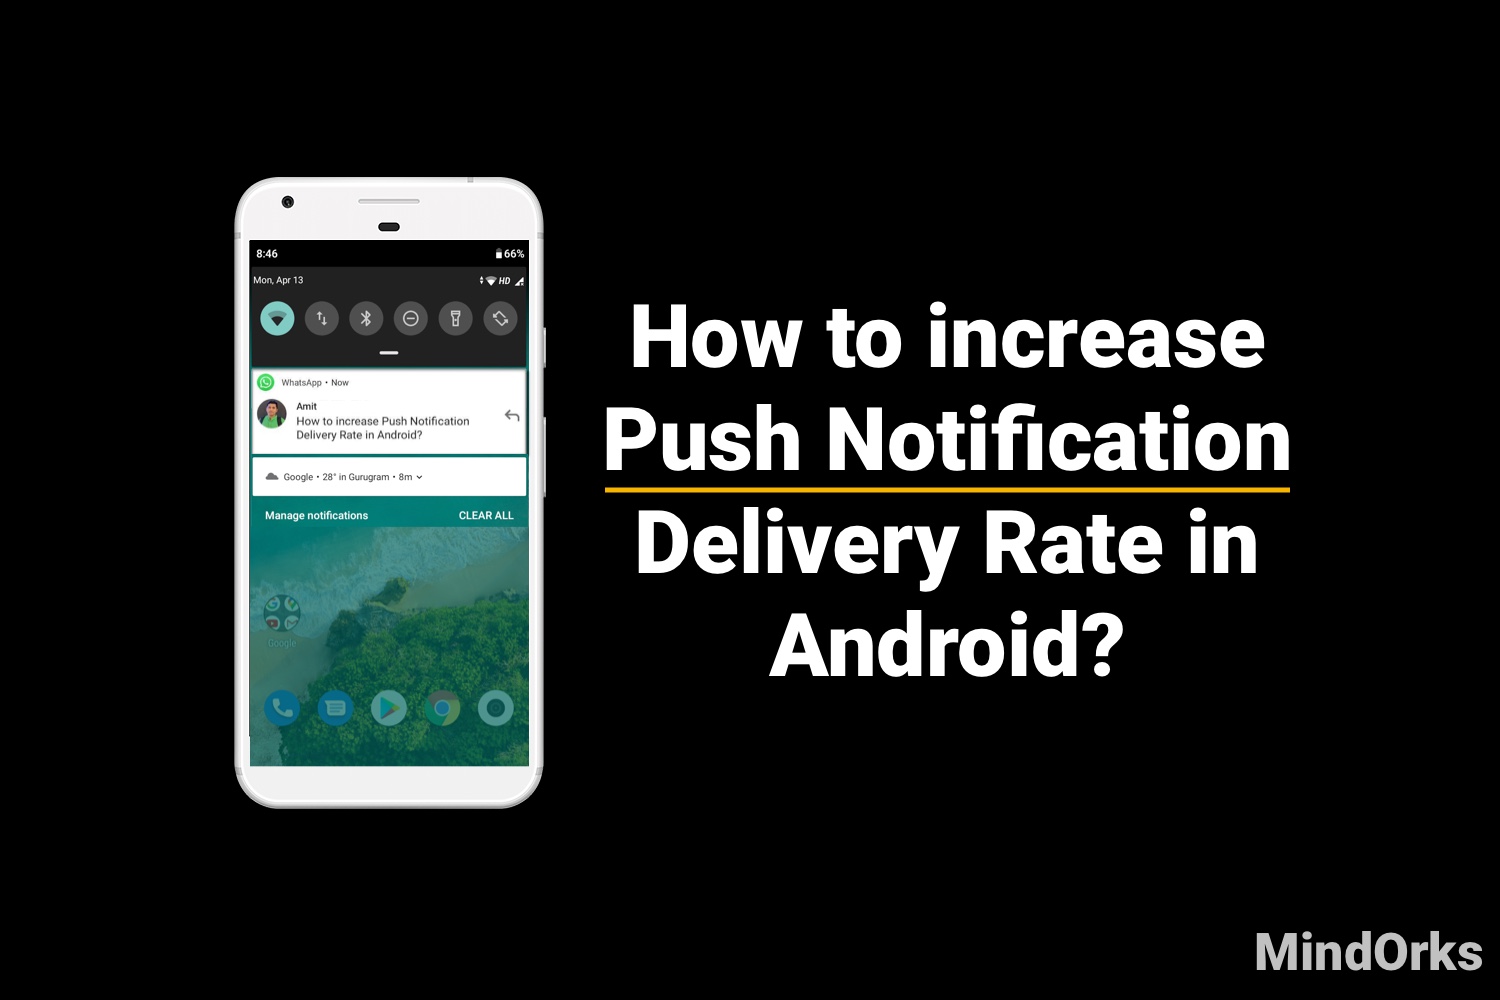
Notifications are one of the important parts of any application. Almost every application on your mobile device will be sending some or other kind of notification. One of the best examples of this is the WhatsApp notification. Whenever you receive some message, then that message is displayed on your phone in the form of notifications.
But many developers find it difficult to send the notifications to all their users i.e. it is found that only a few of their users receive the notifications and due to this, one of the most asked questions to me is "Why some of the users are not receiving the push notifications?"
In short, the answer is: It's not totally in our hands, but yeah we can increase the delivery rate to a large extent.
Welcome to MindOrks ! In this blog, I will discuss some of the ways to increase the delivery rate of notifications. The following is going to be the timeline of this blog:
- What exactly the problem is?
- How does the notification system work?
- How to solve the problems?
- What next?
So, here is a notification for you: LET'S GET STARTED :)
What exactly the problem is?
In this section of the blog, we will discuss the problems that are hampering the delivery rate of notifications.
First of all, the most common mistake that all developers do is taking the wrong data about the users of their app. For example, if your app is having 125 users, then there are cases that out of those 125 users 20% might have uninstalled your app. So, you might be taking data for 125 users but in reality, you sent the notification to 100 users only(20% of 125 = 25). So, the very first thing that you need to do is take the exact user count. (We will see how to track the uninstall and get this data correctly in some other blog).
From my experience, normally, only 30% of the users receive the notifications that we send i.e. only 30 out of 100. So, we are not able to send notifications to 70% of our customers. Let's look at the reasons:
- 30% getting notification: As discussed above, 30% of the users receive a notification.
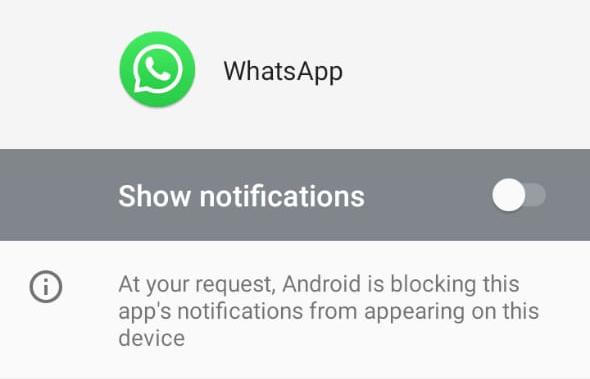
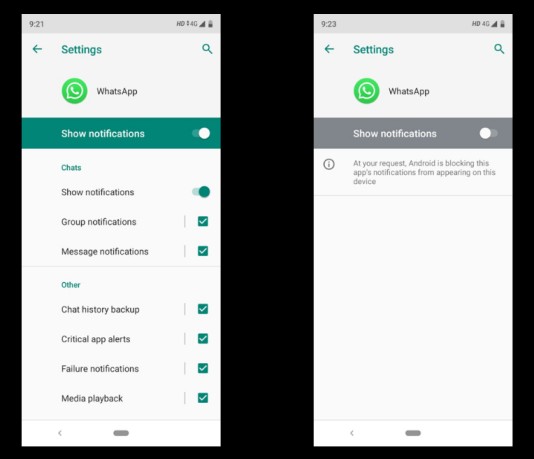
- 30% puts it in DND: Due to a large number of applications and so many notifications from those applications, 30% of the users tend to put that particular application in DND mode i.e. in Do Not Disturb mode. So, in this case, no notifications will be shown to the users for that particular application.
- 20% OEM restrictions: For better performance of mobile devices, the mobile manufactures make a list of apps called whitelisted apps such as WhatsApp, Twitter, Gmail, etc, and all the notifications from those applications are allowed because very few services or no services are killed for these apps. But for battery optimization, the services of those applications which are not present in the whitelisted app list are killed frequently and your user ends up not receiving the notification.
- 20% FCM GooglePlayServices not present or disconnected: All the notifications are sent with the help of FCM. So, in 20% of the cases, this service is not present in your user's device or it is disconnected.
These are the reasons that are responsible for the low FCM delivery rate. Before getting into the solution part, let's have a quick recap of how the notification system works in Android.
How does the notification system work?
Generally, we have two options to send push notification to our users:
- Directly from Firebase console website: Here, we register our app on Firebase console and then we get a registration token that uniquely identifies a device. Now, the notification message is composed with the help of Firebase console and the message is sent to the FCM backend. The FCM backend receives the message and generates a message-id along with some other data and sends the message to the desired user with the help of the registration token and when the user is connected, the message is received. The following image describes the whole process involved:
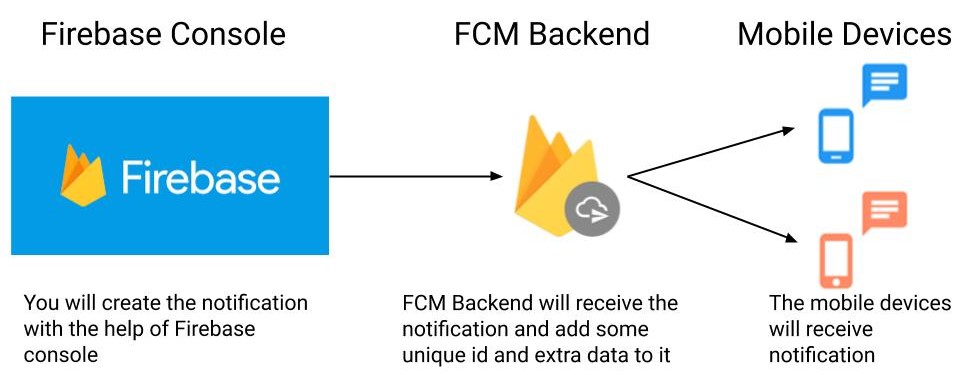
- Your Server to FCM Google Server and then FCM Google Server to users: Here, in this approach, whenever the app is installed in some device, then the application will register itself on the Google Server and in return, Google Server will return some FCM-ID that is unique for every user. Also, we store this FCM-ID on our server. So, what our server does is, it selects some FCM-ID and sends the notification data along with the selected FCM-ID to the Google Server. The Google Server then sends the notification to the user by identifying it with the help of FCM-ID. The following image describes the whole process involved:

How to solve the problems?
So, we have discussed the problems and the working of the Notification System. Now, let's find how to solve the problems that we discussed earlier in this blog:
The DND problem
You can write the code for checking if your user has disabled the notifications for your app or not for API level 19+. You can use the below code:
NotificationManagerCompat.areNotificationsEnabled()
The above method will return
true
if notifications are enabled otherwise
false
. For API level below 19, it will return
true
in any case.
So, if the notifications are blocked by the user, then you can display a message saying that the notifications from your app are very important, so please enable them to stay updated.
Another thing that you can do is to create channels based on the notification type . Now, the users will disable only those types of notifications that they don't want from your app and there are high chances that the user will not disable all the notifications from all the channels.
The OEM problem
You can check programmatically whether your application is in the whitelist of the device or not. If it is not, then you can ask the user to add your application to the whitelist. This can be done by adding the following permission:
<uses-permission
android:name="android.permission.REQUEST_IGNORE_BATTERY_OPTIMIZATIONS"/>
and then adding the app to the whitelist:
if(Build.VERSION.SDK_INT >= Build.VERSION_CODES.M) {
            Intent intent = new Intent();
            String packageName = getPackageName();
            PowerManager pm = (PowerManager) getSystemService(POWER_SERVICE);
            if (!pm.isIgnoringBatteryOptimizations(packageName)) {
                intent.setAction(Settings.ACTION_REQUEST_IGNORE_BATTERY_OPTIMIZATIONS);
                intent.setData(Uri.parse("package:" + packageName));
                startActivity(intent);
            }
        }
The OEM can also kill the services for better battery performance. In this case, you can directly pull the notification from the server. But this approach will not work for instant notification but for other notifications, we can pull the notification from the server by using the WorkManager and create a local notification.
If the above approach does not suit for your use-case, then you can create a separate notification centre page in your application and store all your notification in that place only. For example, below is the screenshot of the Activity page(Notification Center Page) of the Instagram app:
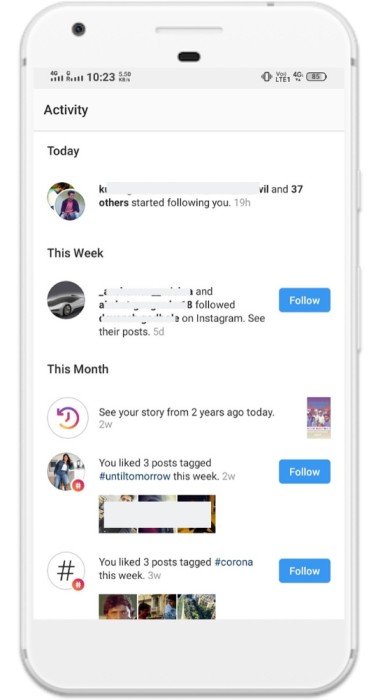
In this way, the user might develop a habit of opening that page for checking all the notification they have received. Here, you can always fetch the latest notification data from the server when the user opens the app or when the user opens the notification centre page or using the WorkManager based on your use-case.
Now, let's discuss the way you need to handle the things when you fetch the notification data from the server, although it will completely depend on your use-case too.
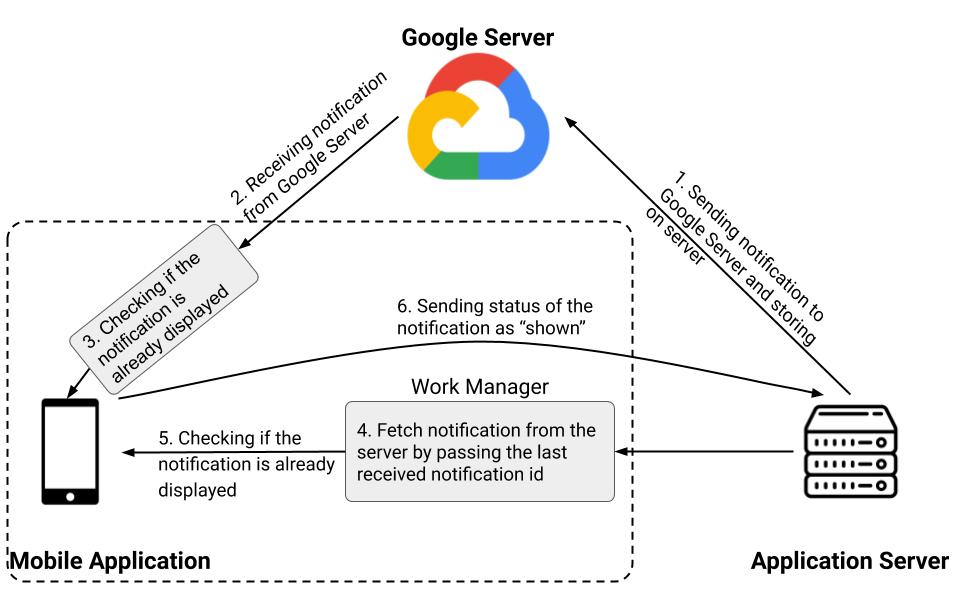
So basically what you can do is make a table on your server and this table will store all the information that the server is sending to Google Server for getting notification i.e. the FCM id and notification data. Along with these data, make a "status" column to store the status of notification i.e. shown or not(this field will be updated by client). The following process will take place:
- The server will request Google Server to send notification by sending the FCM Id and notification data. At the same time, these data will be stored in the table created at the server.
- The Google Server will send the notification to the desired devices but chances are there that the notifications are not delivered due to OEM restrictions. So, we will use the Work Manager.
- We will pull the notification from the server using Work Manager in batches. For example, if we are having 20 notifications having id from 1 to 20, then we can send the last received notification id to the server and the server will give the next 10 notifications.
- Initially, we don't have any notification data, so we will send the last Id as 0 and the server will send notification data having id from 1 to 10 and then we will send 10, the server will send notification data having id from 11 to 20 and so on.
- Now, suppose Google Server has sent the notification having id 7. So, we should not show this notification as we have already displayed.
- Whenever we will pull notification from the server or whenever the notification is received from the Google Server, then we will check at the client side that if it is shown on the device or not. If it is shown, then we will ignore that notification and will not show that notification.
- At the same time, we will update the "status" column of the table on the server as "shown" by making a request from the client to the server because if the user uninstalls the application and again install that, then only those notifications from the server will be pulled whose status is "not shown" otherwise bombarding of notifications will take place. In order to optimize it, you can update the status of the notification in "batches".
- Also, sometimes there are some notifications that are for a specific period of time such as the restaurant offer notification of some food delivery app. In that case, you can add one more field in the database table i.e. the expiry date or time. Now, whenever the WorkManger fetches that notification, then we will check that if the notification is expired or not. If it is expired then we will not show it to the user.
-
There might be cases when you want to display the notification at a certain time only such as in Quiz App where you need to display the notification that the quiz is about to start at 8PM or so. Here, you need to display the notification at that time only, not before, not after. So, to handle these types of situations you can add one more field in the database table and name it as "
display_time
". So, whenever we pull the notification from the server using Work Manager, then it is obvious that the notification has not been displayed yet because only those notifications will be pulled whose
display_time
is about to come in the future. Now, with the help of the
display_time
, you can set an alarm using
AlarmManagerto show the notification at that display_time . - In some cases, the Work Manager will also fail to work. So, you can fetch the notification from the server whenever the app is launched. To optimize this approach, you can write some logic to fetch the notification only after a certain period of time and not every time the app gets launched.
The following images describe the whole process:
Learn more about Work Manager from MindOrks blog .
NOTE: Which notification to be delivered when should be done by writing some logic in your Android Project code. So, you have to tweak the above approach accordingly.
The FCM problem
If your app falls in the category such as messaging, then you can use WebSocket to create the light-weight persistent connection between your client(Android App) and the server, and then the server will be able to send data to the client and show the notifications from that data.
If your application does not fall in the category of messaging app, then it not wiser to use WebSocket. So, you can follow the previously discussed approach i.e. by using Work Manager.
So, these were some of the solutions. By following these approaches, you can increase your push notification delivery rate by twice or triple i.e. up to 70-80%.
What next?
We know that with the fast-paced continuous development in Android, many things are coming, let's see what more we can do with those changes.
I will be experimenting with more and coming up with more ideas to increase this, Let's be connected.
Do share this tutorial with your fellow developers to spread the knowledge. You can read more blogs on Android on our blogging website .
Apply Now: MindOrks Android Online Course and Learn Advanced Android
Learn System Design for your next Interview from here.
Happy Learning :)
Team MindOrks!
Also, Let’s connect on Twitter , Linkedin , Github , and Facebook