Exploring Android ViewPager2 in Android
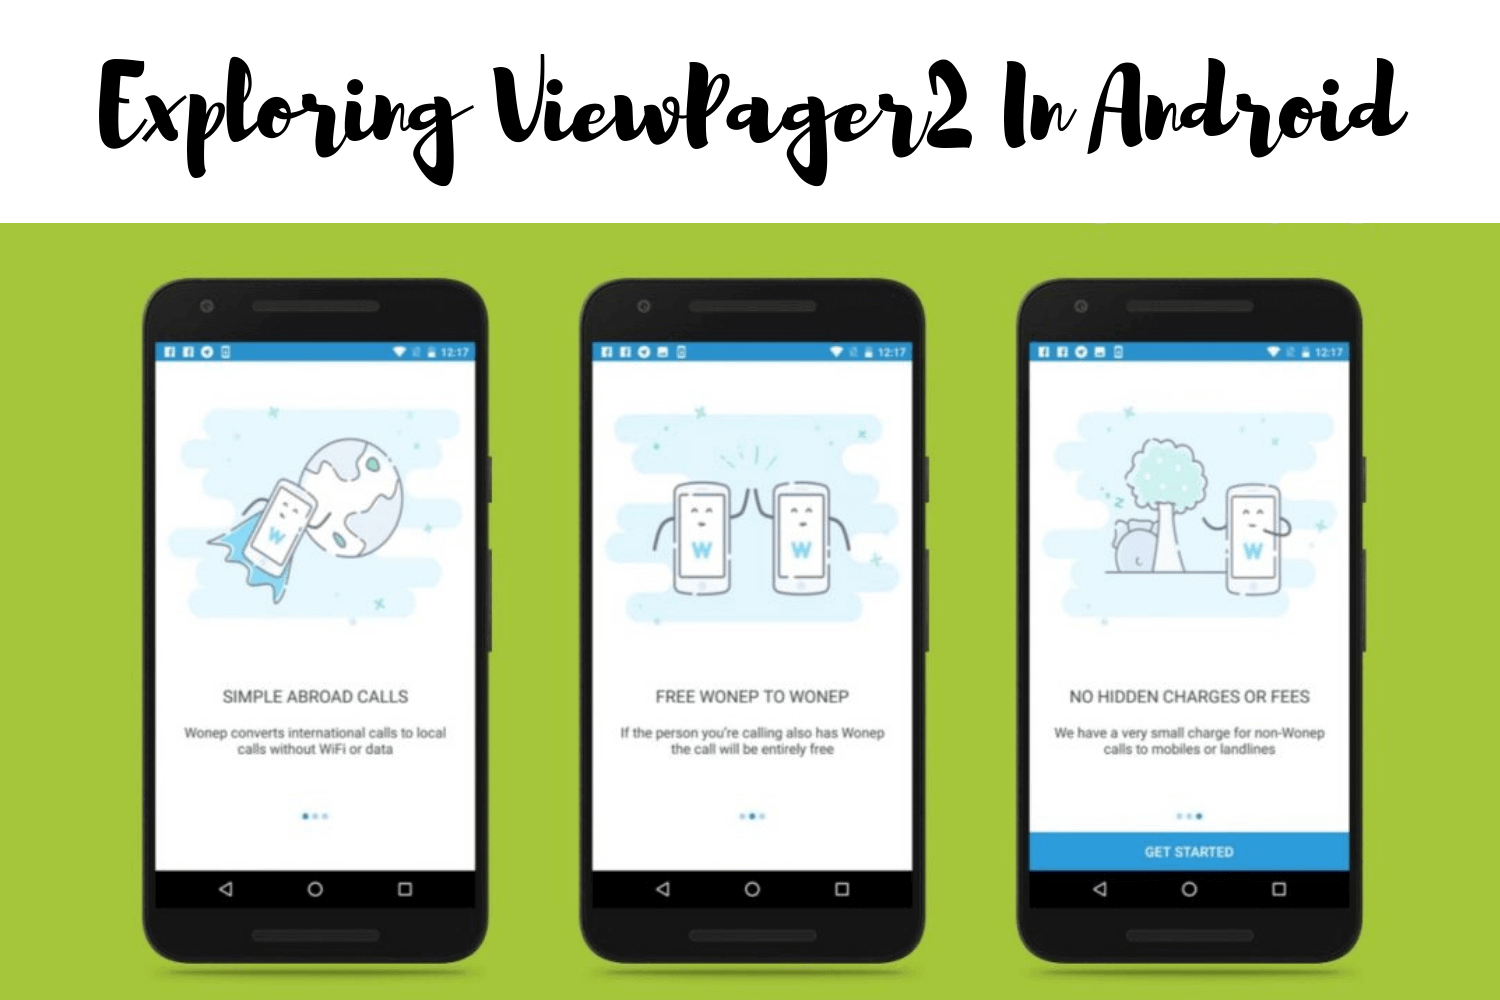
You remeber ,seeing a tutorial like below in some apps when you install and run it for the first time ??
Or you remember the Whatsapp chat UI with Camera, Chats and Call ?? If yes, then it is nothing but a ViewPager
Image Source: Android Developer website
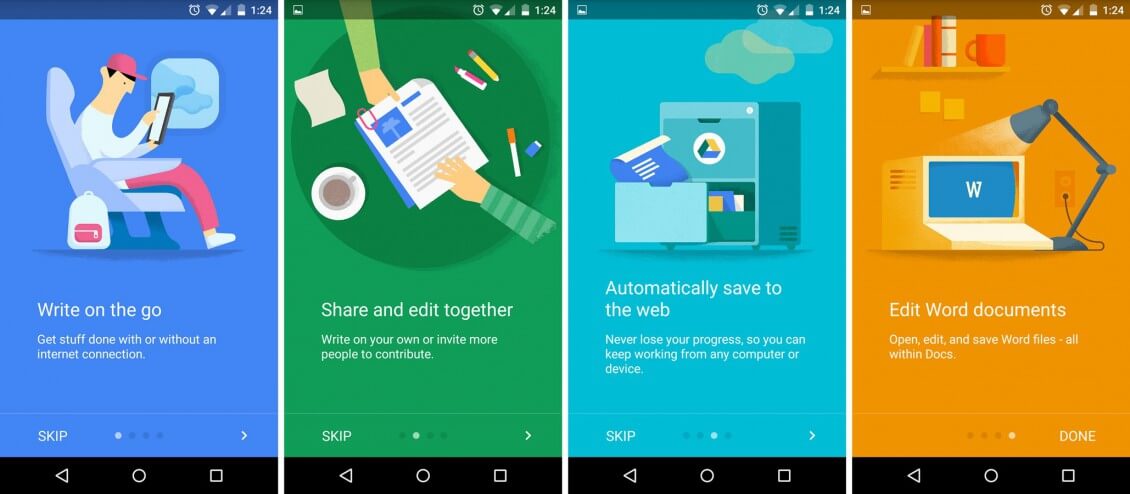
The above image is the onboarding screen of Google Docs mobile app. Here, by swiping right/left, four times, you get am idea about the Google Docs app and what are is pr.
You will get this type of view in almost each and every app you download from the Play Store. You just have to swipe left or right and you get a rough idea of what you can do by using that app.
But if you are reading this blog, then you must be an Android developer. So, as an Android Developer, you have already started thinking of the ways you can use to build these type of screens. Some of you might have used this using ViewPager. Hey! wait, ViewPager? What is this?
So, in this blog, we will learn more about the latest Viewpager i.e. ViewPager2. Don’t know ViewPager ? No problem , we will learn ViewPager2 in a very easy way . So let's begin,
What is ViewPager?
ViewPager is an android widget that allows or helps you to change the screen without changing the activity. In simpler words, if you want to change the app screen without making an Activity then you can use ViewPager. Another approach may be making activity with some buttons on it and then apply onClickListener on it to move on to the next screen.
So, you can change the application screen just by swiping left or right by your fingers. Not only swiping you can add some more screens during runtime. All these facilities and features can be achieved by using ViewPager.
Now, let’s move on to ViewPager2.
ViewPager2
It was 7th Feb 2019, when ViewPager2 was released by Google. It’s an updated version of ViewPager. It does the same thing as ViewPager does but in a smarter and efficient way.
ViewPager2 comes with a variety of new features. But the most important feature is the use of RecyclerView. Why I am saying this as the most important feature because with the ViewPager things become harder when we need to add some fragment dynamically. But now, since we are using RecyclerView in ViewPager2, half of your task is already reduced.
ViewPager Vs ViewPager2
So till now, we have discussed the ViewPager and ViewPager2. Let's have a quick look at the differences between these two:
- You can add some items dynamically with the help of recycler view in ViewPage2 but in ViewPager, there was no support for the recycler view.
- In ViewPager, there is nothing called Right-to-left layout support, you have to reverse the pages yourself but now you can use the ViewPager2 because it supports Right-to-left layout support.
- In ViewPager, you can only use the horizontal swipe. No vertical swipe was present in ViewPager but in ViewPager2, there is a support for Vertical swipe also. So, you can use the horizontal as well as vertical swipe in ViewPager2.
More about ViewPager2
When you are working on something, then you must have a deeper knowledge of everything related to it. This not only helps you to make a great product but will also help you in finding and removing bugs in an easier and quicker manner. So, let’s move deeper into ViewPager2:
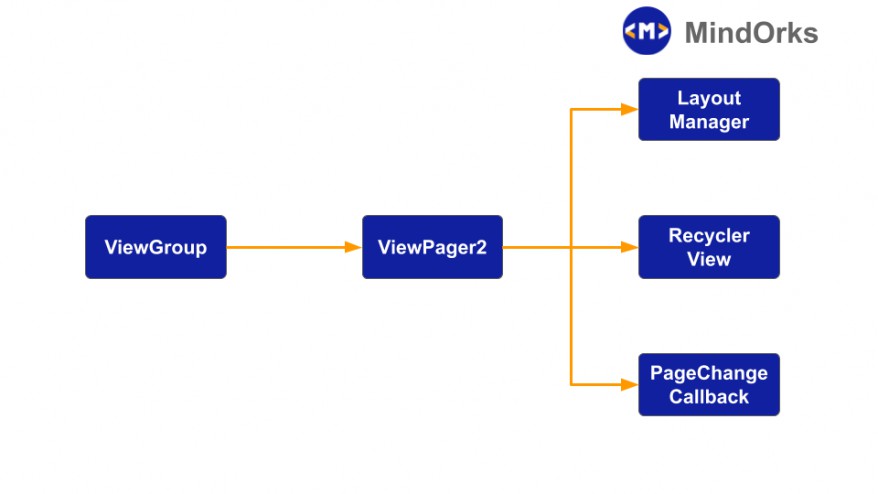
Just like the View Pager, the View Pager 2 extends from the View Group class — from there, things look a little different.
Layout Manager
LayoutManager in ViewPager2 is the same as that in ViewPager. The duty of the LayoutManager is to set the orientation of the components on the screen.
In Viewpager (previous version) we had only Horizontal orientation ,but with ViewPager2, we can set the orientation of the screen to be vertical also by calling the setOrientation() function. By doing so, we can change the screen by swiping up and down also.
RecyclerView
ViewPager2 uses the RecyclerView to display contents on the screen. There are many benefits of using RecyclerView. You have smooth scrolling, data can be changed dynamically in a fluent way, views can be changed dynamically and smoothly. So, you can use all the components of RecyclerView and apply it in the ViewPager2. To handle the vertical orientation,
view_pager2.orientation = ViewPager2.ORIENTATION_VERTICALPage Change Callback
Page Changes are handled by its callback , some of them are listed below,
- onPageScrolled() — will be triggered, whenever there is a scroll event for the current page
- onPageSelected() — will be triggered when you select a new page
- onPageScrollStateChanged() — will be triggered when the scroll state will be changed.
Now, let's discuss its implementation step by step,
Add the dependency in our build.gradle file:
Note: Its still in alpha stage
implementation "androidx.viewpager2:viewpager2:1.0.0-alpha04"Second, to use ViewPager2, you must have to add the widget ViewPager2 in you layout file. So, change the activity_main.xml to:
<?xml version="1.0" encoding="utf-8"?>
<androidx.constraintlayout.widget.ConstraintLayout
        xmlns:android="http://schemas.android.com/apk/res/android"
        xmlns:tools="http://schemas.android.com/tools"
        xmlns:app="http://schemas.android.com/apk/res-auto"
        android:layout_width="match_parent"
        android:layout_height="match_parent"
        tools:context=".MainActivity">

    <androidx.viewpager2.widget.ViewPager2
            android:id="@+id/view_pager2"
            android:layout_width="match_parent"
            android:layout_height="match_parent"/>

</androidx.constraintlayout.widget.ConstraintLayout>
Here we have added the ViewPager2 widget to out MainActivity.
From here, the process is as same as that of RecyclerView. Now we will create a layout file for the look and feel of our main page. Go to res/layout and make a layout file as item_page.xml, the code is below:
<?xml version="1.0" encoding="utf-8"?>
<androidx.constraintlayout.widget.ConstraintLayout xmlns:android="http://schemas.android.com/apk/res/android"
                                                   xmlns:app="http://schemas.android.com/apk/res-auto" xmlns:tools="http://schemas.android.com/tools"
                android:id="@+id/container"
                android:layout_width="match_parent"
                android:layout_height="match_parent">

    <androidx.appcompat.widget.AppCompatTextView
            android:id="@+id/tvTitle"
            android:textColor="#FFFFFF"
            android:layout_width="wrap_content"
            tools:text="Topic"
            android:textSize="32sp"
            android:layout_height="wrap_content"
            app:layout_constraintBottom_toBottomOf="@id/ivImage"
            android:layout_margin="32dp"
            android:gravity="center_horizontal" android:layout_marginEnd="8dp"
            app:layout_constraintEnd_toEndOf="parent" android:layout_marginStart="8dp"
            app:layout_constraintStart_toStartOf="parent"
            app:layout_constraintTop_toBottomOf="@+id/ivImage"/>

    <TextView
            android:id="@+id/tvAbout"
            android:layout_width="wrap_content"
            android:layout_height="wrap_content"
            android:textSize="24sp"
            android:text="About Topic"
            android:layout_margin="16dp"
            android:textColor="#FFFFFF"
            android:layout_marginTop="8dp"
            app:layout_constraintTop_toBottomOf="@+id/tvTitle" android:layout_marginEnd="8dp"
            app:layout_constraintEnd_toEndOf="parent" android:layout_marginStart="8dp"
            app:layout_constraintStart_toStartOf="parent"/>

    <ImageView
            android:id="@+id/ivImage"
            android:layout_width="200dp"
            android:layout_height="200dp" app:layout_constraintEnd_toEndOf="parent" android:layout_marginEnd="8dp"
            app:layout_constraintStart_toStartOf="parent" android:layout_marginStart="8dp"
            android:layout_marginTop="8dp" app:layout_constraintTop_toTopOf="parent"/>

</androidx.constraintlayout.widget.ConstraintLayout>
Here, we have used one ImageView and two TextView to dispaly some random data.
Now, we are done with the layout part of our app. Let’s move forward and make the adapter class as same as we make while using the RecyclerView. This is the best part as we can use RecyclerView.Adapter. Make your class name as ViewPageAdapter.kt
class ViewPagerAdapter : RecyclerView.Adapter<PagerVH>() {

    //array of colors to change the background color of screen
    private val colors = intArrayOf(
        android.R.color.black,
        android.R.color.holo_red_light,
        android.R.color.holo_blue_dark,
        android.R.color.holo_purple
    )

    override fun onCreateViewHolder(parent: ViewGroup, viewType: Int): PagerVH =
        PagerVH(LayoutInflater.from(parent.context).inflate(R.layout.item_page, parent, false))

    //get the size of color array
    override fun getItemCount(): Int = Int.MAX_VALUE

    //binding the screen with view
    override fun onBindViewHolder(holder: PagerVH, position: Int) = holder.itemView.run {
        if(position == 0){
            tvTitle.text = "ViewPager2"
            tvAbout.text = "In this application we will learn about ViewPager2"
            ivImage.setImageResource(R.drawable.face_image)
            container.setBackgroundResource(colors[position])
        }
        if(position == 1) {
            tvTitle.text = "ViewPager2"
            tvAbout.text = "In this application we will learn about ViewPager2"
            ivImage.setImageResource(R.drawable.face_image)
            container.setBackgroundResource(colors[position])
        }
        if(position == 2) {
            tvTitle.text = "ViewPager2"
            tvAbout.text = "In this application we will learn about ViewPager2"
            ivImage.setImageResource(R.drawable.face_image)
            container.setBackgroundResource(colors[position])
        }
        if(position == 3) {
            tvTitle.text = "ViewPager2"
            tvAbout.text = "In this application we will learn about ViewPager2"
            ivImage.setImageResource(R.drawable.face_image)
            container.setBackgroundResource(colors[position])
        }
    }
}

class PagerVH(itemView: View) : RecyclerView.ViewHolder(itemView)
Till now, we are done with the layout and adapter part. Now we just have to call the adapter class form our MainActivity file. So, open the MainActivity.kt file and add the following code:
class MainActivity : AppCompatActivity() {

    override fun onCreate(savedInstanceState: Bundle?) {
        super.onCreate(savedInstanceState)
        setContentView(R.layout.activity_main)

        view_pager2.adapter = ViewPagerAdapter()

        //below line can be used to change the orientation to vertical i.e. vertical swipe
        //view_pager2.orientation = ViewPager2.ORIENTATION_VERTICAL
    }
}
That’s it, now run your app and enjoy the ViewPager2.
Summary
In this blog, we have learned how to use the ViewPager2 in our Android application. We saw the architecture of ViewPager2 and at last, we did one example to understand the ViewPager2 in a better way. We saw some new features that are added in the ViewPager2. The best part of ViewPager2 is the use of RecyclerView.
Hope, you learned the new ViewPager concept and will try to explore more by having some hands-on with ViewPage2.
See you in the next blog. Till then, Keep Learning!
Team MindOrks :)