Integrating Android Google’s reCAPTCHA in Android App
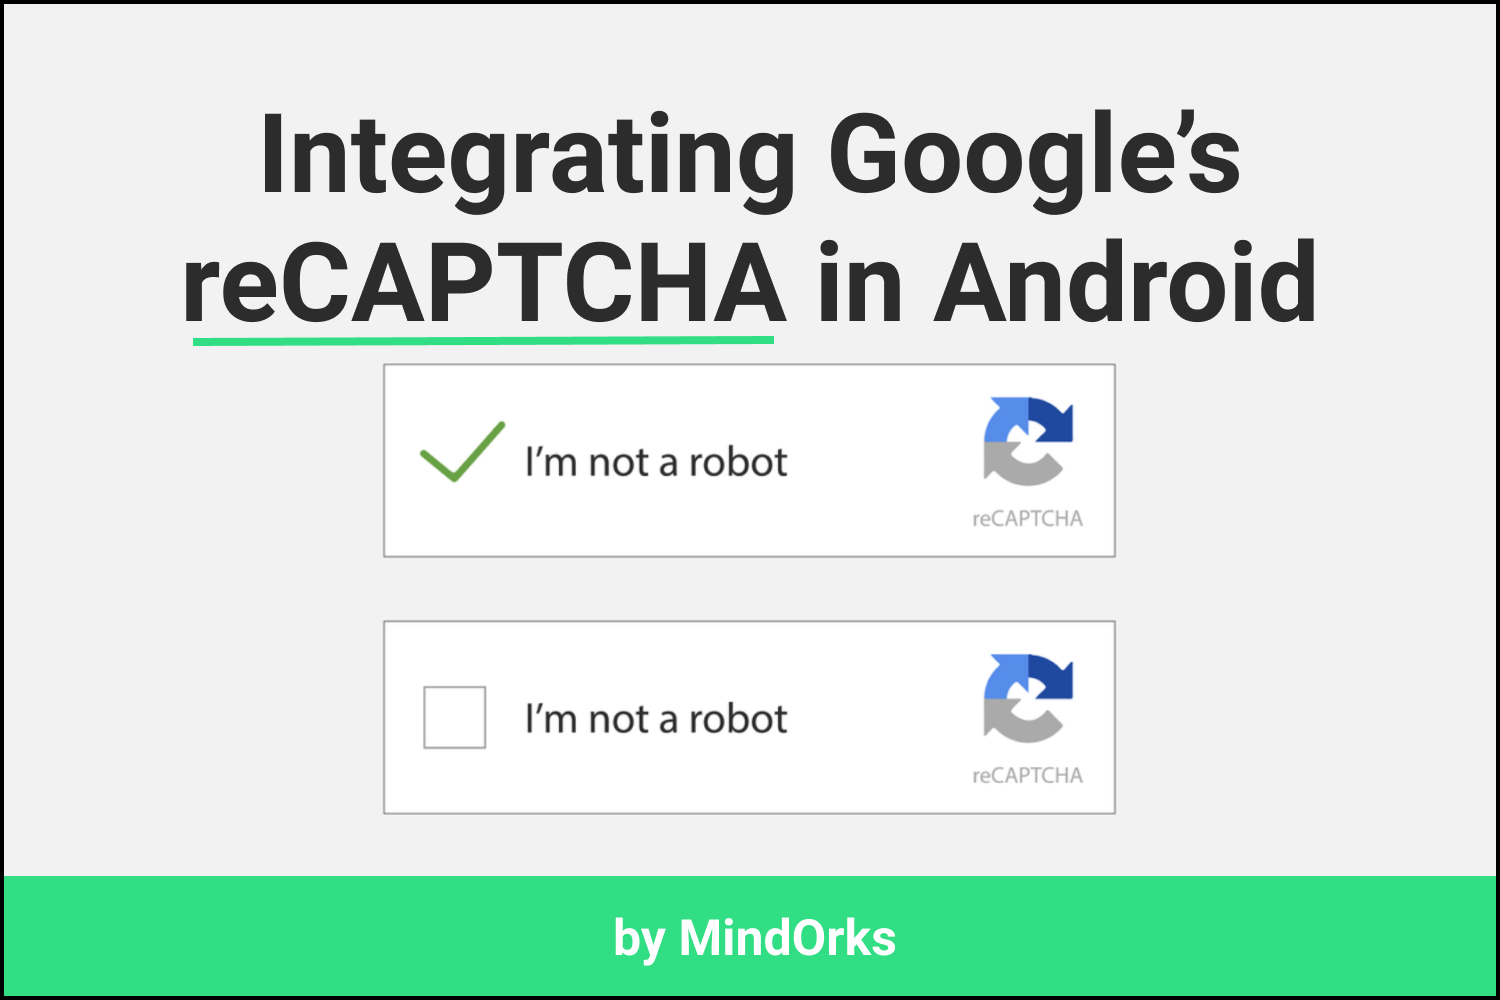
While submitting some form or any other kind of information on a website, you might have noticed some captcha that you have to fill before submitting the details. That captcha may be of the form of an image having some numbers written on it and you just have to enter those numbers in the EditText provided to you. Another captcha can be an image and you have to identify certain object present in that image(like a car, road, etc).
But have you ever thought of why these captchas are integrated or put on to websites? The reason is very simple. To verify the authenticity of a user, these captchas are used to find if a user is a human being or not. Nowadays, many smart bots can fill the information in a form and in order to avoid such type of cases, we use captcha in our website or app.
In this blog, we will learn how to implement CAPTCHA using Google’s reCAPTCHA in our Android Application. So, let’s get started.
SafetyNet reCAPTCHA API
SafetyNet provides a set of services and APIs that can be used to secure and protect your mobile application from security threats like fake users, device tampering, bad URLs, etc. One of the services includes the support of reCAPTCHA that protects your user from malicious traffic.
Here is an introduction of reCAPTCHA present on the Android website:
reCAPTCHA is a free service that uses an advanced risk analysis engine to protect your app from spam and other abusive actions. If the service suspects that the user interacting with your app might be a bot instead of a human, it serves a CAPTCHA that a human must solve before your app can continue executing.
But to use your
minSdkVersion
should be 14 or higher.
Working
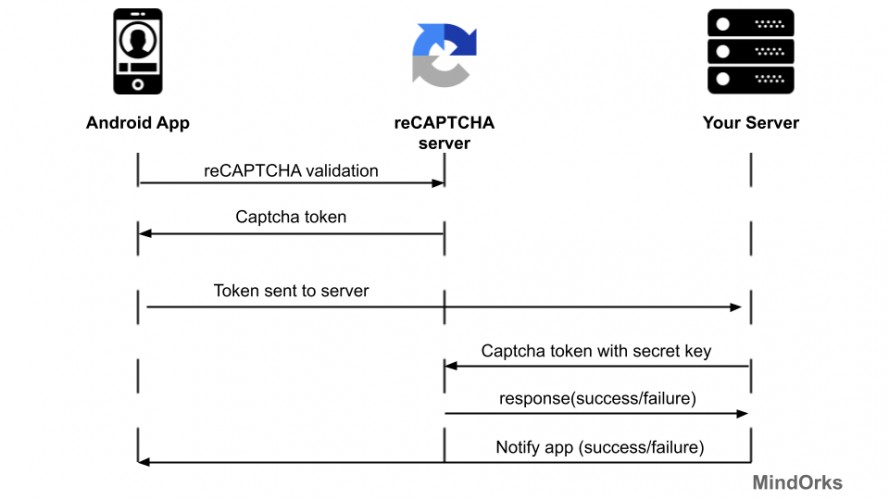
The working of Google’s reCAPTCHA includes certain network calls i.e. call from your Android application to the SafetyNet server, then from SafetyNet server to your Android application and finally from your Android application to your server. So, following are the steps involved in the working of Google’s reCAPTCHA in your Android application:
- Firstly, you have to get the Site Key and Secret Key from the reCAPTCHA website . The Site Key will be used in your Android application and the Secret Key should be placed in your Server.
- By using the Site Key, reCAPTCHA will be generated and the user has to complete the reCAPTCHA challenge if needed.
- After the generation of reCAPTCHA, the application will communicate with the captcha server and will return the User Response Token using your Site Key.
- Now your Android application will send the token to your server and the server will send the token to the reCAPTCHA server again but with the Secret Key. The reCAPTCHA server will send the success status to your server and the server in return send the success status to your Android application.
The whole summary can be seen from the below image:
Generate the reCAPTCHA Site Key and Secret Key
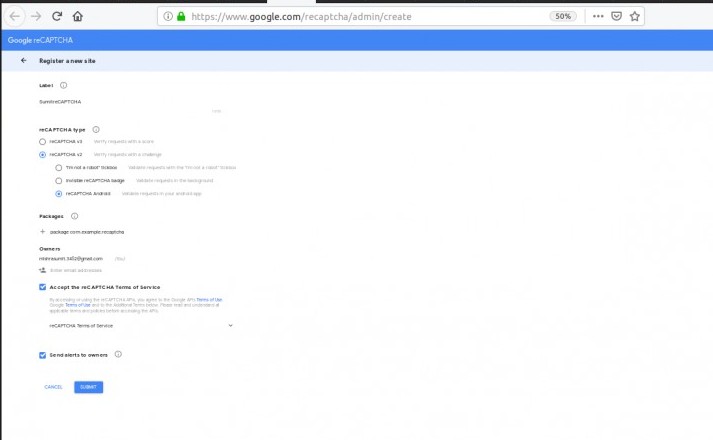
So, we have seen the flow of Google’s reCAPTCHA in Android application. Our next step is to integrate this reCAPTCHA in our app. So, firstly we need to generate a Site Key and a Secret Key from the reCAPTCHA website. Follow the below steps:
- Visit the reCAPTCHA website .
- Enter the label to identify your key. You can enter any name here.
- After entering the label, select reCAPTCHA type that you want to add in your app. I will be using reCAPTCHA v2 and after that reCAPTCHA Android.
- Enter the package name of your Android project.
- Finally, select the Accept the reCAPTCHA Terms and Conditions and Send alerts to owners.
- Click on Submit
Following is the screen of the reCAPTCHA website:
After submitting the form, you will get one Site Key and one Secret Key. Copy the keys and store somewhere, we will use these keys in our app.
Setting up an Android Project for reCAPTCHA
Create a new project in Android studio. Here, I will be using the BasicActivity Template.
After, creating the Android project, our next step is to add the dependency of the reCAPTCHA in the build.gradle file. So, add the below line in your project:
//dependency for the reCAPTCHA (safetynet)
implementation 'com.google.android.gms:play-services-safetynet:17.0.0'
//dependency for fast networking for networking
implementation 'com.amitshekhar.android:android-networking:1.0.2'
After adding dependencies, our next job is to add internet permission to our app. Add the below line in the AndroidManifest.xml file under the manifest tag:
<uses-permission android:name="android.permission.INTERNET"/>And to add the Fast Networking Library in your app, write the below code in your Application class,
AndroidNetworking.initialize(applicationContext);Once, we are done with the permission and dependencies part, our next step is to create the UI for the project. Here, we are having only one button that will call the reCAPTCHA event when clicked. So, the code for the activity_main.xml file will be:
<?xml version="1.0" encoding="utf-8"?>
<androidx.constraintlayout.widget.ConstraintLayout
xmlns:android="http://schemas.android.com/apk/res/android"
        xmlns:app="http://schemas.android.com/apk/res-auto"
        android:layout_width="match_parent"
        android:layout_height="match_parent">

    <TextView
            android:layout_width="wrap_content"
            android:layout_height="wrap_content"
            android:text="reCAPTCHA example"
            app:layout_constraintBottom_toBottomOf="parent"
            android:layout_marginTop="8dp"
            app:layout_constraintTop_toTopOf="parent"
            app:layout_constraintEnd_toEndOf="parent"
            android:layout_marginEnd="8dp"
            app:layout_constraintStart_toStartOf="parent"
            android:layout_marginStart="8dp"
            android:id="@+id/textView"
            android:textSize="32sp"/>

    <Button
            android:id="@+id/button"
            android:layout_width="wrap_content"
            android:layout_height="wrap_content"
            android:text="Click for CAPTCHA"
            android:layout_marginTop="8dp"
            app:layout_constraintTop_toBottomOf="@+id/textView"
            app:layout_constraintEnd_toEndOf="parent"
            android:layout_marginEnd="8dp"
            app:layout_constraintStart_toStartOf="parent"
            android:layout_marginStart="8dp"/>

</androidx.constraintlayout.widget.ConstraintLayout>
Now, we have created the UI part of our application. Let’s write the code for the reCAPTCHA in our
MainActivity.kt
file.
In the
MainActivity.kt
file, we are calling the SafetyNet on the button click and after receiving the token from the reCAPTCHA server, we will send the token to our server by using the
handleVerify()
function(to verify the captcha by sending it to the reCAPTCHA server by our server along with the secret key) and then sending back the success message to the mobile app. The code of the
MainActivity.kt
file will be:
class MainActivity : AppCompatActivity(), View.OnClickListener {

    companion object {
        const val TAG = "MainActivity"
        const val SITE_KEY = "YOUR_SITE_KEY"
    }

    private lateinit var btnverifyCaptcha: Button

    override fun onCreate(savedInstanceState: Bundle?) {
        super.onCreate(savedInstanceState)
        setContentView(R.layout.activity_main)
        btnverifyCaptcha = findViewById(R.id.button)
        btnverifyCaptcha.setOnClickListener(this)
    }

    override fun onClick(view: View) {
        SafetyNet.getClient(this).verifyWithRecaptcha(SITE_KEY)
            .addOnSuccessListener(this) { response ->
                if (!response.tokenResult.isEmpty()) {
                    handleVerify(response.tokenResult)
                }
            }
            .addOnFailureListener(this) { e ->
                if (e is ApiException) {
                    Log.d(TAG,("Error message: " + CommonStatusCodes.getStatusCodeString(e.statusCode)))
                } else {
                    Log.d(TAG, "Unknown type of error: " + e.message)
                }
            }
    }

    protected fun handleVerify(responseToken: String) {
        //it is google recaptcha siteverify server
        //you can place your server url
        val url = "https://www.google.com/recaptcha/api/siteverify"
        AndroidNetworking.get(url)
            .addHeaders("token", responseToken)
            .setTag("MY_NETWORK_CALL")
            .setPriority(Priority.LOW)
            .build()
            .getAsJSONArray(object : JSONArrayRequestListener() {
                fun onResponse(response: JSONArray) {
                    // do anything with response
                }

                fun onError(error: ANError) {
                    // handle error
                }
            })
    }
}
Finally, run your application and click the button saying “Click for CAPTCHA”.
Common API error of the reCAPTCHA
Here is the list of errors that might occur in reCAPTCHA:
- RECAPTCHA_INVALID_SITEKEY: If you have not registered the API key correctly. Your Site Key is invalid.
- RECAPTCHA_INVALID_KEYTYPE: The Key type is invalid. Create new reCAPTCHA key.
- RECAPTCHA_INVALID_PACKAGENAME: The package name that you have entered during API generation is not the same as that of calling app’s package. Add the correct Package name.
- NETWORK_ERROR: If there is no internet connection then this error will be encountered.
- UNSUPPORTED_SDK_VERSION: You might be using the API level 13 or lower. Change your MinSdkVersion to 14 or higher.
Conclusion
In this blog, we learned how to use Google’s reCAPTCHA in our Android app. For using reCAPTCHA in our app, we need to get one Site key and one Secret key and after that, we request for the captcha from the reCAPTCHA server. Once we get the reCAPTCHA and the user has entered the captcha, we send the entered value to the reCPATCA server and get the captcha token. This token is sent to our server and our server along with secret key send the token to the reCAPTCHA server again. After that, we get some success message and that message is conveyed to our Android app.
Hope you enjoyed this blog.
Keep Learning :)
Team MindOrks!