Navigation Drawer Android Example
Sliding Menu tutorial with the help of PlaceHolderView
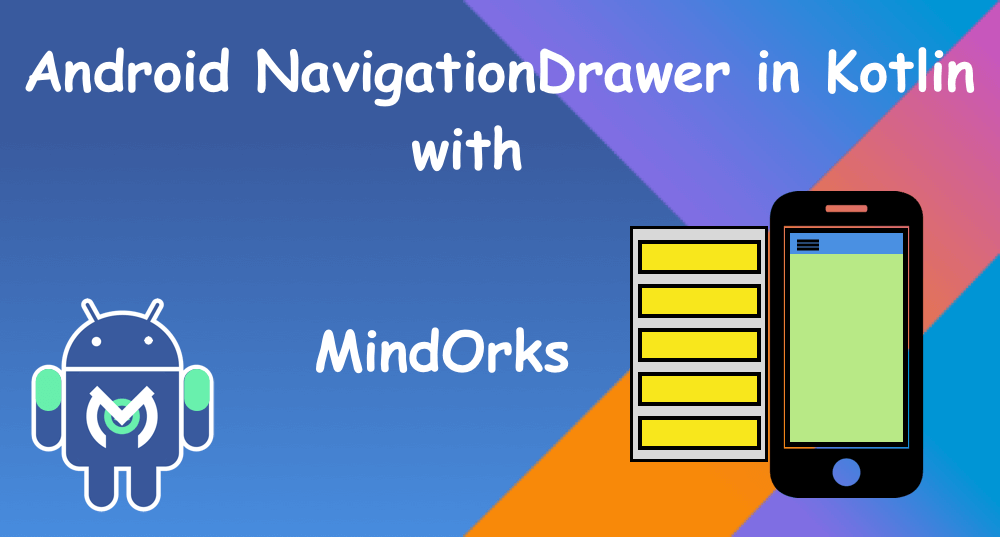
Into: Navigation Drawer is the sliding menu that appears on the android screen with a hamburger menu icon in the ActionBar. The construction of it requires placing multiple views inside the navigation portion of the DrawerLayout. We are going to design a Drawer with the help of PlaceHolderView , that is a library built upon the RecyclerView

Why use a PlaceHolderView?
If you have worked with RecyclerView, you will definitely appreciate this library because of the ease and power it brings in. Let’s come back to this question after we have gone through this tutorial because it will provide a better perspective.
Let’s Build this up
To build up this drawer we need to go through steps as described below:
Use gradle dependency for PlaceHolderView library in your app’s build.gradle :
dependencies {
    compile 'com.mindorks:placeholderview:0.2.7'
}
Step 1:
Create style for the Drawer with respect to the Action Bar and Status Bar. In this example we will be using Toolbar. This is for the reason that we want our Drawer to slide over the Status Bar.
Define theme in res/values/styles.xml
<style name="AppTheme" parent="Theme.AppCompat.Light.NoActionBar">
    <item name="colorPrimary">@color/colorPrimary</item>
    <item name="colorPrimaryDark">@color/colorPrimaryDark</item>
    <item name="colorAccent">@color/colorAccent</item>
    <item name="android:windowContentOverlay">@null</item>
    <item name="windowActionBar">false</item>
    <item name="windowNoTitle">true</item>
    <item name="drawerArrowStyle">@style/MaterialDrawer.DrawerArrowStyle</item>
</style>
<!--use item name="drawerArrowStyle" if you are using dark primaryColor in your app, else remove it-->
<style name="MaterialDrawer.DrawerArrowStyle" parent="Widget.AppCompat.DrawerArrowToggle">
    <item name="spinBars">false</item>
    <item name="color">@android:color/white</item>
</style>
You can specify the color for the hamburger menu icon here
<item name="color">@android:color/white</item>Step 2:
Define the activity xml in res/layout/activity_main.xml
<?xml version="1.0" encoding="utf-8"?>
<android.support.v4.widget.DrawerLayout xmlns:android="http://schemas.android.com/apk/res/android"
    android:id="@+id/drawerLayout"
    android:layout_width="match_parent"
    android:layout_height="match_parent">
    <LinearLayout
        android:layout_width="match_parent"
        android:layout_height="match_parent"
        android:orientation="vertical">
        <include
            android:id="@+id/toolbar"
            layout="@layout/toolbar_home"/>
        <com.mindorks.placeholderview.PlaceHolderView
            android:id="@+id/galleryView"
            android:layout_width="match_parent"
            android:layout_height="wrap_content"
            android:scrollbars="vertical"/>
    </LinearLayout>
    <FrameLayout
        android:layout_width="250dp"
        android:layout_height="match_parent"
        android:layout_gravity="left"
        android:background="@android:color/white">
        <com.mindorks.placeholderview.PlaceHolderView
            android:id="@+id/drawerView"
            android:layout_width="match_parent"
            android:layout_height="match_parent"
            android:scrollbars="vertical"/>
    </FrameLayout>
</android.support.v4.widget.DrawerLayout>
Notes:
- The view is split in two parts: DrawerLayout defines the holder for both the views. Top LinearLayout defines the screen view and FrameLayout defines the view for the drawer
- we are going to define toolbar in the next step as our custom Toolbar
- We have PlaceHolderView in the drawer layout section to design the drawer layout
- ( Optional )The PlaceHolderView ( galleryView ) in the above code is for the purpose of creating a gallery of images and not relevant for this tutorial and can be removed
Step 3:
Create Toolbar res/layout/toolbar_home.xml
<?xml version="1.0" encoding="utf-8"?>
<android.support.v7.widget.Toolbar
    xmlns:android="http://schemas.android.com/apk/res/android"
    android:layout_width="match_parent"
    android:layout_height="?attr/actionBarSize"
    android:background="@color/colorPrimaryDark">
    <TextView
        android:layout_width="match_parent"
        android:layout_height="wrap_content"
        android:textColor="@color/white"
        android:gravity="left|center"
        android:layout_gravity="center"
        android:textSize="18sp"
        android:text="@string/home"/>
</android.support.v7.widget.Toolbar>
Step 4:
This Drawer has two type of views, header and menu items , we are going to define header view in this section
Create Header view: res/layout/drawer_header.xml
Note:
Create required string resource in res/values/strings
<?xml version="1.0" encoding="utf-8"?>
<LinearLayout xmlns:android="http://schemas.android.com/apk/res/android"
    android:layout_width="match_parent"
    android:layout_height="178dp"
    android:orientation="vertical"
    android:background="@color/colorPrimary"
    android:paddingLeft="30dp">
    <ImageView
        android:id="@+id/profileImageView"
        android:layout_width="50dp"
        android:layout_height="50dp"
        android:src="@drawable/ic_profile"
        android:layout_gravity="left|top"
        android:layout_marginTop="55dp" />
    <TextView
        android:id="@+id/nameTxt"
        android:layout_width="wrap_content"
        android:layout_height="wrap_content"
        android:textColor="@color/white"
        android:textSize="14sp"
        android:layout_marginTop="20dp"
        android:textStyle="bold"/>
    <TextView
        android:id="@+id/emailTxt"
        android:layout_width="wrap_content"
        android:layout_height="wrap_content"
        android:textColor="@color/white"
        android:layout_marginTop="5dp"
        android:textSize="14sp"
        android:textStyle="normal"/>
</LinearLayout>
Step 5:
Create menu item view: res/layout/drawer_item.xml
<?xml version="1.0" encoding="utf-8"?>
<LinearLayout xmlns:android="http://schemas.android.com/apk/res/android"
    android:id="@+id/mainView"
    android:layout_width="match_parent"
    android:layout_height="50dp"
    android:orientation="horizontal"
    android:gravity="center|left"
    android:paddingLeft="20dp">
    <ImageView
        android:id="@+id/itemIcon"
        android:layout_width="wrap_content"
        android:layout_height="wrap_content"
        android:src="@drawable/ic_email_black_18dp"/>
    <TextView
        android:id="@+id/itemNameTxt"
        android:layout_width="wrap_content"
        android:layout_height="wrap_content"
        android:textColor="@color/colorPrimaryDark"
        android:text="Menu Item"
        android:layout_marginLeft="10dp"
        android:textSize="14sp" />
Step 6:
Create DrawerHeader.java
@NonReusable
@Layout(R.layout.drawer_header)
public class DrawerHeader {

    @View(R.id.profileImageView)
    private ImageView profileImage;

    @View(R.id.nameTxt)
    private TextView nameTxt;

    @View(R.id.emailTxt)
    private TextView emailTxt;

    @Resolve
    private void onResolved() {
        nameTxt.setText("Janishar Ali");
        emailTxt.setText("janishar.ali@gmail.com");
    }
}
Notes:
- @NonReusable is annotation in PlaceHolderView , to be used in cases where we want to release all the resources and references if removed from the list and won’t use the same object in addView() method in PlaceHolderView .
- @layout is used to bind the layout with this class
- @View is used to bind the views in this layout we want to refer to
- @Resolve is used to operate on the view references obtained from @View , in short if we want to define any operation on the views it should be put in a method and annotated with @Resolve
The Documentation for PlaceHolderView is on github: https://github.com/janishar/PlaceHolderView
Step 7:
Similarly create DrawerMenuItem.java
Notes: Pre step notes
This class is rather long as it define all the operations and depending on the item option selected does the operations operate.
- Bind the layout and views as we did in the step 6
- We define the Constants so that we can refer to the item type
- Create a constructor for this class and pass context and the PlaceHolderView
- Write a method to set the values of the view depending upon the menu item type instantiated and annotate with @Resolve
- Write a method to handle the click and operation to be performed depending on the menu item type clicked.
- ( Optional ) If we want to pass the click events in any other class then write an interface with methods to call on menu item clicks. Implement the interface in the activity and set callback listeners defined in this class.
@Layout(R.layout.drawer_item)
public class DrawerMenuItem {

    public static final int DRAWER_MENU_ITEM_PROFILE = 1;
    public static final int DRAWER_MENU_ITEM_REQUESTS = 2;
    public static final int DRAWER_MENU_ITEM_GROUPS = 3;
    public static final int DRAWER_MENU_ITEM_MESSAGE = 4;
    public static final int DRAWER_MENU_ITEM_NOTIFICATIONS = 5;
    public static final int DRAWER_MENU_ITEM_SETTINGS = 6;
    public static final int DRAWER_MENU_ITEM_TERMS = 7;
    public static final int DRAWER_MENU_ITEM_LOGOUT = 8;

    private int mMenuPosition;
    private Context mContext;
    private DrawerCallBack mCallBack;

    @View(R.id.itemNameTxt)
    private TextView itemNameTxt;

    @View(R.id.itemIcon)
    private ImageView itemIcon;

    public DrawerMenuItem(Context context, int menuPosition) {
        mContext = context;
        mMenuPosition = menuPosition;
    }

    @Resolve
    private void onResolved() {
        switch (mMenuPosition){
            case DRAWER_MENU_ITEM_PROFILE:
                itemNameTxt.setText("Profile");
                itemIcon.setImageDrawable(mContext.getResources().getDrawable(R.drawable.ic_account_circle_black_18dp));
                break;
            case DRAWER_MENU_ITEM_REQUESTS:
                itemNameTxt.setText("Requests");
                itemIcon.setImageDrawable(mContext.getResources().getDrawable(R.drawable.ic_compare_arrows_black_18dp));
                break;
            case DRAWER_MENU_ITEM_GROUPS:
                itemNameTxt.setText("Groups");
                itemIcon.setImageDrawable(mContext.getResources().getDrawable(R.drawable.ic_group_work_black_18dp));
                break;
            case DRAWER_MENU_ITEM_MESSAGE:
                itemNameTxt.setText("Messages");
                itemIcon.setImageDrawable(mContext.getResources().getDrawable(R.drawable.ic_email_black_18dp));
                break;
            case DRAWER_MENU_ITEM_NOTIFICATIONS:
                itemNameTxt.setText("Notifications");
                itemIcon.setImageDrawable(mContext.getResources().getDrawable(R.drawable.ic_notifications_black_18dp));
                break;
            case DRAWER_MENU_ITEM_SETTINGS:
                itemNameTxt.setText("Settings");
                itemIcon.setImageDrawable(mContext.getResources().getDrawable(R.drawable.ic_settings_black_18dp));
                break;
            case DRAWER_MENU_ITEM_TERMS:
                itemIcon.setImageDrawable(mContext.getResources().getDrawable(R.drawable.ic_book_black_18dp));
                itemNameTxt.setText("Terms");
                break;
            case DRAWER_MENU_ITEM_LOGOUT:
                itemIcon.setImageDrawable(mContext.getResources().getDrawable(R.drawable.ic_exit_to_app_black_18dp));
                itemNameTxt.setText("Logout");
                break;
        }
    }

    @Click(R.id.mainView)
    private void onMenuItemClick(){
        switch (mMenuPosition){
            case DRAWER_MENU_ITEM_PROFILE:
                Toast.makeText(mContext, "Profile", Toast.LENGTH_SHORT).show();
                if(mCallBack != null)mCallBack.onProfileMenuSelected();
                break;
            case DRAWER_MENU_ITEM_REQUESTS:
                Toast.makeText(mContext, "Requests", Toast.LENGTH_SHORT).show();
                if(mCallBack != null)mCallBack.onRequestMenuSelected();
                break;
            case DRAWER_MENU_ITEM_GROUPS:
                Toast.makeText(mContext, "Groups", Toast.LENGTH_SHORT).show();
                if(mCallBack != null)mCallBack.onGroupsMenuSelected();
                break;
            case DRAWER_MENU_ITEM_MESSAGE:
                Toast.makeText(mContext, "Messages", Toast.LENGTH_SHORT).show();
                if(mCallBack != null)mCallBack.onMessagesMenuSelected();
                break;
            case DRAWER_MENU_ITEM_NOTIFICATIONS:
                Toast.makeText(mContext, "Notifications", Toast.LENGTH_SHORT).show();
                if(mCallBack != null)mCallBack.onNotificationsMenuSelected();
                break;
            case DRAWER_MENU_ITEM_SETTINGS:
                Toast.makeText(mContext, "Settings", Toast.LENGTH_SHORT).show();
                if(mCallBack != null)mCallBack.onSettingsMenuSelected();
                break;
            case DRAWER_MENU_ITEM_TERMS:
                Toast.makeText(mContext, "Terms", Toast.LENGTH_SHORT).show();
                if(mCallBack != null)mCallBack.onTermsMenuSelected();
                break;
            case DRAWER_MENU_ITEM_LOGOUT:
                Toast.makeText(mContext, "Logout", Toast.LENGTH_SHORT).show();
                if(mCallBack != null)mCallBack.onLogoutMenuSelected();
                break;
        }
    }

    public void setDrawerCallBack(DrawerCallBack callBack) {
        mCallBack = callBack;
    }

    public interface DrawerCallBack{
        void onProfileMenuSelected();
        void onRequestMenuSelected();
        void onGroupsMenuSelected();
        void onMessagesMenuSelected();
        void onNotificationsMenuSelected();
        void onSettingsMenuSelected();
        void onTermsMenuSelected();
        void onLogoutMenuSelected();
    }
}
Step 8: Last Step
Create MainActivity.java
public class MainActivity extends AppCompatActivity {

    private PlaceHolderView mDrawerView;
    private DrawerLayout mDrawer;
    private Toolbar mToolbar;
    private PlaceHolderView mGalleryView;

    @Override
    protected void onCreate(Bundle savedInstanceState) {
        super.onCreate(savedInstanceState);
        setContentView(R.layout.activity_main);

        mDrawer = (DrawerLayout)findViewById(R.id.drawerLayout);
        mDrawerView = (PlaceHolderView)findViewById(R.id.drawerView);
        mToolbar = (Toolbar)findViewById(R.id.toolbar);
        mGalleryView = (PlaceHolderView)findViewById(R.id.galleryView);
        setupDrawer();
    }

    private void setupDrawer(){
        mDrawerView
                .addView(new DrawerHeader())
                .addView(new DrawerMenuItem(this.getApplicationContext(), DrawerMenuItem.DRAWER_MENU_ITEM_PROFILE))
                .addView(new DrawerMenuItem(this.getApplicationContext(), DrawerMenuItem.DRAWER_MENU_ITEM_REQUESTS))
                .addView(new DrawerMenuItem(this.getApplicationContext(), DrawerMenuItem.DRAWER_MENU_ITEM_MESSAGE))
                .addView(new DrawerMenuItem(this.getApplicationContext(), DrawerMenuItem.DRAWER_MENU_ITEM_GROUPS))
                .addView(new DrawerMenuItem(this.getApplicationContext(), DrawerMenuItem.DRAWER_MENU_ITEM_NOTIFICATIONS))
                .addView(new DrawerMenuItem(this.getApplicationContext(), DrawerMenuItem.DRAWER_MENU_ITEM_TERMS))
                .addView(new DrawerMenuItem(this.getApplicationContext(), DrawerMenuItem.DRAWER_MENU_ITEM_SETTINGS))
                .addView(new DrawerMenuItem(this.getApplicationContext(), DrawerMenuItem.DRAWER_MENU_ITEM_LOGOUT));

        ActionBarDrawerToggle  drawerToggle = new ActionBarDrawerToggle(this, mDrawer, mToolbar, R.string.open_drawer, R.string.close_drawer){
            @Override
            public void onDrawerOpened(View drawerView) {
                super.onDrawerOpened(drawerView);
            }
            @Override
            public void onDrawerClosed(View drawerView) {
                super.onDrawerClosed(drawerView);
            }
        };

        mDrawer.addDrawerListener(drawerToggle);
        drawerToggle.syncState();
    }
}
Notes:
- Get the reference to the views and initialize the variables in onCreate.(Optional)We can remove this boilerplatecode findViewById by using another library of mindorks : https://github.com/janishar/ButterKnifeLite
- Add the views in the drawer by calling the addView method
- ActionBarDrawerToggle is used to add listener to the drawer and to add the hamburger menu icon
The Question:
Now that we have gone through the exercise we can review the PlaceHolderView application over RecyclerView.
- PlaceHolderView remove all the boilerplate codes for setting the View adapters. The amazing fact is that there is no adapter to worry about.
- The code is extremely modular and works with the flexibility of putting annotations on any view and methods.
- NO findViewById, NO onClickListener ugly codes
- There are a lot of benefit of using PlaceHolderView . For greater perspective please view the GitHub Repository PlaceHolderView
Source code link:
https://github.com/janishar/PlaceHolderView
I Hope that this tutorial will help you in building great Drawers. Post me anything you build, on this post. And do give star on the repository https://github.com/janishar/PlaceHolderView


