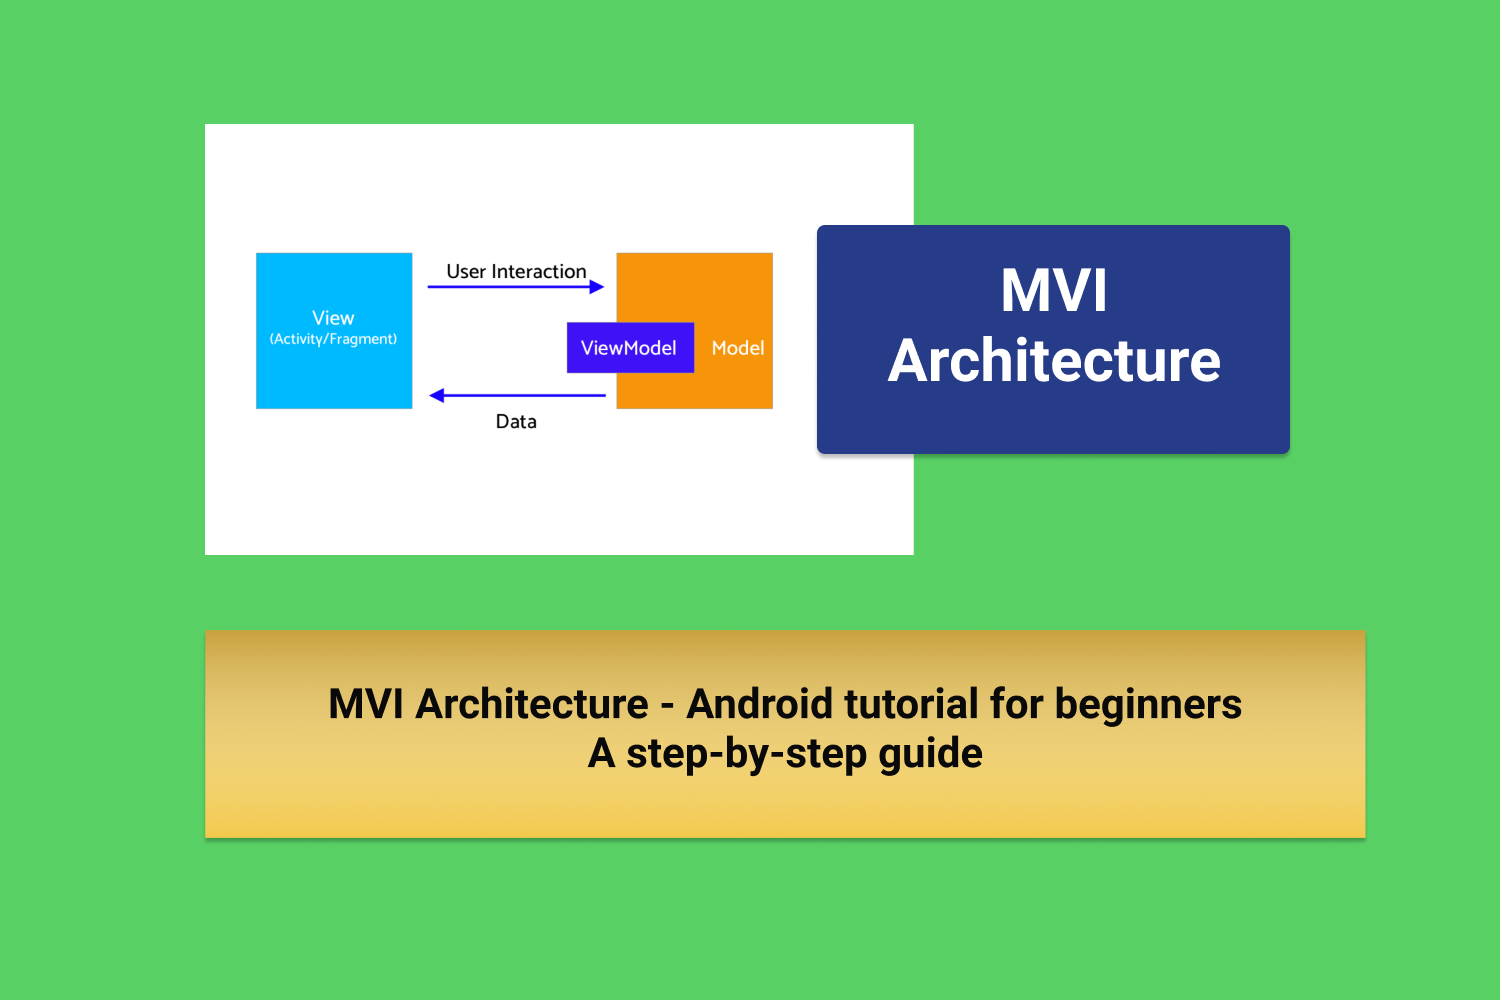
Migrating to 64 bit Architecture in Android
In 2017, Google announced that in Aug'19 Apps on the PlayStore should provide the subsequent version of 32 bit native libraries in 64 bit. 64 bit is supported since Android 5( Lollipop ) days.
Why we need 64 bit CPUs?
Because they deliver faster, richer experiences for the users of your app. Adding the 64 bit version in your app provides performance improvements. It will only be compatible with 64-bit-only hardware.
So , how can you make sure if you app is supported for 64 bit hardware devices.
If you are using Java, Kotlin or any Android SDK your app is already supported by 64 bit hardwares but if you app runs th native android code with extension `.so` then you need to update it for 64 bit architecture.
But, How can we check if we have .so extension files
You need to analyse the APK of your app in APK Analyser of the Android Studio. To open APK Analyser,
- Open Android Studio , and open any project .
- From the menu, select Build > Analyze APK and select the APK which you want to evaluate.
- Now, if in the analyser you look into lib folder , and in that you see any .so then you have 32-bit libraries or if you have any armeabi-v7a or x86 , then you have 32-bit libraries
- If you see no .so files, then your app requires no upgrade versions.
Uprgade to 64 bit architecture
- If we have arm64-v8a or x86_64 libraries in the analyser we dont have to upgrade the architecture.
- If we don't see these, you need to upgrade
- To upgrade, just add the following
// Your app's build.gradle
apply plugin: 'com.android.app'

android {
   compileSdkVersion 27
   defaultConfig {
       appId "com.google.example.64bit"
       minSdkVersion 15
       targetSdkVersion 28
       versionCode 1
       versionName "1.0"
       ndk.abiFilters 'armeabi-v7a','arm64-v8a','x86','x86_64'
// ...
Here, we add the arm64-v8a and x86_64 to support the 64 bit architecture.
and to use it while building CMAKE, we run the following
:: Command Line
> cmake -DANDROID_ABI=arm64-v8a … or
> cmake -DANDROID_ABI=x86_64 …
To build with ndk-build, we have to modify our Application.mk file with,
APP_ABI := armeabi-v7a arm64-v8a x86 x86_64That's not it, this can be also handled by Game devleopers. In game development engines, almost all of them provide the 64 bit architecture.
In this blog, we will talk about Unity Game Engine. Unity started provding the support since 2017 versions for 64 bit architecture. The one which doesn't support the 64 bit can still port it towards it.
To update it to 64 bit we use,
- Goto Build Settings
Ensure you are building it for Android.If not press the switch platform at below the popup
- Click Player Settings
- Move to Player Settings Panel > Settings for Android > Other settings > Configuration
- Change Scripting backend to IL2CPP
- And check the ARM64 checkbox to build it for 64 bit
- Now just test the app!!!
Now, the game app is upgraded to 64 bit architecture
Overall, is how we can upgrade to 64 bit architecuture. To know more watch the video by Google Developers.
Happy learning
Team MindOrks :)