Gradle for Android Developers - Getting the most of it

As developers, we are mostly involved with writing clean and memory-efficient code, but, the end-user only looks at the final application build that is installed on the device. So how come a build is generated with our code files and XML files?
This is possible with Gradle in Android Studio. So, apart from the orthodox coding standards we generally discuss as developers, for a change, let’s understand about Gradle in this article!
Welcome to our MindOrks blog regarding Gradle for Android Developers.
In this blog, we will understand:
- What is Gradle?
- What is the role of Gradle in Android Development?
- The Android Plugin for Gradle
- What are the Gradle Plugins?
- Why does an Android Project contain multiple build.gradle files?
- What do the different fields in the project level build.gradle file signify?
- What happens behind the scenes when we click the green play button in Android Studio?
- What is a Gradle task? How to create a custom Gradle Task?
- How can we achieve Gradle build through the command line?
Gradle
By definition, Gradle is an open-source build automation tool focused on flexibility and performance
So, simply putting, it is an automation tool that generates the application build. Gradle is the official build tool for Android.
Role of Gradle in Android Development
Whenever we try to run the developed code into an emulator or an actual device via USB, we can see the process of “Gradle Build Running” in our IDEs.
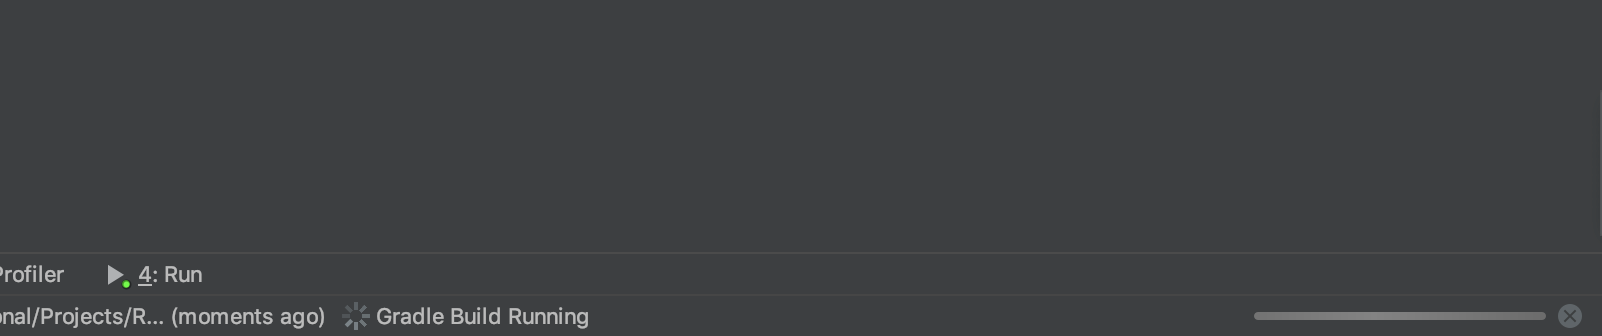
This is when Gradle helps in compiling the Java and Kotlin code into an APK. So if Gradle can do this, what is an Android Gradle Plugin?
Android Gradle Plugin
Want to know an interesting fact? Neither Android Studio or the Gradle alone, have any clue how to compile the Java and Kotlin code into an APK.
Yes, that’s correct!
So, how is Gradle able to help is in the build process? From this link of the Offical Android Developers’ website , we can see that:
The Android plugin for Gradle works with the build toolkit to provide processes and configurable settings that are specific to building and testing Android applications.
Gradle Plugins
Gradle alone cannot do much of the automation build process. That’s why if we go back to our section, where we have mentioned the definition of Gradle, it is focused on “Flexibility”.
If we can recall, as Android Developers, the third-party libraries that have to be used in our project should be added as dependencies in our app-level Gradle file, and we can access their classes only after syncing the Gradle with the project. This is how Gradle is flexible enough by providing a “Plug-in” feature.
You can have a look at all the available Gradle plugins for download here and the list of core plugins provided by Gradle itself here .
Multiple build.gradle files in an Android Project
Every time, we start a new Android Project, we can see two different build.gradle files present. One at the project level and another at the app level. So, what is the “app” here? “app” is a module of the project. Now, what is a module? According to the Android Developers’ documentation,
A module is a collection of source files and build settings that allow you to divide your project into discrete units of functionality. Your project can have one or many modules and one module may use another module as a dependency. Each module can be independently built, tested, and debugged.
Since modules are based on functionality, each module will have its dependencies or third-party libraries and hence each module will have it’s own Gradle file. Want to understand what different types of modules can be included in a project? You can have a look here .
Fields in build.gradle files
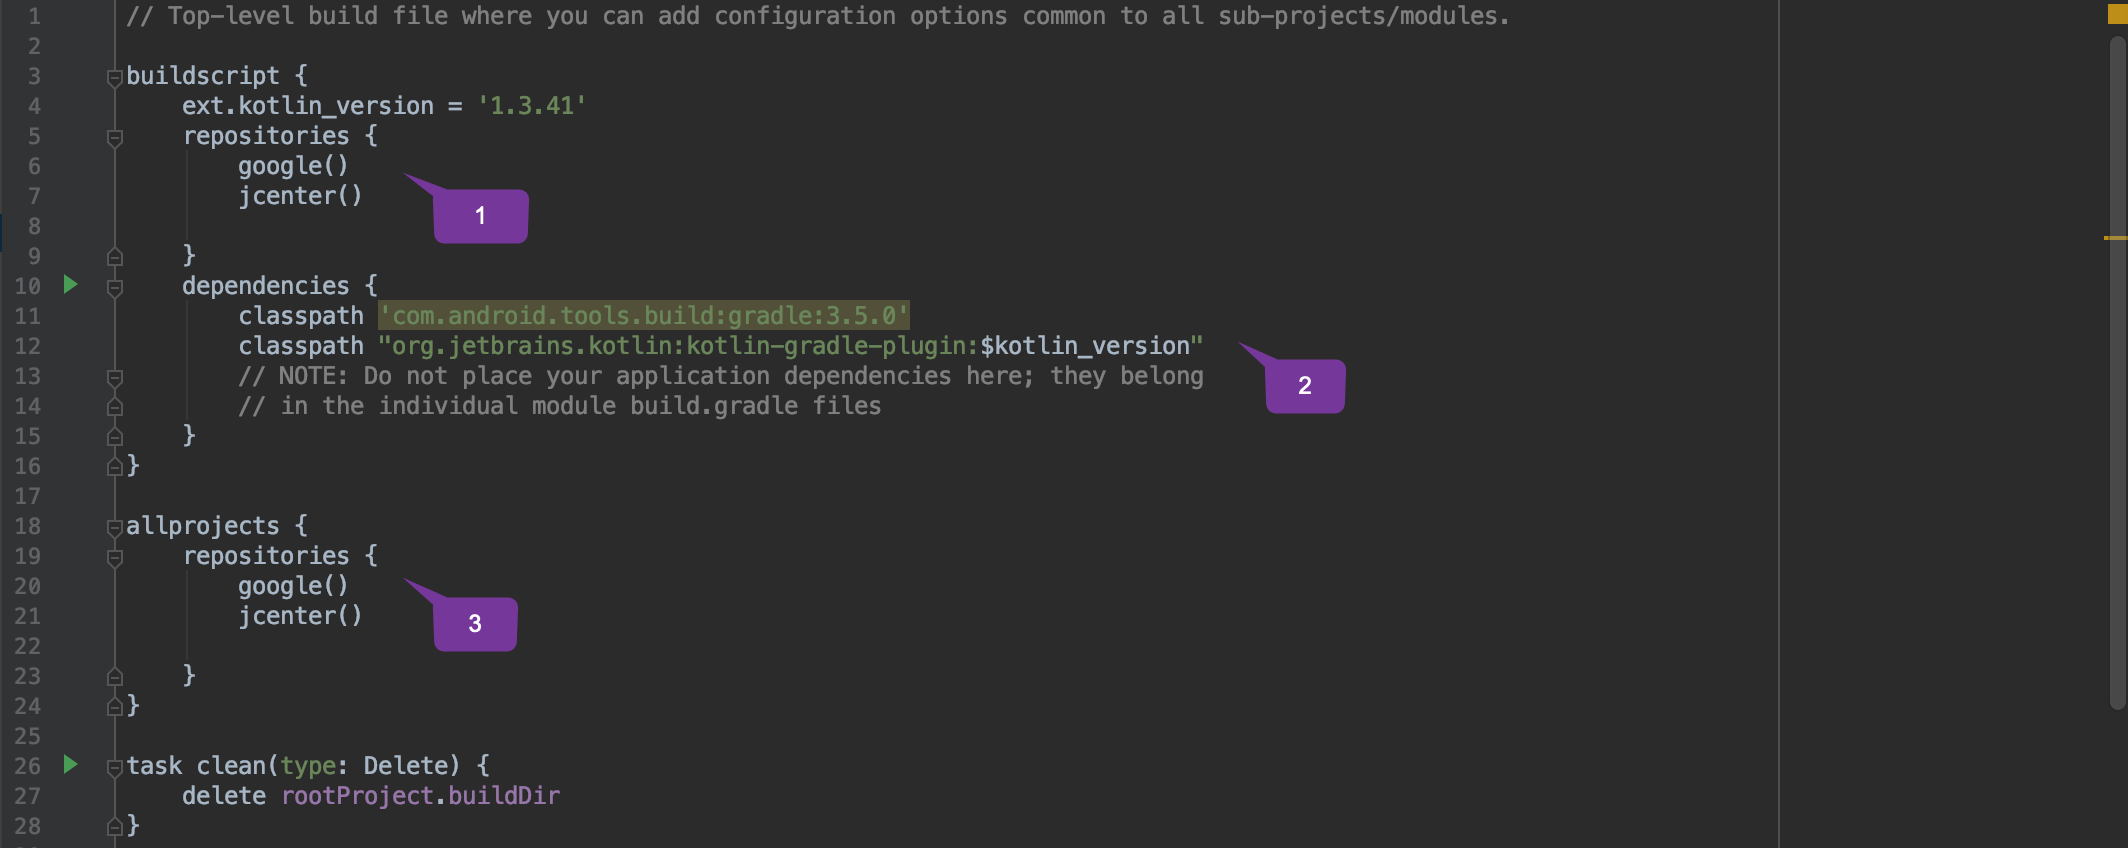
From the project level build.gradle file, there are mainly three fields(areas) we should understand:
- The repositories from which the dependencies for the project are to be downloaded (google and jcenter in this case)
- The dependencies that are required at a project level (useful for all the sub-projects or modules). we can see that the Gradle dependency and the kotlin dependency are used throughout the project and hence it is declared here (at the project level).
- The repositories for which all the sub-projects/modules are to be downloaded (google and jcenter in this case)
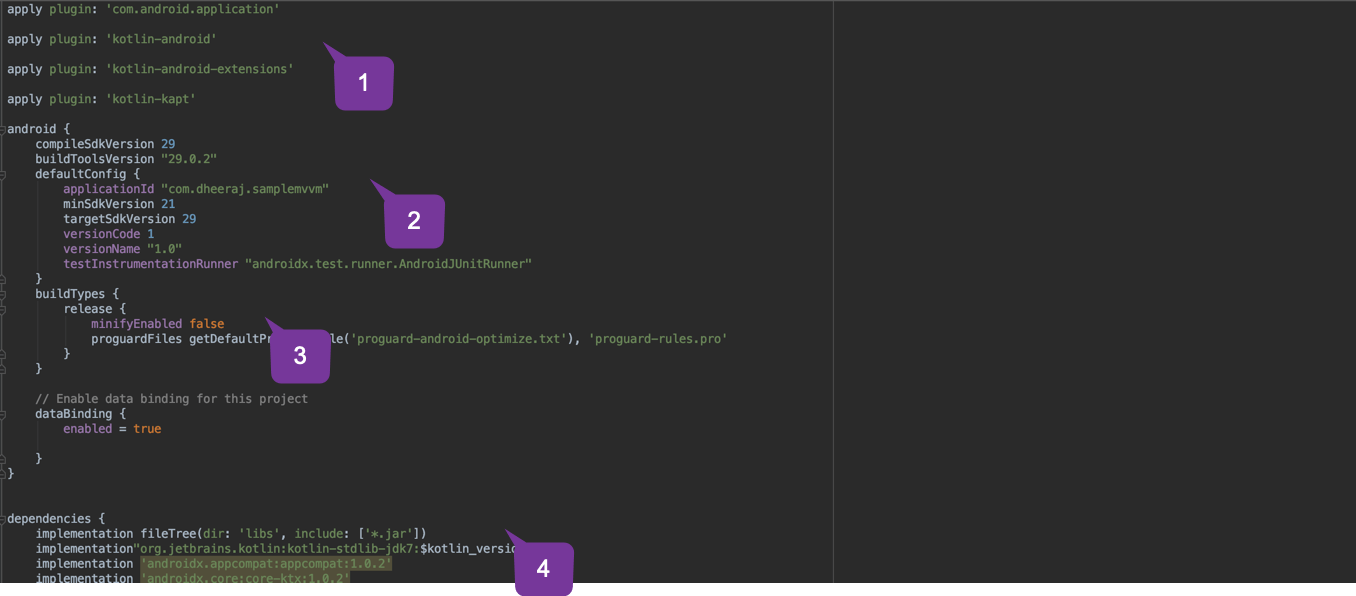
- We add the required plugins: the android Gradle plugin along with the kotlin plugins required
- This is the android block where all the requirements are listed. This only works because we have applied the android Gradle plugin in Step 1.
- The different build types that are to be included as per the requirement. You can learn more about build types here .
- Finally, all the third-party dependencies that are required for this respective module or sub-project.
What happens when the build process starts on Android Studio?
Now that we have understood, why we have different build.gradle files and what do different fields in the Gradle file signify, let’s understand what happens when the run button is clicked.From the official documentation :
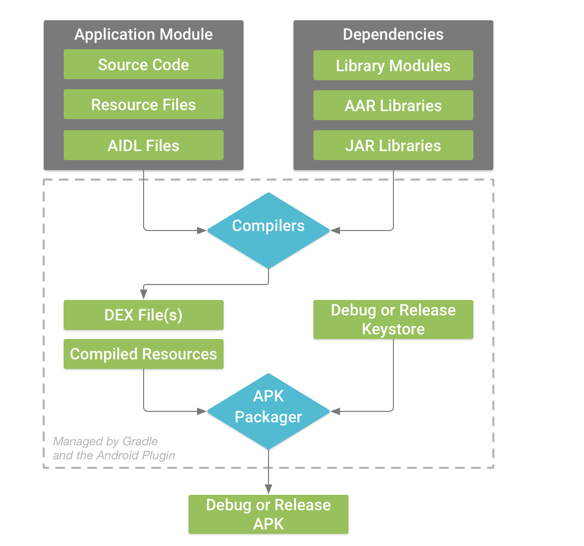
In words:
- compilers convert your source code into DEX (Dalvik Executable) files, which include the bytecode that runs on Android devices, and everything else into compiled resources.
- The APK Packager combines the DEX files and compiled resources into a single APK. Before your app can be installed and deployed onto an Android device, the APK must be signed.
- The APK Packager signs your APK using either the debug or release Keystore.
- If you are building a debug version of your app, that is, an app you intend only for testing and profiling, the packager signs your app with the debug Keystore. Android Studio automatically configures new projects with a debug Keystore.
- If you are building a release version of your app that you intend to release externally, the packager signs your app with the release Keystore.
- To create a release Keystore, read about signing your app in Android Studio .
- Before generating your final APK, the packager uses the zipalign tool to optimize your app to use less memory when running on a device.
- At the end of the build process, you have either a debug APK or release APK of your app that you can use to deploy, test, or release to external users.
Gradle Task
Gradle Task is an action performed by Gradle. For example, when the run button is pressed in Android Studio, a Gradle task is triggered.
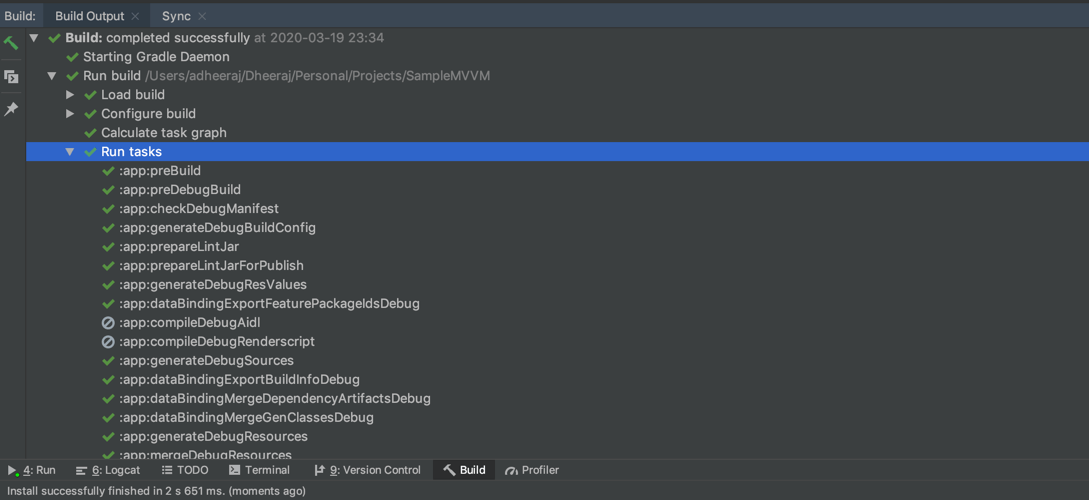
If we keep the build window open from the bottom navigation bar and click on the run icon, a list of the Gradle tasks can be observed on the console.
Running Gradle tasks through the command line
Can we achieve the same behavior discussed in the Gradle tasks section through the command line? Yes, we can open the terminal from the bottom navigation bar and type:
./gradlew assembleDebug --console plain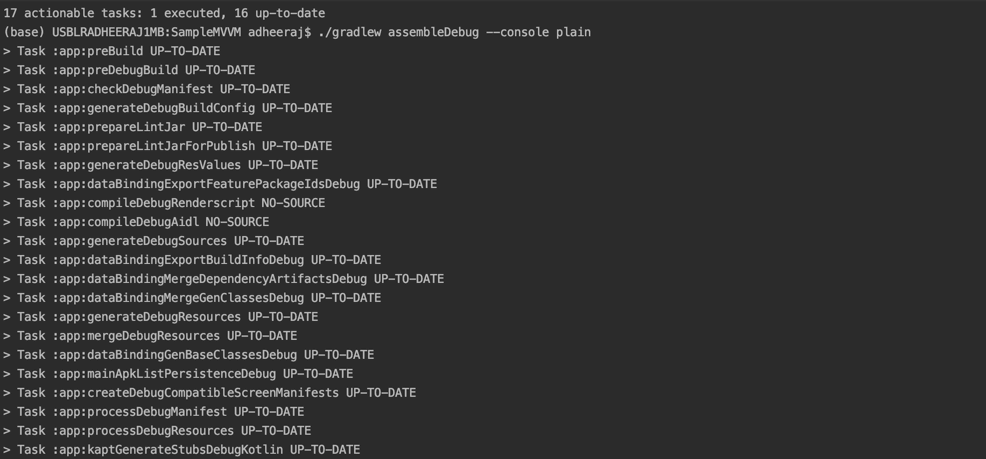
We can see that this is the same set of tasks that we have observed from clicking the run button in Android Studio. Hence, the task that is triggered here by clicking the run button is “assembleDebug”.A description here from the command we have used;
- ./gradlew means to use the Gradle Wrapper. It is highly recommended to always use the Wrapper version. You can understand more about the Gradle Wrapper here
- assembleDebug is the name of the task we just asked it to run.
- --console plain tells Gradle to print out the build log exactly as how you see it in Android Studio. It's completely optional to mention this.
Similarly, if you want to view the list of Gradle tasks available, you can use the command:
./gradlew tasksYou will be able to see a list of all the available Gradle tasks available:
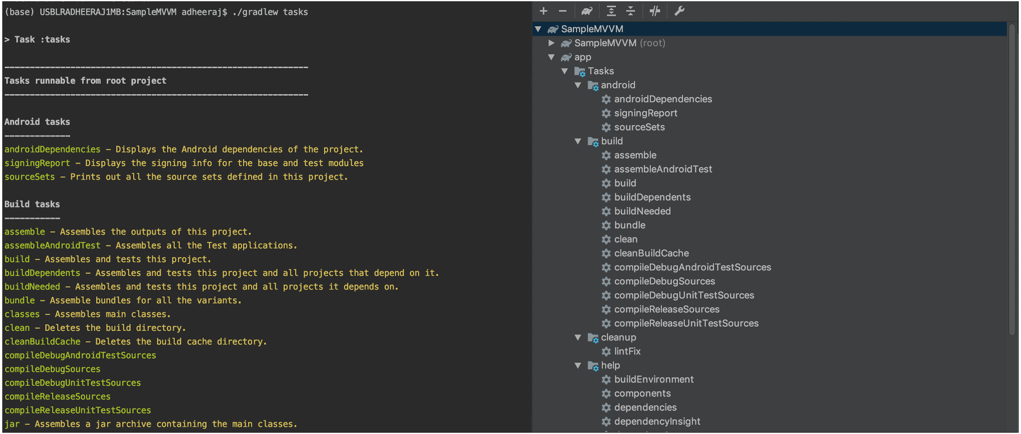
We can also observe that the list of tasks displayed by executing the command from the terminal is similar to the tasks available in the Gradle console at the top right corner.
Creating custom tasks
We have seen and understood how we can run the “assembleDebug” task from the command line. Now, what if we want to create our custom task: Let’s say we want to clean the project by creating our custom task. We can add this task to the project-level build.gradle file:
task clean(type: Delete) {
    delete rootProject.buildDir
}
Now when we provide on the terminal:
./gradlew cleanThis executes the clean command that deletes the build directory as per the command given in the task declared. The same can also be obtained by selecting the option “Clean Project” under the “Build” menu. But if we wanted to customize our task, this is the way we can achieve it.
Now this task is in a way default provided by Gradle at the project level build.gradle file. Now, let's consider one of the common use cases. Let's say once we build our apk through the assembleDebug process, we want to copy the apk to the Desktop and rename it to our own choice rather than keeping the 'app-debug.apk' name. How can we achieve this?
Yes! By creating a custom Gradle task in the app level build.gradle file:
task getDebugAppInDesktopFolder(dependsOn: 'assembleDebug') {
    doLast {
        def destination = "Put the desired path"
        def desiredName = "Put the desired name"
        ext.apk = file("build/outputs/apk/debug/app-debug.apk")

        if (ext.apk.exists()) {
            copy {
                from ext.apk.absolutePath
                into destination
                rename { desiredName }
            }
        }
    }
}
Here 'getDebugAppInDesktopFolder' is our task name, 'assembleDebug' is the task that our current Gradle task is dependent on. (assembleDebug is the task which builds our 'app-debug.apk') file. Finally, in our doLast block, we are getting the user name from the System properties so that this can be dynamic and copying the apk file if it exists on to the desktop.
This makes our job easier rather than locating the 'app-debug.apk' file, copying it to our desktop and then renaming it.
That’s it! That’s all we wanted to discuss here regarding Gradle for Android Developers in this blog.
We hope that this blog has given you a bit of understanding of what Gradle is, and why it is that we are forced to sync Gradle files if any changes are made, etc.
The main agenda of this article was to understand Gradle, rather than just waiting for the build to complete after clicking the run button :)
Thank you so much for your time.
Keep Learning, Keep sharing!
Team MindOrks.