Getting started with Motion Layout: Android Tutorials
Are you fond of animations? Have you tried writing code for a simple animation in android? If yes, then you know that adding complex animation is possible but time-consuming. That's why Google introduced the MotionLayout in I/O 2018.
To have a clear understanding of what the MotionLayout can do, please see the animation used in the Youtube app.
What is MotionLayout?
MotionLayout is the new layout in Android, for creating amazing interactive animations in android. It’s a part of ConstraintLayout 2.0 library to help Android Developers manage motion and widget animation in their applications.
The MotionLayout widget can do everything the Constraint Layout widget can.
The main difference between ConstraintLayout and MotionLayout at the XML level is that the actual description of what MotionLayout will do is
not
necessarily contained in the layout file.Rather, MotionLayout typically keeps all this information in a separate XML file (a
MotionScene
) that it references, and this information will take precedence over the information in the layout file.This way, the layout file can contain only the Views and their properties — not their positioning or movement.
To have MotionLayout up and running in your project, and to get a feel of how it works, you’ll need :
- A starting layout that has the starting constraints
- An ending layout that has the ending constraints
- And a motion scene (which defines our animation)
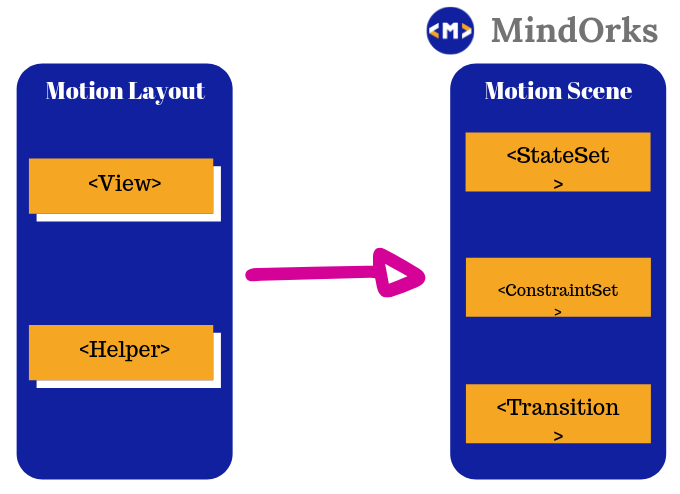
MotionLayout uses a mechanism called MotionScene to create all animations. If you are using MotionLayout, then you should be familiar with 4 important terms i.e. MotionScene , Transition , KeyFrameSet , ConstraintSet .
- MotionScene: In the MotionScene, we write all the animations that we want to add in our project. Animation here doesn't mean just moving object but, in general, changing their properties with respect to time.
- Transition: A transition describes the change from state A to state B. You can add the start constraint by using app:constraintSetStart and final one by using app:constraintSetEnd .
- KeyFrameSet: You can think of an animation as a sequence of frames. Suppose, if we want to move from A to B, then the shortest path will be considered during transition.
- ConstraintSet: Finally, you use ConstraintSet definitions to define starting and final constraints, for each of the View you want to animate.
Why Motion Layout?
The Android framework already provides several ways of adding animation in our application, such as:
- Animated Vector Drawable
- Property Animation framework
- LayoutTransition animations
- Layout transitions with TransitionManager
- CoordinatorLayout
So, instead of having so many options, why we are using MotionLayout for making animations?MotionLayout was created to bridge the gap between layout transitions and complex motion handling. You can think of it in terms of capabilities as a mix between the property animation framework, TransitionManager, and CoordinatorLayout.It let's you describe the transition between two layouts (like TransitionManager), but can animate any properties as well (not just layout attributes). It supports touch handling and keyframes, allowing developers to easily customize transitions to their own needs.Beyond this scope, the other key difference is that MotionLayout is fully declarative — you can fully describe in XML a complex transition — no code is expected (if you need to express motion by code, the existing property animation framework already provides a great way of doing it).
Let's get started
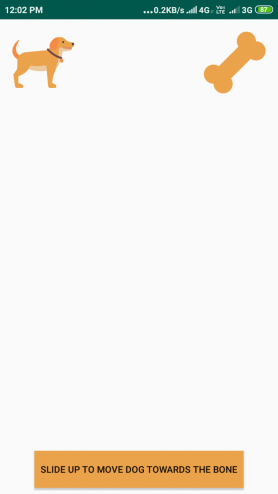
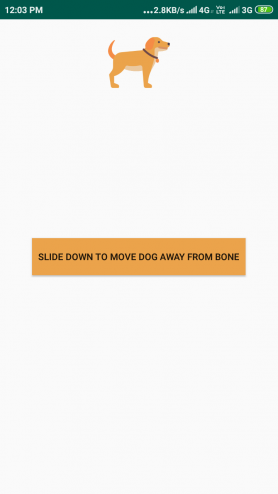
In this blog, we will try to make the below animation using the MotionLayout.
Follow the below steps to use MotionLayout :
- Add ConstraintLayout 2.0 to your build.gradle dependencies
implementation 'com.android.support.constraint:constraint-layout:2.0.0-alpha2'- Starting layout: This will the layout from where your animation will start. In my case the start activity is MotionStartActivity . Following is the code for the XML file activity_motion_start.xml. Just 3 views with constraints all set! Two of these will animate and third, will stay static.
<?xml version="1.0" encoding="utf-8"?>
<android.support.constraint.motion.MotionLayout
    xmlns:android="http://schemas.android.com/apk/res/android"
    xmlns:tools="http://schemas.android.com/tools"
    xmlns:app="http://schemas.android.com/apk/res-auto"
    android:layout_width="match_parent"
    android:layout_height="match_parent"
    app:layoutDescription="@xml/motion_scene">

    <ImageView
        android:id="@+id/movingImageView"
        android:layout_width="80dp"
        android:layout_height="80dp"
        android:src="@drawable/dog"
        android:layout_marginTop="16dp"
        android:layout_marginStart="16dp"
        app:layout_constraintTop_toTopOf="parent"
        app:layout_constraintStart_toStartOf="parent"/>

    <Button
        android:id="@+id/button"
        android:text="Slide Up to move dog towards the bone"
        android:layout_width="wrap_content"
        android:layout_height="wrap_content"
        android:clickable="false"
        android:background="#EBA34B"
        android:padding="8dp"
        android:layout_marginBottom="8dp"
        android:layout_marginStart="8dp"
        android:layout_marginEnd="8dp"
        app:layout_constraintBottom_toBottomOf="parent"
        app:layout_constraintEnd_toEndOf="parent"
        app:layout_constraintStart_toStartOf="parent"/>

    <ImageView
        android:id="@+id/staticImageView"
        android:src="@drawable/bone"
        android:layout_width="80dp"
        android:layout_height="80dp"
        android:layout_marginTop="16dp"
        android:layout_marginEnd="16dp"
        app:layout_constraintTop_toTopOf="parent"
        app:layout_constraintEnd_toEndOf="parent"/>

</android.support.constraint.motion.MotionLayout>- Ending Layout: We then create an ending layout, called activity_motion_end.xml.
Note: It only has the two views we intend to animate! (and their final constraints)
<?xml version="1.0" encoding="utf-8"?>
<android.support.constraint.motion.MotionLayout
    xmlns:android="http://schemas.android.com/apk/res/android"
    xmlns:app="http://schemas.android.com/apk/res-auto"
    android:layout_width="match_parent"
    android:layout_height="match_parent">

    <ImageView
        android:id="@+id/movingImageView"
        android:layout_width="80dp"
        android:layout_height="80dp"
        android:src="@drawable/dog"
        android:layout_marginTop="16dp"
        android:layout_marginStart="16dp"
        android:layout_marginEnd="16dp"
        app:layout_constraintTop_toTopOf="parent"
        app:layout_constraintStart_toStartOf="parent"
        app:layout_constraintEnd_toEndOf="parent"/>

    <Button
        android:id="@+id/button"
        android:text="Slide Down to move dog away from bone"
        android:background="#EBA34B"
        android:layout_width="wrap_content"
        android:layout_height="wrap_content"
        android:padding="8dp"
        android:layout_marginBottom="8dp"
        android:layout_marginEnd="8dp"
        android:layout_marginStart="8dp"
        android:layout_marginTop="8dp"
        app:layout_constraintBottom_toBottomOf="parent"
        app:layout_constraintEnd_toEndOf="parent"
        app:layout_constraintStart_toStartOf="parent"
        app:layout_constraintTop_toTopOf="parent"/>

</android.support.constraint.motion.MotionLayout>- Motion Scene: This is the file that defines the type of motion/animation we want and what the starting/ending constraints are. Let’s call it motion_scene.xml (placed in res/xml/motion_scene.xml)
<?xml version="1.0" encoding="utf-8"?>
<MotionScene
    xmlns:motion="http://schemas.android.com/apk/res-auto">

    <Transition
        motion:constraintSetStart="@layout/activity_motion_start"
        motion:constraintSetEnd="@layout/activity_motion_end"
        motion:duration="1000">

        <OnSwipe
            motion:touchAnchorId="@id/button"
            motion:touchAnchorSide="top"
            motion:dragDirection="dragUp"/>

    </Transition>

</MotionScene>
Here we defined a Transition (the animation) with duration & a start/end point to the layouts. And also a swipe Trigger on the button (with up direction) — which adds interactivity.
Also, make sure to add a reference to this motion_scene file in activity_main using
app:layoutDescription="@xml/motion_scene"And that's it! A simple motion layout animation is now added to the project.
Another Example (using KeyFrameSet)
Here we will use the KeyFrameSet for animation. KeyFrameSet is a child element of Transition and it can contain KeyPosition , KeyAttribute , and KeyCycle elements for defining middle states of animation.
- KeyPosition is used to add a position through which the target element passes when it is animated.
- KeyAttribute is used to add values for attributes for middle state. You can assign values for standard attributes by directly using the name of properties as attribute of KeyAttribute element.
- KeyCycle is used to add oscillations during animation. You can specify the point on the animation at which you want oscillation by using framePosition attribute.
Let's take another example, whose Motion Scene file is :
<?xml version="1.0" encoding="utf-8"?>
<MotionScene xmlns:android="http://schemas.android.com/apk/res/android"
    xmlns:motion="http://schemas.android.com/apk/res-auto">
    <Transition
        motion:constraintSetStart="@+id/wish_start"
        motion:constraintSetEnd="@+id/wish_end"
        motion:duration="2000">
        <OnClick motion:target="@+id/click"/>
        <KeyFrameSet>
            <KeyPosition
                motion:keyPositionType="pathRelative"
                motion:percentY="0.25"
                motion:framePosition="50"
                motion:target="@id/tv1"/>
            <KeyPosition
                motion:keyPositionType="pathRelative"
                motion:percentY="-0.25"
                motion:framePosition="50"
                motion:target="@id/tv2"/>
            <KeyAttribute
                motion:framePosition="50"
                motion:target="@id/tv1"
                android:rotation="-30"/>
            <KeyAttribute
                motion:framePosition="50"
                motion:target="@id/tv2"
                android:rotation="-30">
                <CustomAttribute
                    motion:attributeName="textSize"
                    motion:customFloatValue ="20"/>
            </KeyAttribute>
            <KeyCycle
                motion:framePosition="30"
                motion:target="@id/tv1"
                android:rotation="-30"
                motion:waveShape="bounce"
                motion:wavePeriod="3"/>
        </KeyFrameSet>
    </Transition>
    <ConstraintSet android:id="@+id/wish_start">
        <Constraint
            android:id="@+id/tv1"
            android:layout_width="wrap_content"
            android:layout_height="60dp"
            android:text="hello"
            motion:layout_constraintEnd_toEndOf="parent"
            motion:layout_constraintStart_toStartOf="parent"
            motion:layout_constraintTop_toTopOf="parent">
            <CustomAttribute
                motion:attributeName="textSize"
                motion:customFloatValue ="50"/>
        </Constraint>
        <Constraint
            android:id="@+id/tv2"
            android:layout_width="wrap_content"
            android:layout_height="60dp"
            android:text="mindorks"
            motion:layout_constraintEnd_toEndOf="parent"
            motion:layout_constraintStart_toStartOf="parent"
            motion:layout_constraintTop_toBottomOf="@+id/tv1">
            <CustomAttribute
                motion:attributeName="textSize"
                motion:customFloatValue ="50"/>
        </Constraint>
        <Constraint
            android:id="@+id/click"
            style="?android:attr/borderlessButtonStyle"
            android:layout_width="wrap_content"
            android:layout_height="wrap_content"
            android:layout_marginTop="200dp"
            android:text="click"
            motion:layout_constraintEnd_toEndOf="parent"
            motion:layout_constraintStart_toStartOf="parent"
            motion:layout_constraintTop_toTopOf="parent" />
    </ConstraintSet>
    <ConstraintSet android:id="@+id/wish_end">
        <Constraint
            android:id="@id/tv1"
            android:layout_width="wrap_content"
            android:layout_height="60dp"
            android:text="HELLO"
            android:layout_marginTop="400dp"
            motion:layout_constraintEnd_toEndOf="parent"
            motion:layout_constraintStart_toStartOf="parent"
            motion:layout_constraintTop_toTopOf="parent">
            <CustomAttribute
                motion:attributeName="textSize"
                motion:customFloatValue ="50"/>
        </Constraint>
        <Constraint
            android:id="@id/tv2"
            android:layout_width="wrap_content"
            android:layout_height="60dp"
            android:text="MINDORKS"
            android:layout_marginTop="16dp"
            motion:layout_constraintEnd_toEndOf="parent"
            motion:layout_constraintStart_toStartOf="parent"
            motion:layout_constraintTop_toBottomOf="@+id/tv1">
            <CustomAttribute
                motion:attributeName="textSize"
                motion:customFloatValue ="50"/>
        </Constraint>
        <Constraint
            android:id="@id/click"
            style="?android:attr/borderlessButtonStyle"
            android:layout_width="wrap_content"
            android:layout_height="wrap_content"
            android:layout_marginTop="200dp"
            android:text="click"
            motion:layout_constraintEnd_toEndOf="parent"
            motion:layout_constraintStart_toStartOf="parent"
            motion:layout_constraintTop_toTopOf="parent" />
    </ConstraintSet>
</MotionScene>
The layout file for the above example is:
<?xml version="1.0" encoding="utf-8"?>
<android.support.constraint.motion.MotionLayout
    xmlns:android="http://schemas.android.com/apk/res/android"
    xmlns:app="http://schemas.android.com/apk/res-auto"
    android:layout_width="match_parent"
    android:layout_height="match_parent"
    android:layout_margin="8dp"
    android:layout_marginTop="32dp"
    app:layoutDescription="@xml/keyframeset">
    <TextView
        android:id="@+id/tv1"
        android:layout_width="wrap_content"
        android:layout_height="20dp"
        android:text="Hello"
        android:layout_marginTop="16dp"
        app:layout_constraintEnd_toStartOf="@+id/tv2"
        app:layout_constraintStart_toStartOf="parent"
        app:layout_constraintTop_toTopOf="parent"/>
    <TextView
        android:id="@+id/tv2"
        android:layout_width="wrap_content"
        android:layout_height="20dp"
        android:text="MindOrks"
        android:layout_marginTop="16dp"
        app:layout_constraintEnd_toEndOf="parent"
        app:layout_constraintStart_toEndOf="@+id/tv1"
        app:layout_constraintTop_toTopOf="parent"/>

    <Button
        android:id="@+id/click"
        style="@style/Widget.AppCompat.Button.Colored"
        android:layout_width="wrap_content"
        android:layout_height="wrap_content"
        android:text="Click"
        android:layout_marginTop="200dp"
        app:layout_constraintEnd_toEndOf="parent"
        app:layout_constraintStart_toStartOf="parent"
        app:layout_constraintTop_toTopOf="parent"/>

</android.support.constraint.motion.MotionLayout>
Limitations of MotionLayout
MotionLayout is helpful when we are having less views in our layout because MotionLayout provide its capabilities to its direct children while TransitionManager can work with nested layouts also.
When to use MotionLayout?
You can use MotionLayout when you need to move, resize or animate the actual UI elements — buttons, title bar, etc. i.e. the elements that user needs to interact with.
It’s important to realize that motion is here to serve a special purpose and it should not be used to provide some special effect in your application. It should be used to help the user understand what your application is doing. The Material Design principles website is a great introduction to those concepts.
Conclusion
If you want to add some animation in your application then you can use MotionLayout but before adding the MotionLayout, try to find out the feature you are trying to address using the MotionLayout. If you want to add some type of motions to your application then you are good to go with the MotionLayout but if you want some special effect in your application in which there are a number of nested layouts then you should avoid using MotionLayout.
Happy learning :)
Team MindOrks.