Getting Started With CameraX Jetpack Support Library
Camera Development is Hard, Very Hard.
and when I say hard it means we have to do a lot of manual labour in this automated world and that too are not foolproof solution of creating a consistent experience throughout all the android flavours and different devices.
I have worked with Camera APIs before and when I say hard it means it is so tough that it is technically impossible to master the powerfull and complex camera API.
In Google IO 2019 , Google added another powerfull tool for camera development in Android development called CameraX as part of Jetpack.
Few Features of CameraX,
- It is backward compatible till Android 5.0 / Lollipop (API 21) and it works with atleast 90% devices in the market.
- Under the hood , it uses and leverages the Camera 2 APIs. It basically provide same consistency like Camera 1 API via Camera 2 Legacy layer and it fixed a lot of issues accross the device.
- It also has a lot of awesome advanced features like Portrait, HDR, Night mode etc (Provided your Device supports that).
- CameraX has also introduced USECASES which allow you to focus on the task you need to get it done and not waste your time with specific devices.Few of them are Preview , Image Analysis, Image Capture.
- CameraX doesn't have specific call/stop methods in onResume() and onPause() but it binds to lifecycle of the View with help of CameraX.bindToLifecycle()
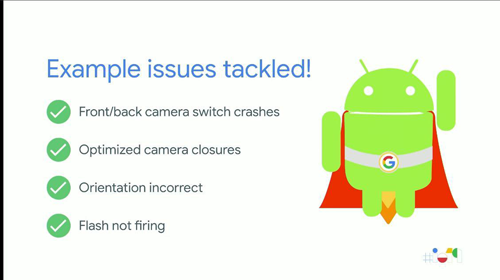
- The following is the few list of known issues fixed with CameraX,
In this blog we will help you build your own Camera App step by step using CameraX.
To start Integrating the CameraX in your project,
Create a New Project in Android Studio with Kotlin and,
Step 01 :
Add the following to each module’s
build.gradle
file:
dependencies {
  def camerax_version = "1.0.0-alpha01"
  implementation "androidx.camera:camera-core:$camerax_version"
  implementation "androidx.camera:camera-camera2:$camerax_version"
}
Step 02 :
Now, the project will have an Activity and its layout file. MainActivity.kt and activity_main.xml.
in activity_main.xml, add TextureView tag to display the Camera in View.
<?xml version="1.0" encoding="utf-8"?>
<androidx.constraintlayout.widget.ConstraintLayout xmlns:android="http://schemas.android.com/apk/res/android"
    xmlns:app="http://schemas.android.com/apk/res-auto"
    xmlns:tools="http://schemas.android.com/tools"
    android:layout_width="match_parent"
    android:layout_height="match_parent"
    tools:context=".MainActivity">

    <TextureView
        android:id="@+id/texture"
        android:layout_width="0dp"
        android:layout_height="0dp"
        app:layout_constraintBottom_toBottomOf="parent"
        app:layout_constraintEnd_toEndOf="parent"
        app:layout_constraintStart_toStartOf="parent"
        app:layout_constraintTop_toTopOf="parent" />

    <com.google.android.material.button.MaterialButton
        android:id="@+id/btn_take_picture"
        style="@style/Widget.MaterialComponents.Button"
        android:layout_width="0dp"
        android:layout_height="wrap_content"
        android:layout_alignParentBottom="true"
        android:gravity="center"
        android:text="@string/capture"
        android:textAllCaps="false"
        android:textColor="@android:color/black"
        app:layout_constraintBottom_toBottomOf="parent"
        app:layout_constraintEnd_toEndOf="parent"
        app:layout_constraintStart_toStartOf="parent" />

</androidx.constraintlayout.widget.ConstraintLayout>
Step 03 :
Now, we have to add Camera permission in AndroidManifest file
<uses-permission android:name="android.permission.CAMERA" />and handle the permission dynamically in your codebase. You can read more about it here .
Step 04 :
Now we have to add the following code in the MainActivity.kt file,
class MainActivity: AppCompatActivity() {

    private var lensFacing = CameraX.LensFacing.BACK
    private val TAG = "MainActivity"

    override fun onCreate(savedInstanceState: Bundle?) {
        super.onCreate(savedInstanceState)
        setContentView(R.layout.activity_main)

        texture.post { startCamera() }

        // Every time the provided texture view changes, recompute layout
        texture.addOnLayoutChangeListener { _, _, _, _, _, _, _, _, _ ->
            updateTransform()
        }
    }

    private fun startCamera() {
        val metrics = DisplayMetrics().also { texture.display.getRealMetrics(it) }
        val screenSize = Size(metrics.widthPixels, metrics.heightPixels)
        val screenAspectRatio = Rational(metrics.widthPixels, metrics.heightPixels)

        val previewConfig = PreviewConfig.Builder().apply {
            setLensFacing(lensFacing)
            setTargetResolution(screenSize)
            setTargetAspectRatio(screenAspectRatio)
            setTargetRotation(windowManager.defaultDisplay.rotation)
            setTargetRotation(texture.display.rotation)
        }.build()

        val preview = Preview(previewConfig)
        preview.setOnPreviewOutputUpdateListener {
            texture.surfaceTexture = it.surfaceTexture
            updateTransform()
        }


        // Create configuration object for the image capture use case
        val imageCaptureConfig = ImageCaptureConfig.Builder()
            .apply {
                setLensFacing(lensFacing)
                setTargetAspectRatio(screenAspectRatio)
                setTargetRotation(texture.display.rotation)
                setCaptureMode(ImageCapture.CaptureMode.MAX_QUALITY)
            }.build()

        // Build the image capture use case and attach button click listener
        val imageCapture = ImageCapture(imageCaptureConfig)
        btn_take_picture.setOnClickListener {

            val file = File(
                Environment.getExternalStorageDirectory().toString() +
                        "${MainActivity.folderPath}${System.currentTimeMillis()}.jpg"
            )

            imageCapture.takePicture(file,
                object : ImageCapture.OnImageSavedListener {
                    override fun onError(
                        error: ImageCapture.UseCaseError,
                        message: String, exc: Throwable?
                    ) {
                        val msg = "Photo capture failed: $message"
                        Toast.makeText(baseContext, msg, Toast.LENGTH_SHORT).show()

                    }

                    override fun onImageSaved(file: File) {
                        val msg = "Photo capture successfully: ${file.absolutePath}"
                        Toast.makeText(baseContext, msg, Toast.LENGTH_SHORT).show()
                    }
                })

        }

        CameraX.bindToLifecycle(this, preview, imageCapture)
    }

    private fun updateTransform() {
        val matrix = Matrix()
        val centerX = texture.width / 2f
        val centerY = texture.height / 2f

        val rotationDegrees = when (texture.display.rotation) {
            Surface.ROTATION_0 -> 0
            Surface.ROTATION_90 -> 90
            Surface.ROTATION_180 -> 180
            Surface.ROTATION_270 -> 270
            else -> return
        }
        matrix.postRotate(-rotationDegrees.toFloat(), centerX, centerY)
        texture.setTransform(matrix)
    }
}
Here,
- CameraX.bindToLifecycle() binds to the lifecycle of the view.
- PreviewConfig.Builder() is the builder class for PreviewConfig(which helps to see the Preview of Image) where you can set different type of configuration like lens facing side , target resolution , Aspect ratio with setLensFacing(value) where value = CameraX.LensFacing.BACK/FRONT etc.
- ImageCaptureConfiguration.Builder() is configuration for image when the Image is captured.
- rotationDegrees here corrects the output of the Preview and finally texture sets the trasnformation using texture.setTransform(matrix) and matrix rotates the preview based on rotationDegress.
- when button, button_take_picture is clicked, we have to click and image and store it in out Local storage.
- in the Click listeners, we take images using takePicture and it implements two methods onError() and onImageSaved() .
That's it how we can click Image using CameraX.
Step 05 :
Now, Quickly lets talk about the effects we can use using CameraX which comes pre-build in the CameraX support Library.
If we want to use Bokeh mode like iPhone using CameraX we have to use the following,
    // Create a Extender object which can be used to apply extension
    // configurations.
    val bokehImageCapture = BokehImageCaptureExtender.create(imageConfigConfig)

    // Query if extension is available (optional).
    if (bokehImageCapture.isExtensionAvailable()) {
        // Enable the extension if available.
        bokehImageCapture.enableExtension()
    }
Here, BokehImageCaptureExtender can be imported,
import androidx.camera.extensions.BokehExtenderVoila you have finally built your first Camera App using CameraX.
Now, Let's understand what more you can do with CameraX .
- You can also create Video Recorder App using CameraX
- Add multiple extensions like Portrait Mode, HDR etc.
- We can also use Image Analysis to perform Computer Vision, ML. So it implements Analyzer method to run on each and every frame.
To read more about CameraX refer here