Understanding Canvas API in Android

Worked with Custom UI elements that are not present in the Android Widget group and wondered how was it made?
It's the magic of Canvas API which is present in Android. I think the name canvas itself defines that its a playground for artists and you have to show your best art.
In this blog, we are going to learn about how we are going to learn about,
- What is Canvas API in Android?
- Understanding the canvas implementation.
- How we can make out own UI element using canvas API?
What are Canvas API?
Canvas API in Android is a drawing framework which helps us to draw custom design like line, circle or even a rectangle. Using these we can make any shape whichever we want according to design.
The drawing of canvas happens in Bitmap, where we draw the outline and then the Paint API helps to fill color and whatever style we need.
Canvas helps to create the skeleton and Paint helps in beautifying the design.
Understanding the canvas implementation
So, since we know Canvas helps in designing views, let's understand the way the view gets rendered. There are layout methods that get called, they are

Here, onMeasure() - measures the size of the view and the children present there, onLayout() - helps in setting the size and onDraw() is the one which helps in drawing on the view.
So, in onDraw() the canvas is used to draw using its pre-contained methods, like drawLine, drawArc, etc. But, how does canvas actually draws itself on the screen?
Canvas follows the coordinate system to draw itself on the screen. It considers the phone screen as its own coordinate system.
Check the image below to get the feel of it,
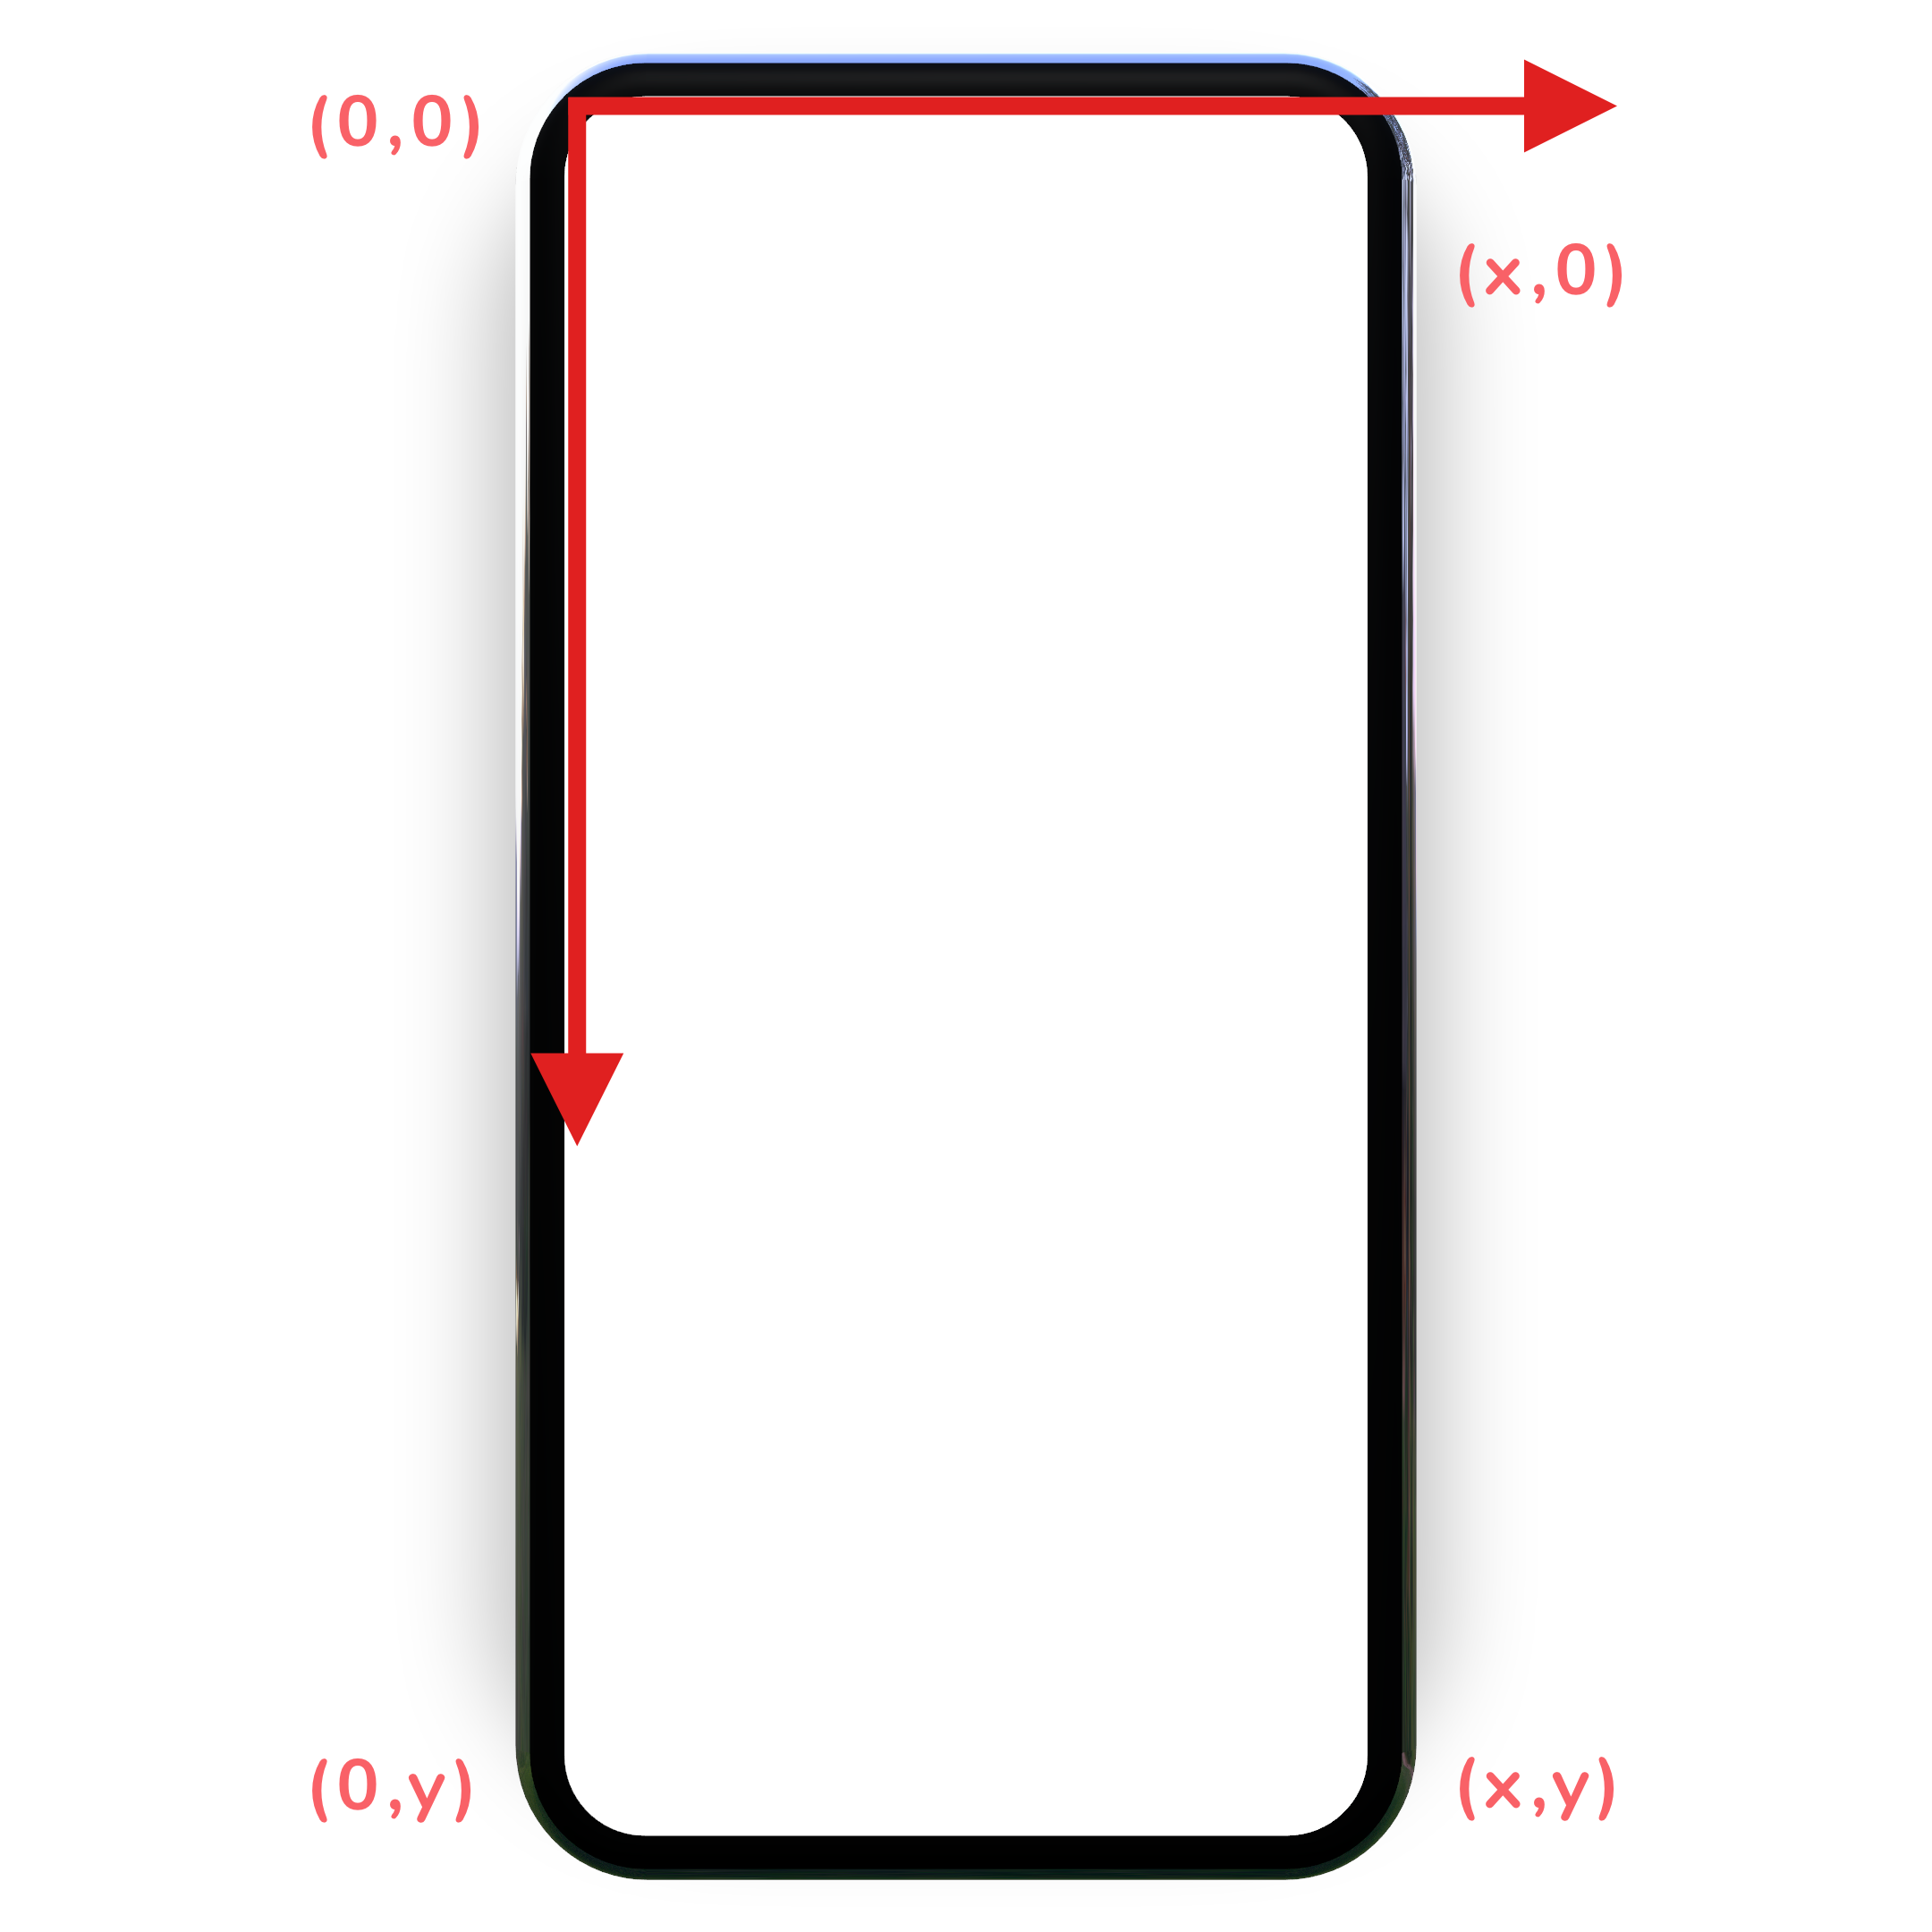
So, here
- The top left corner represents the (0,0) point in the coordinate system.
- and bottom right is then (x,y) point in the coordinate system.
- so, in that way, the center of the screen is represented by (x/2,y/2) point.
Till now, we learnt how we can use Canvas and what factors do we need to take care of while drawing on canvas. Now, let's see how we can actually draw using canvas.
To draw our own custom drawing , we can do it in own view classes. Here I will create my own CanvasView,
class CanvasView @JvmOverloads constructor(
    context: Context,
    attrs: AttributeSet? = null,
    defStyleAttr: Int = 0
) : View(context, attrs, defStyleAttr) {


    override fun onDraw(canvas: Canvas?) {
        super.onDraw(canvas)
        //here we have to use the canvas API to draw
    }
}
As you can see, in onDraw() we will be drawing my own design.
Now, to draw on Canvas we need the Paint object in the view class. So to define paint,
to define paint, I will use
private val myViewPaint =
    Paint().apply {
        isAntiAlias = true
        color = Color.BLACK
        style = Paint.Style.STROKE
    }
Here, I have initialized the paint object and set a custom property to it like color and style to store the information to draw on the canvas.
isAntiAlias - is used to make the edges smooth while drawing.
Now, let's start by drawing a line on canvas. In, onDraw() i will write,
canvas?.drawLine(0f, 5f, 0f, 10f, myViewPaint)Here, drawLine() takes two-point co-ordinate and the paint to draw itself. In the above code, 0f and 5f are x and y coordinate for the first point and 0f and 10f are the coordinate for the second point.
Similarly, in place of passing point co-ordinate we can also use Path() to draw the custom shape.
Path is used to draw shapes by passing them what to do from point to point. To draw a line using Path we have to use,
val path = Path().apply {
    moveTo(x1, y1)
    lineTo(x2, y2)
    close()
}
canvas?.drawPath(path, myViewPaint)
Here, in the above code, we have used a path to draw a line. let me break it down line by line to make you understand.
moveTo - this is used to move the drawing tip from one point to another. So here the drawing tip has moved to (x1, y1).
lineTo - this is used to draw a line to (x2, y2) from (x1,y1). As we have moved to (x1, y1), it would be our starting point to draw the line.
PS. Using Path you can draw any type of shape you desire.
and now, just to draw the line using the path, we need to use canvas.drawPath and not canvas.drawLine as we used in earlier code.
Similarly, to draw a circle, we use
canvas?.drawCircle(x,y,radius,myViewPaint)where x and y are the coordinate of the point and we pass the radius of the circle.
Now, to draw this finally on screen, we call invalidate() in onDraw of the view.
To use the above View class in Activity we just use following in the XML file,
<LinearLayout xmlns:android="http://schemas.android.com/apk/res/android"
        android:layout_width="match_parent"
        android:layout_height="match_parent">

    <app.himanshu.playground.CanvasView
            android:layout_width="match_parent"
            android:layout_height="match_parent" />
</LinearLayout>
Points to remember,
- As the drawing happens on the main UI thread, avoid re-drawing in the same section for too long.
- Don't do a lot of calculations in onDraw()
- Canvas works on pixels and not dp.
Happy learning.
Team MindOrks :)