Build your first Android application in Kotlin

In this blog, we will learn how to make an Android application and run it on our mobile device or on Android Emulator. We will simply print one text in our application. So, let's get started by creating an Emulator in our Andriod Studio.
Create an Emulator
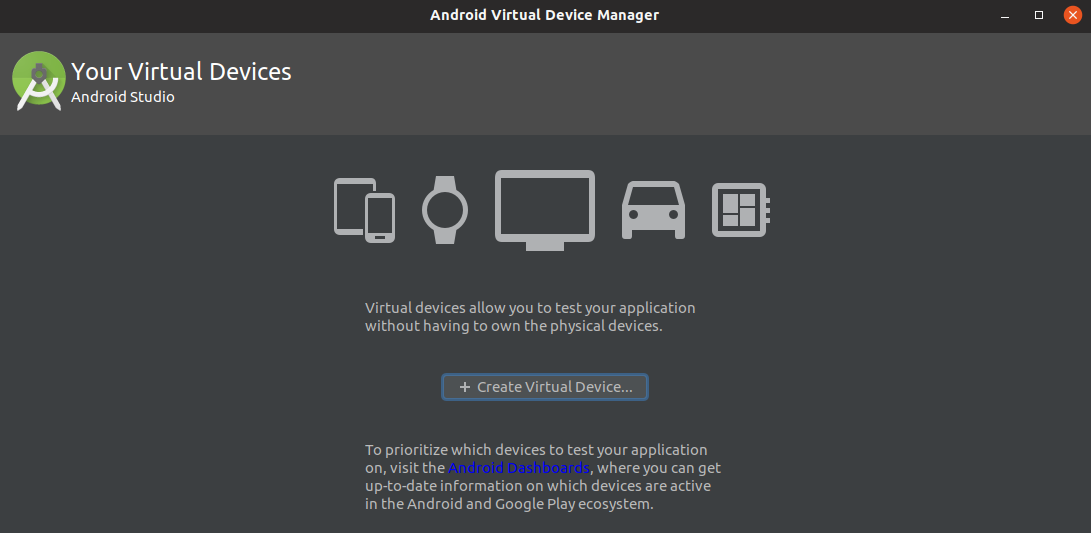
Android Studio provides Android Virtual Device(AVD) which is an emulator that is used to test our applications. It is similar to our normal mobile phone.
NOTE: The performance of Android Emulator depends on the RAM of your system and the allocated RAM to the Android Emulator. If your system has less RAM, then you will end up with system lag and emulator lag. In that case, use your mobile device.
Following are the steps you can follow to create an emulator:
- Select Tools > AVD Manager > Create Virtual Device.
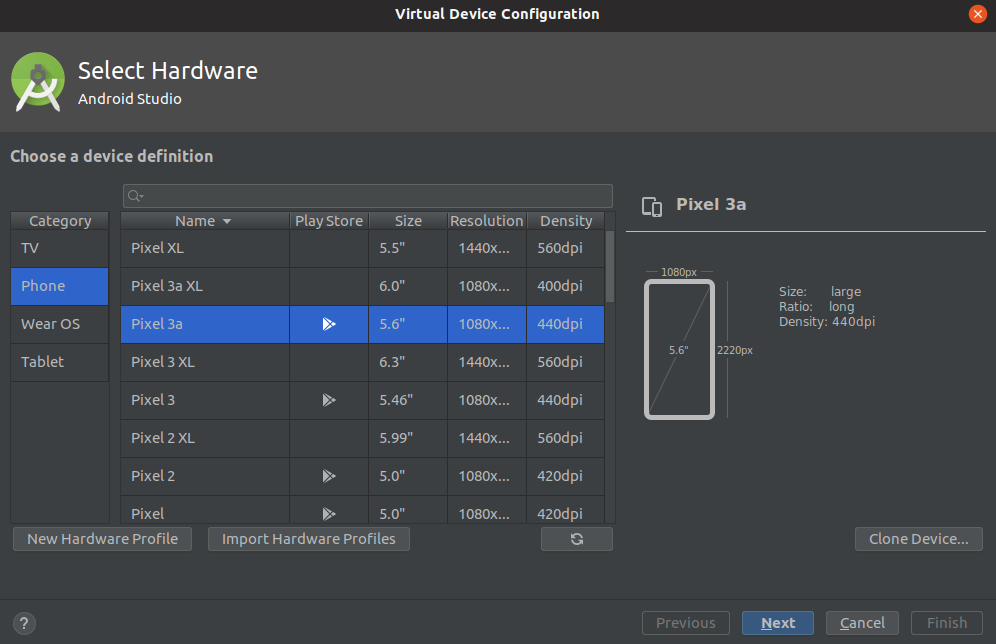
- You will have four options i.e. TV, Phone, Wear OS, and Tablet. I am using the Phone option.
- Select the desired Hardware and click on Next .
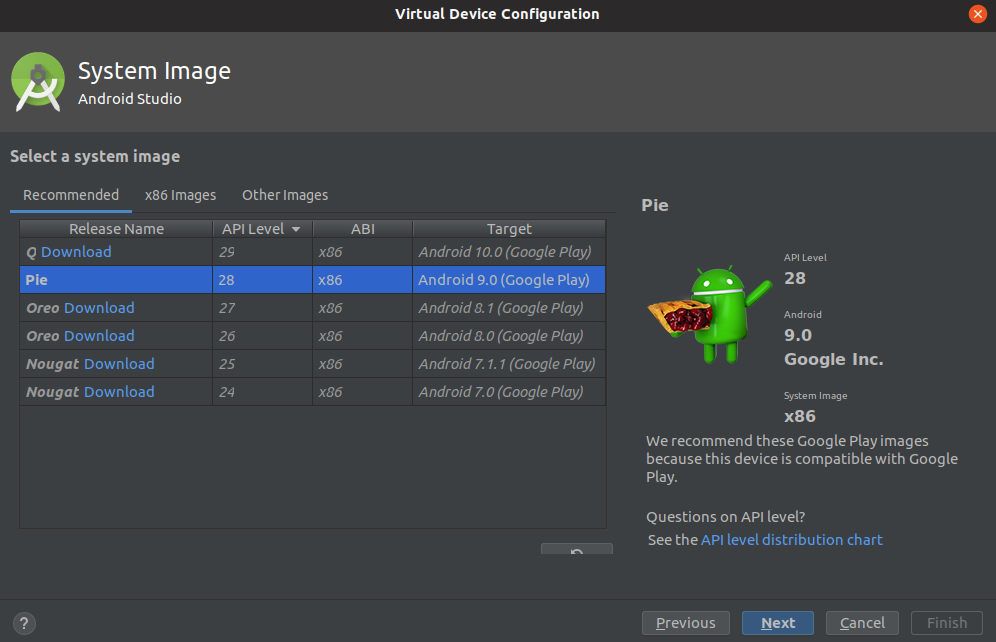
- Now, select the desired system image i.e. the API level of your Android OS and click on Next .
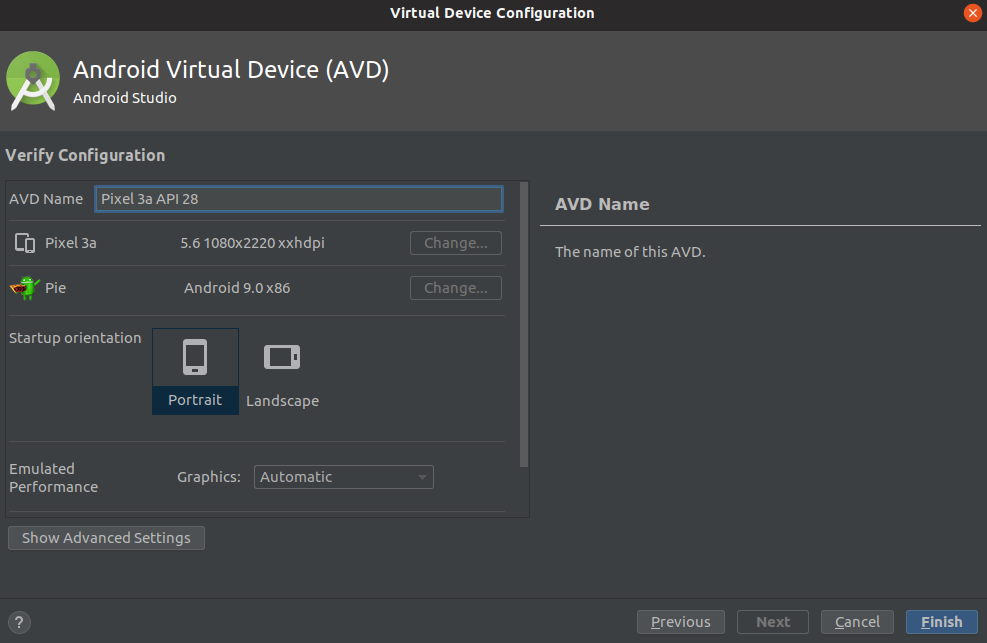
- Enter the required details and click on Finish .
- Now, you will have a list of emulators that are available on your Android Studio. You can launch any emulator by clicking on the " Play " button on the right side of the panel.
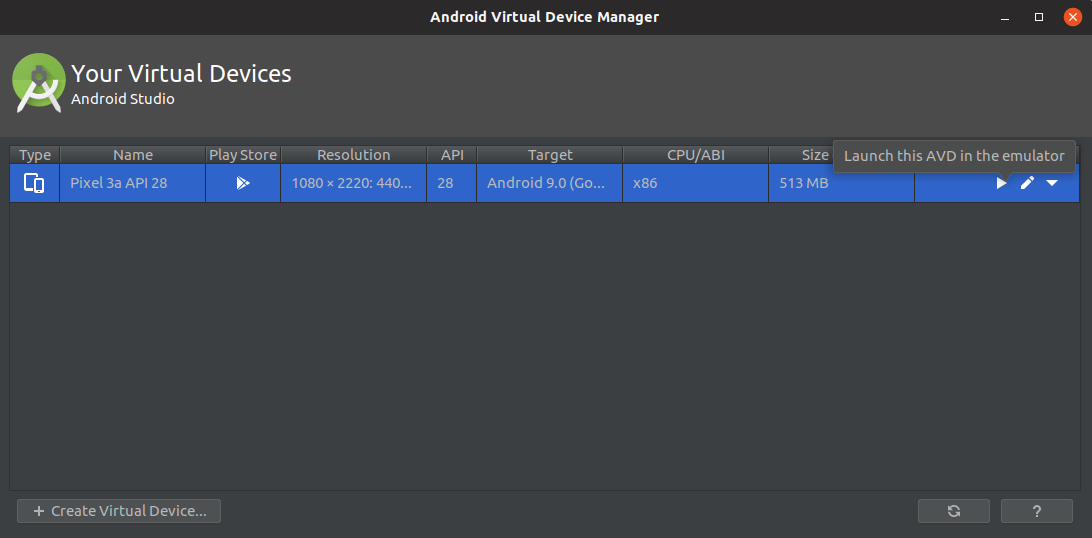
That's it. You are done with the creation of emulator in Android Studio.
Make your first Android Studio Project
To make your first Android Studio project, follow the below steps:
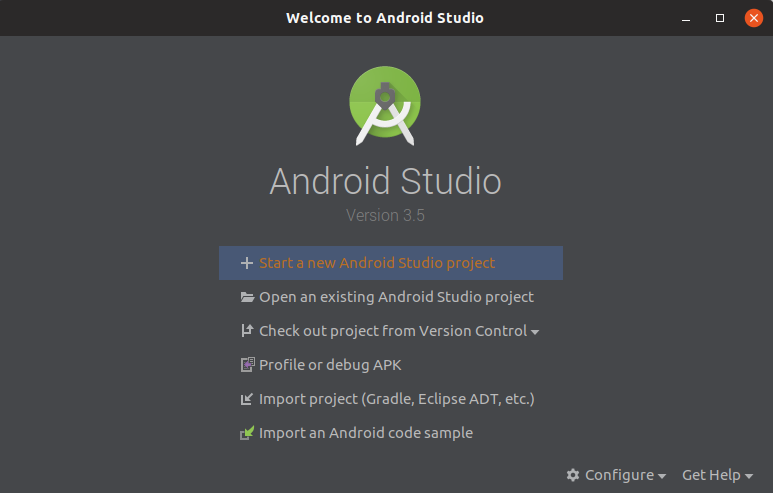
- Open Android Studio and click on " Start a new Android Studio project ".
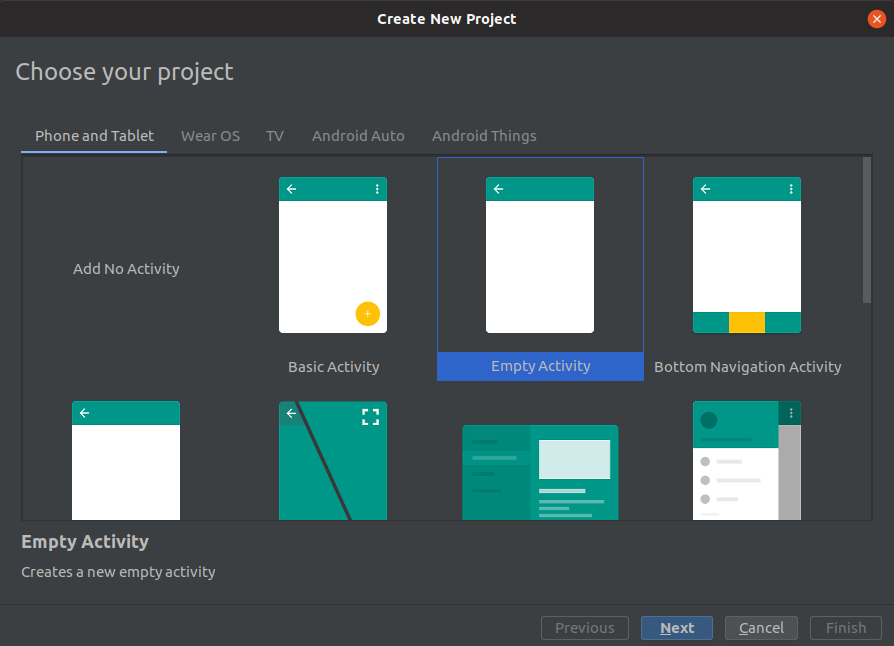
- Now, you have a lot of activity templates from which you can choose anyone according to your need. In this example, we will be using "EmptyActivity". So, click on EmptyActivity and click on Next .
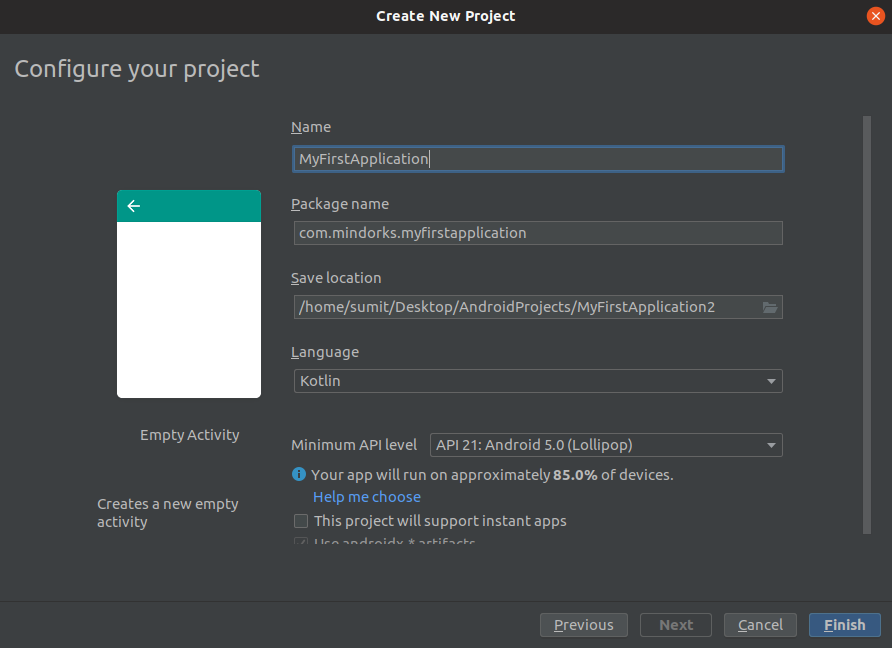
- Enter the name of the project and other required details. Select the language as " Kotlin " and select the Minimum Api level as API 21. (You can choose any API but if you are choosing the Minimum Api level as 21 then your app will run on all the devices of Api 21 or higher but it may produce some error for lower Apis). After that, click on Finish .
Now your project is created and you will see something like below:
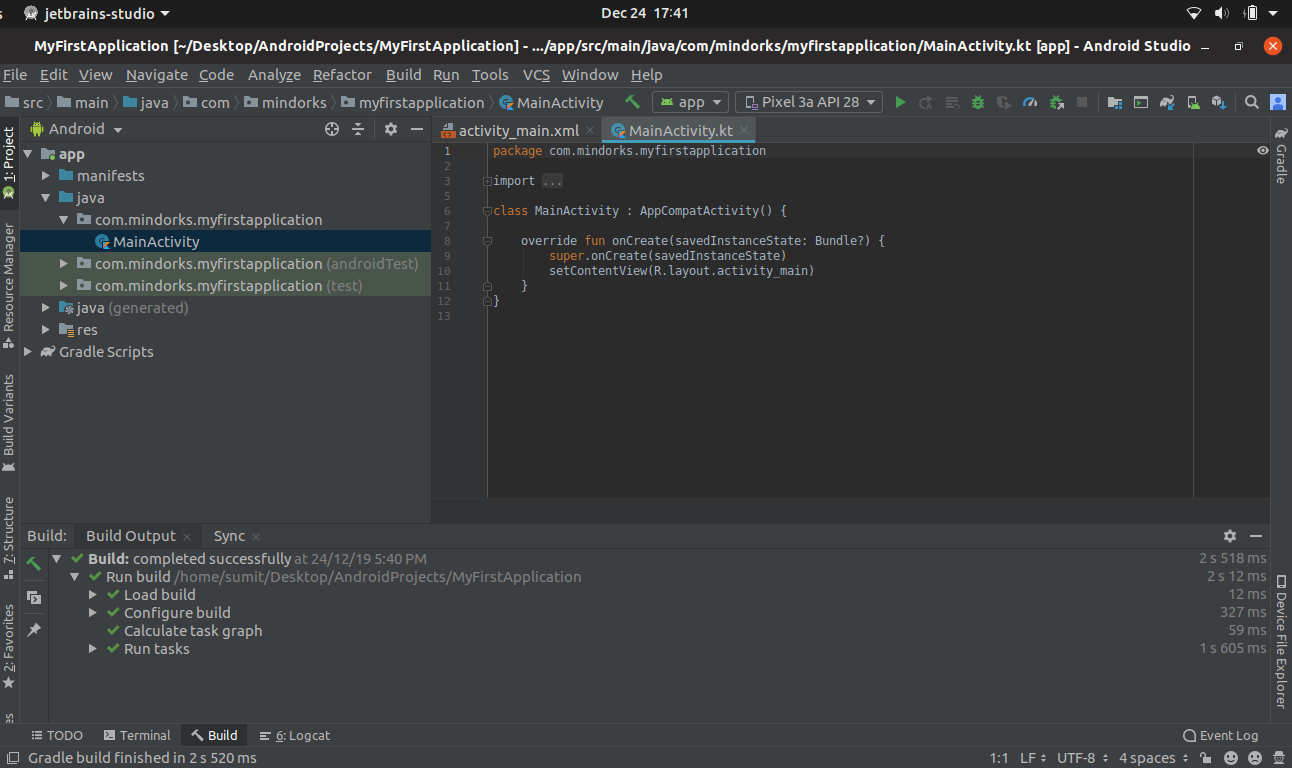
So, if you are creating some Android project then it will create some Activity for you and each Activity is having two files i.e. the code file and the layout file. In our example, we have a MainActivity.kt file and activtiy_main.xml file. In the MainActivity.kt file, you will write the logic of your application and in the activity_main.xml file, you will write the code for the layout of your application.
The MainActivity.kt file can be found by going app > java > your_package > MainActivity.kt .
The activity_main.xml file can be found by going app > res > layout > activity_main.xml .
Add the below code in your activity_main.xml file:
NOTE: If by opening the activity_main.xml file, you are getting some design view, then click on the text option that is present in the bottom of the screen.
<?xml version="1.0" encoding="utf-8"?>
<androidx.constraintlayout.widget.ConstraintLayout xmlns:android="http://schemas.android.com/apk/res/android"
    xmlns:app="http://schemas.android.com/apk/res-auto"
    xmlns:tools="http://schemas.android.com/tools"
    android:layout_width="match_parent"
    android:layout_height="match_parent"
    tools:context=".MainActivity">

    <TextView
        android:layout_width="wrap_content"
        android:layout_height="wrap_content"
        android:text="Hello MindOrks!"
        app:layout_constraintBottom_toBottomOf="parent"
        app:layout_constraintLeft_toLeftOf="parent"
        app:layout_constraintRight_toRightOf="parent"
        app:layout_constraintTop_toTopOf="parent" />

</androidx.constraintlayout.widget.ConstraintLayout>
Here in the above code, we have one TextView that is having "Hello MindOrks!" text in it.
Run the application
To run the application on the emulator, just click on the green Play button present in Android Studio or simple press Shift + F10 .
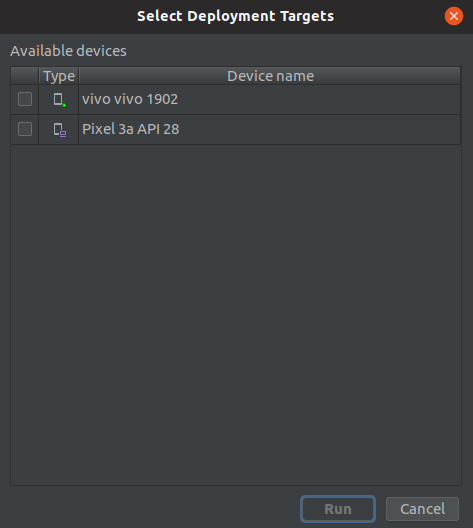
All the available devices for running your application will be made available to you and you can choose any of them and run your application on that. Here, both the emulator and your mobile device(if any) will be shown to you.
NOTE: In order to run your application on your mobile device, you have to enable the developer option in your mobile device.
Enable Developer Options
To enable your device to run the application directly from Android Studio to mobile, you need to configure your device by allowing Developer Options .
Go to Settings > System > About Phone > Tap Build Number 7 times(this number may change according to devices). You will see one message in the form of Toast saying "You are a developer now :)"
Return to the previous screen and you will see " Developer Options ". Open it and enable "USB Debugging" inside it to install the applications via your USB.
This is how you can create an application and run it on your mobile device or on the emulator.
Congratulations on your first Android Studio project. Hope you enjoyed this blog.
Happy Learning :)
Team MindOrks!