Firebase Realtime Database: Android Tutorial
Databases are an important part of any of our project. We store, retrieve, delete and update our data in the database taken from the application or from the software that we have made. Things become harder when you want to update and save all the data at real-time i.e. whenever you update the data, that updated data should be reflected back in your application at that very instant. But don't worry, things become easier when you use Firebase Realtime Database. In this blog, we will learn how to use Firebase Realtime Database in our application. Following topics are going to be covered in this blog:
- What is Firebase Realtime Database?
- Advantages of using Firebase Realtime Database
- About JSON structured data
- Database configuration rules
- Example
- Closing note
So, let's get started.
What is Firebase Realtime Database?
Following is the definition of Firebase Realtime Database from the Firebase website:
Firebase Realtime Database is a cloud-hosted database that supports multiple platforms Android, iOS and Web. All the data is stored in JSON format and any changes in the data, reflects immediately by performing sync across all the platforms & devices. This allows us to build more flexible realtime apps easily with minimal effort.
In simpler words, we can say that a Firebase Realtime Database is a type of database that is cloud-hosted i.e. it runs on the cloud and it can be accessed from any platform i.e. it can be accessed from Android, iOS and Web at the same time. So, make the database once and use it on different platforms. The data stored in the database is of the form of NoSQL database and is stored in JSON format. The best part is that whenever there is a change in the database, it will be immediately reflected all the devices connected to it.
Advantages of using Firebase Realtime Database
Following are the advantages of using Firebase Realtime Database in our project:
- Realtime: The data stored in the Firebase Realtime Database will be reflected at realtime i.e. if there is a change in the values in the database then that change will be reflected back to all the users at that instant only and no dealy will be there.
- Large Accessibility: The Firebase Realtime Database can be accessed from various platforms like Android, iOS, Web. So, you need not write the same code for different platforms a number of times.
- Offline Mode: This is the best advantage of using Firebase Realtime Database. If you are not connected with the internet and you changed something on your application then that change will be reflected in your application at that time only but on the Firebase Database, the change will be updated once you are online i.e. your device is connected to the internet. So, even if there is no internet, the user feels like using the services the same as done when there is the internet.
- No Application Server: There is no need for application server here because the data is directly accessed from the mobile device.
- Control access to data: By default, no one is allowed to change the data in the Firebase Realtime Database but you can control the access of data i.e. you can set which user can access the data.
About JSON structured data
The data stored in the Firebase Realtime Database is JSON structured i.e. the entire database will be a JSON tree with multiple nodes. So, unlike SQL database, we don't have tables or records in the JSON tree. Whenever you are adding some data to the JSON tree, then it becomes a node in the existing JSON structure with some key associated with it. So, all Firebase Realtime Database data is stored as JSON objects. Following is an example of JSON structured data:
{
    "company": {
        "name": "MindOrks",
        "address": "Gurugram"
    }
}
Here, in the above example, we are just using nesting to store our information. To find how to structure your data in the Firebase Realtime Database, you can visit the Firebase website .
Database configuration rules
The data present in the database is very important and you shouldn't give access to everyone to use the data present in your database. So, in order to do so, Firebase Realtime Database has some database configuration rules that can be used to provide different access to different users. Following are the database configuration rules:
- Default: By default, the read and write access to your database is disabled and no one can read or write data from the database in this mode. But here, you can access the data of the database from the Firebase Console only.
// These rules don't allow anyone read or write access to your database
{
  "rules": {
    ".read": false,
    ".write": false
  }
}- Public: By using public rules, anyone can change the data present in the database. This rule is generally used when you are testing your application and after testing the application you can set the rule to User only.
// These rules give anyone, even people who are not users of your app,
// read and write access to your database
{
  "rules": {
    ".read": true,
    ".write": true
  }
}- User: In this rule, the user of your application can read and write in your database. You can authenticate your user using the Firebase Login and Authentication and after that, your user will have the access to your database.
// These rules grant access to a node matching the authenticated
// user's ID from the Firebase auth token
{
  "rules": {
    "users": {
      "$uid": {
        ".read": "$uid === auth.uid",
        ".write": "$uid === auth.uid"
      }
    }
  }
}
In this blog, we will be making our database as public because we want to learn the Firebase Realtime Database concept. But it is advised to give access to your database to the authenticated users only. To find how to Authenticate users using Firebase, you can read our blog on the same by clicking here .
Example
In this section of the blog, we will learn the concept of Firebase Realtime Database with the help of one example. In our example, we will store the name and mobile number of users in our database and at the same time, we will display the name and mobile number of the user at realtime. So, let's get started.
Step 1: Open Android Studio and create a new project or open an existing project.
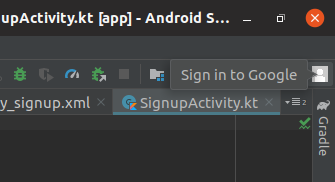
Step 2: In Android Studio, log in with your email. You can find the login button at the top right corner of the Android Studio. (Remember the email id that you have used here)
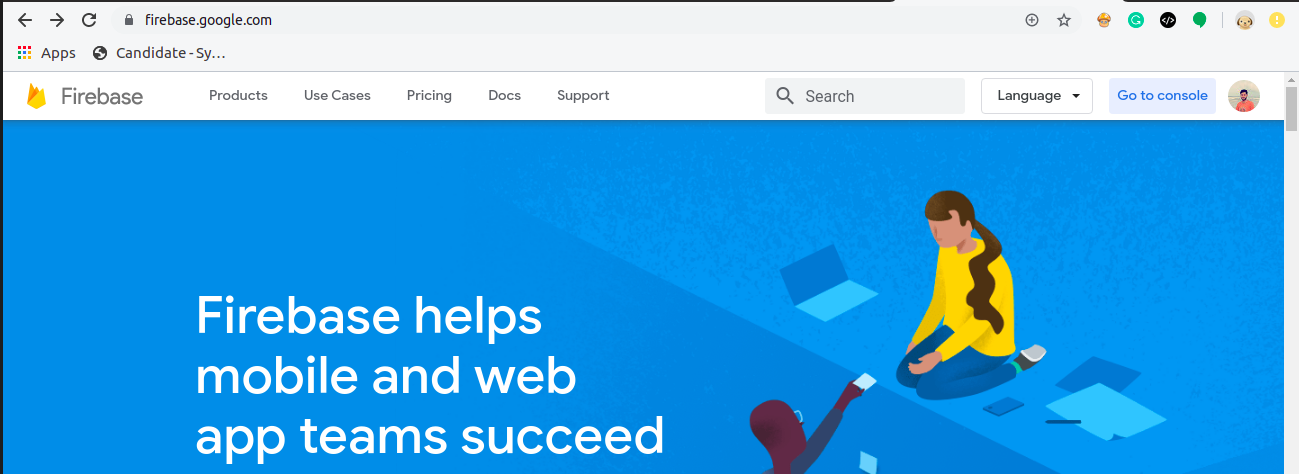
Step 3: Open the Firebase Website and login into it. (use the same email id as used in Android Studio for login)
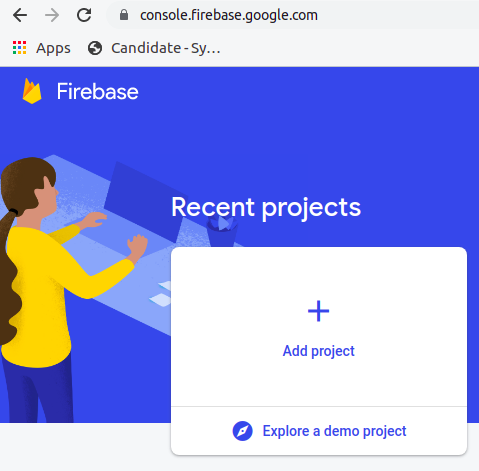
Step 4: After login, click on the " Go To Console " button that is present of the upper right side of the website.
Step 5: Click on " Add Project ".
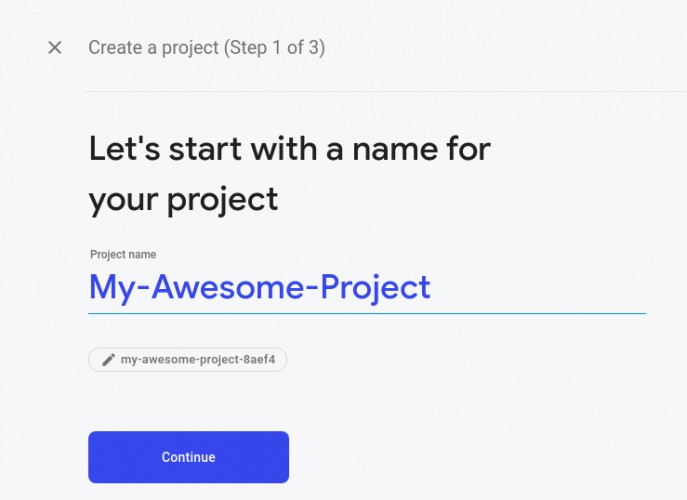
Step 6: Enter the required details of the project and click on submit.
Step 7: After creating a project, you will see the below image of your project dashboard.

Here, all the services of Firebase are shown and you can use any of them.
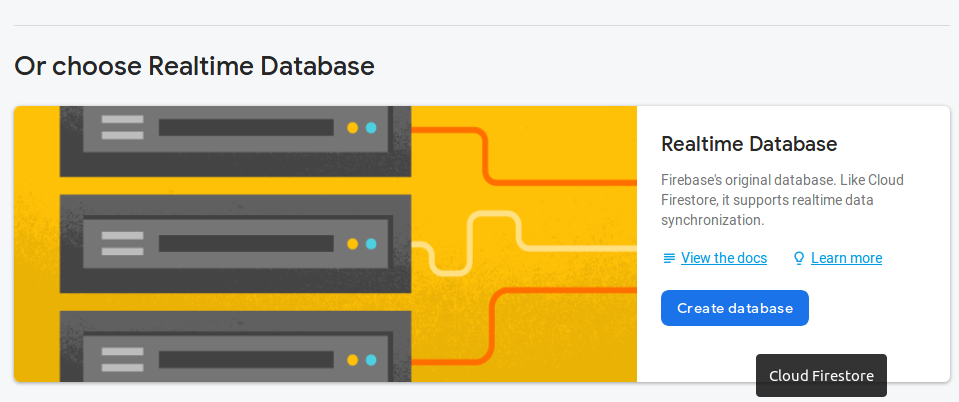
Step 8: Click on " Database " and then in the Realtime Database section, click on " Create Database ".
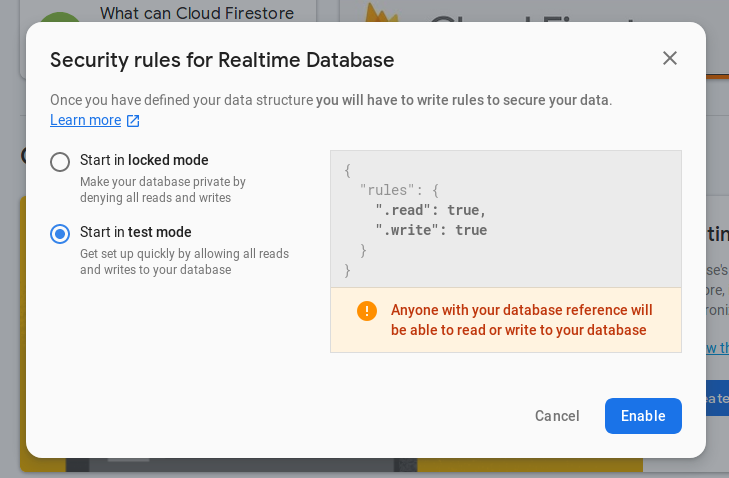
Step 9: Since we are just using the database for our practice purpose. So, select the " Start in test mode " option and click on enable.
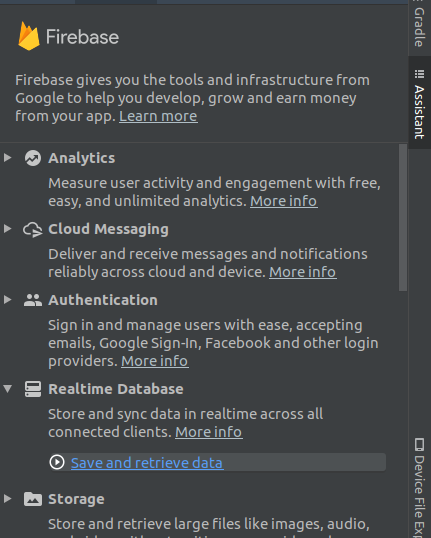
Step 10: Now, come back to your Android Studio project. We have to connect our Firebase project with the Android Studio project. So, click on Tools > Firebase > Realtime Database > Save and retrieve data .
Step 11: After that click on " Connect to Firebase ". A list of projects will be shown to you. Select the project that you have created on the Firebase website and click on " Connect to Firebase ".
Step 12: Lastly, you have to add the dependency of Firebase Realtime Database in your project by clicking on " Add Firebase Realtime Database to your app " button and then " Accept changes ".
Adding code for the main_activity.xml
In our example, we are updating and showing the information of the user i.e. name and mobile. So, we will have two TextViews for showing details and two EditTexts for getting the new values from the user and an update button. The code for the same will be:
<?xml version="1.0" encoding="utf-8"?>
<androidx.constraintlayout.widget.ConstraintLayout xmlns:android="http://schemas.android.com/apk/res/android"
    xmlns:app="http://schemas.android.com/apk/res-auto"
    xmlns:tools="http://schemas.android.com/tools"
    android:layout_width="match_parent"
    android:layout_height="match_parent"
    tools:context=".UserAccount">

    <TextView
        android:id="@+id/user_name"
        android:layout_width="match_parent"
        android:layout_height="56dp"
        app:layout_constraintEnd_toEndOf="parent"
        app:layout_constraintStart_toStartOf="parent"
        app:layout_constraintTop_toTopOf="parent"
        android:text="@string/dummy_name"
        android:textSize="32sp"/>

    <TextView
        android:id="@+id/user_mobile"
        android:layout_width="match_parent"
        android:layout_height="56dp"
        app:layout_constraintEnd_toEndOf="parent"
        app:layout_constraintStart_toStartOf="parent"
        app:layout_constraintTop_toBottomOf="@+id/user_name"
        android:text="@string/dummy_mobile"
        android:textSize="32sp"/>

    <com.google.android.material.textfield.TextInputLayout
        android:id="@+id/textInputLayout"
        android:layout_width="match_parent"
        android:layout_height="56dp"
        android:layout_marginTop="32dp"
        app:layout_constraintEnd_toEndOf="parent"
        app:layout_constraintStart_toStartOf="parent"
        app:layout_constraintTop_toBottomOf="@+id/user_mobile">

        <EditText
            android:id="@+id/name_edt_text"
            android:layout_width="match_parent"
            android:layout_height="match_parent"
            android:hint="@string/name_hint" />

    </com.google.android.material.textfield.TextInputLayout>

    <com.google.android.material.textfield.TextInputLayout
        android:id="@+id/textInputLayout2"
        android:layout_width="match_parent"
        android:layout_height="56dp"
        app:layout_constraintEnd_toEndOf="parent"
        app:layout_constraintStart_toStartOf="parent"
        app:layout_constraintTop_toBottomOf="@+id/textInputLayout">

        <EditText
            android:id="@+id/mobile_edt_text"
            android:layout_width="match_parent"
            android:layout_height="match_parent"
            android:hint="@string/mobile_hint"
            android:inputType="phone" />

    </com.google.android.material.textfield.TextInputLayout>

    <Button
        android:id="@+id/update_user_btn"
        android:layout_width="match_parent"
        android:layout_height="56dp"
        android:layout_marginTop="8dp"
        app:layout_constraintEnd_toEndOf="parent"
        app:layout_constraintStart_toStartOf="parent"
        app:layout_constraintTop_toBottomOf="@+id/textInputLayout2"
        android:text="@string/update_user_info"/>

</androidx.constraintlayout.widget.ConstraintLayout>
Creating a UserInfo class
Till now, we are done with the UI part of our project. Now, in our example, we are storing the name and mobile of the users of the application in our database. So, create a data class in your project named UserInfo.kt and add the below code:
package com.mindorks.firebaseloginsignup

import com.google.firebase.database.IgnoreExtraProperties

@IgnoreExtraProperties
data class UserInfo(
    var name: String? = "",
    var mobile: String? = ""
)
Get a Database Reference
To read or write into your database, you need to get the instance of DatabaseReference . To do so, we can use the getReference() method and pass the reference node to it. Following is the code for the same:
private lateinit var dbReference: DatabaseReference
//some code

//get reference to the "users" node
dbReference = FirebaseDatabase.getReference("users")
Read and Write Data
Now, we are having DatabaseReference with us. So, the next thing that we can do is perform read and write operation on our database. To write something on the database, we can use the setValue() method as below:
private fun createUser(name: String, mobile: String) {
    val user = UserInfo(name, mobile)
    dbReference.child(userId).setValue(user)
}
The setValue() method, overwrite the data that is present with the new data.
Here, the userId is the id of the current user who is writing on the database. Also, we have created the reference of "users" node. So, we need not pass the name of the node that is to be updated, explicitly. To do it explicitly, we can use the below code:
dbReference.child("users").child(userId).setValue(user)Instead of updating the entire object, we can update a particular child by using:
dbReference.child("users").child(userId).child("name").setValue(name)The above code will change the name of the current user in the " users" node and nothing else will be changed.
Since we are using a Realtime Database. So, we must listen to the changes that are made to our database. To listen for changes in the database, we can use the addValueEventListener() method to add a ValueEventListener to a DatabaseReference . Following is the code for the same:
private fun addUserChangeListener() {
        // User data change listener
        dbReference.child(userId).addValueEventListener(object : ValueEventListener {
            override fun onDataChange(dataSnapshot: DataSnapshot) {
                val user = dataSnapshot.getValue(UserInfo::class.java)

                // Check for null
                if (user == null) {
                  return
                }


                // Display newly updated name and email
                userNameTv.setText(user?.name).toString()
                userMobileTv.setText(user?.mobile).toString()

                // clear edit text
                userNameEt.setText("")
                userMobileEt.setText("")
            }

            override fun onCancelled(error: DatabaseError) {
                // Failed to read value
            }
        })
    }
onDataChange() will be called when there is a change in the data of the database and if due to some reasons the application is unable to read data from the database, then the onCancelled() method will be called.
Delete a data
To delete a data from a specific location, you can use the removeVale() method on a reference to the location of that data.
You can find the full code of UserAccount.kt from here .
Closing note
In this blog, we learned how to use Firebase Realtime Database in our application. We saw some of the advantages of using Realtime Database in our app and at last, we saw one example on the same. You can go through the Login and Authentication using Firebase blog from here .
Hope you learned something new today.
Have a look at our Android tutorials here .
Do share this blog with your fellow developers to spread the knowledge. You can read more blogs on Android on our blogging website .
Apply Now: MindOrks Android Online Course and Learn Advanced Android
Happy Learning :)
Team MindOrks!
Also, Let’s connect on Twitter , Linkedin , Github , and Facebook