Understanding Build Analyzer in Android
With the release of Android Studio 4.0, a lot of new features launched. A few of them are, Motion Editor, Improved Layout Inspector, Layout Validation, Build Analyzer, etc.
In this blog, we are going to understand and learn about Build Analyzer.
What is Build Analyzer?
When building an app, we sometimes see it takes 20mins (Gradle issues :P), or even sometimes it can also happen very quickly. So, to analyze why all of it is taking a lot of time, Build Analyzer was introduced as a tool in Android Studio 4.0 where you can check the performance of the build of the project, and based on it we can improve the build time.
Now, let us start understanding the Analyzer.
How Analyzer generates the report?
When we build the project, the data generated will be dependent whenever we build the project and might change whenever we build it.
When working with the project if it's a smaller app, then the analyzer might not generate a different report but if the project is large enough a lot of things in the report can change between two different build reports.
Now, let's say when we build the project, it will take some time and after successful, we will get the following output,
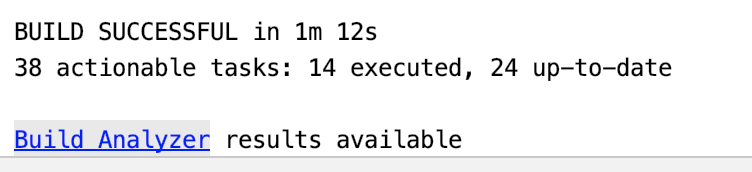
This will provide a detailed report and to visit we can click the Build Analyzer.
And, now when we click Build Analyzer, we open the following,
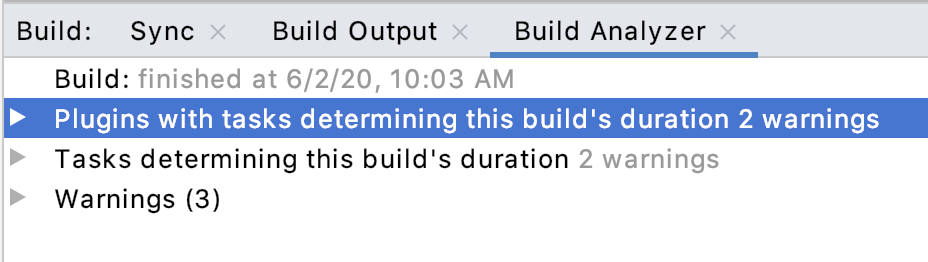
Here, you can see we have now a new tab called Build Analyzer. Every report might have at least two options i.e.,
- Plugins with tasks determining the build’s duration.
- Tasks determining this build's duration.
But if we have some warning in the project, a new Warnings option would be there as well.
Now, let us understand each of them one by one.
Plugins with tasks determining the build’s duration
When we open the option, we see a visual representation of plugins and the time it takes to contributions to building the project.
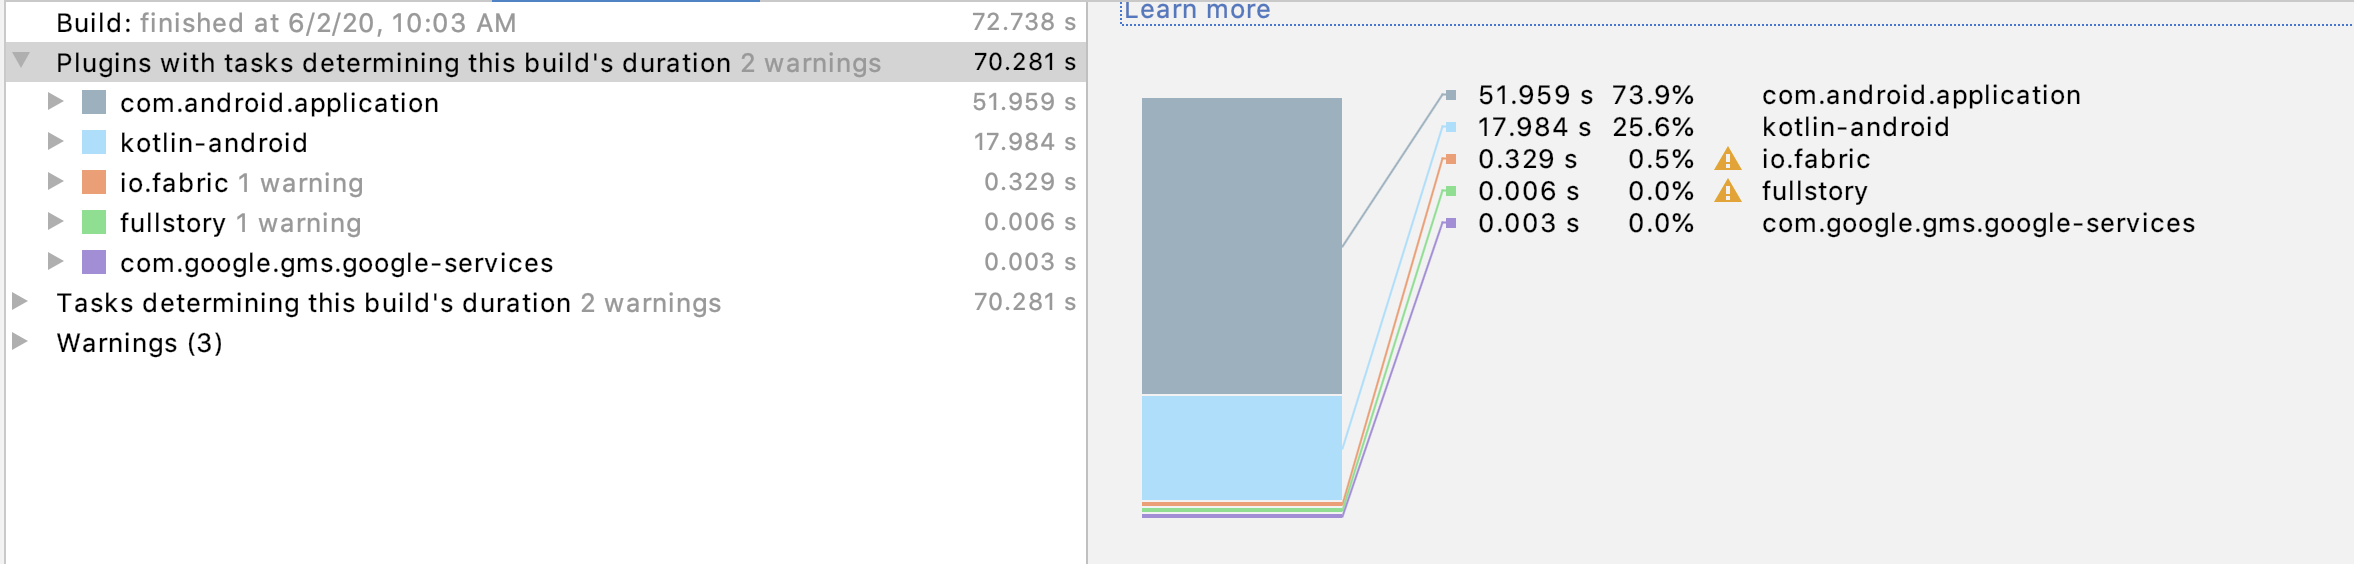
Here you can see, that in the analyzer we have got all the plugins, and based on it we have its build timing.
Here, plugins are only added if they have contributed to at least one task in the build of the project.
Now, if you click the plugin of the left side, you can see the individual task performed under each plugin. So, if I click com.android.application, the report changes like,
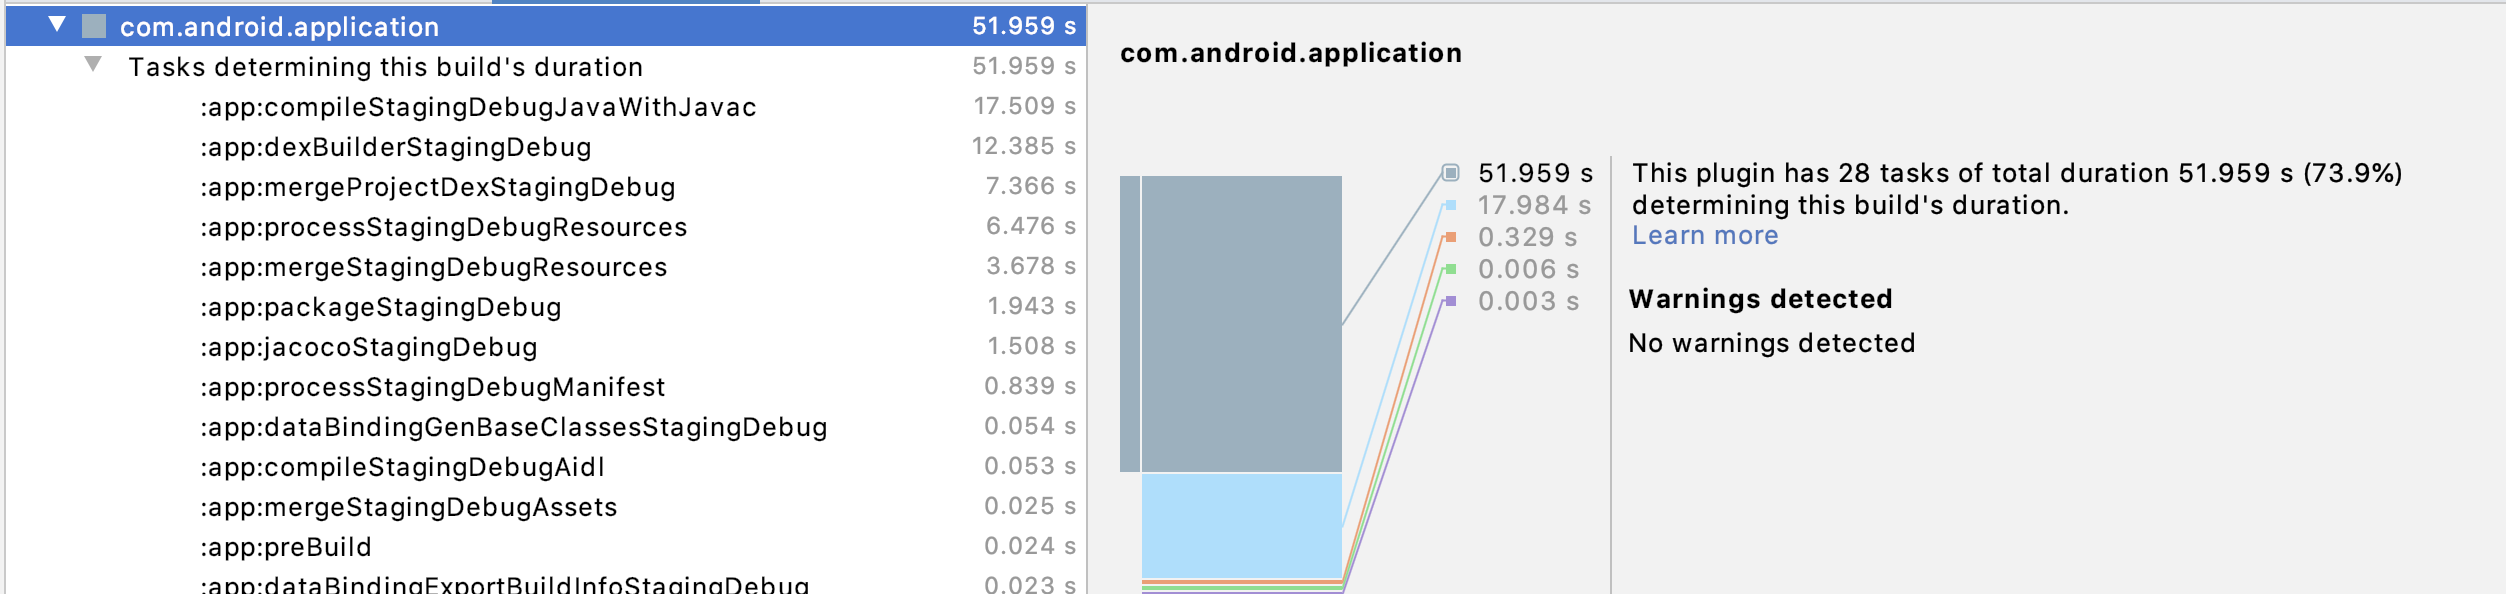
Here, you can see the task performed on the left, and on the right, you can see the total task with its execution time.
Task determining this build's duration
This section has the task in sequential order from multiple plugins in which it orders itself based on the maximum time taken to perform the build.
Here, as well the left-hand side panel has a collection of all the tasks inside it like above.
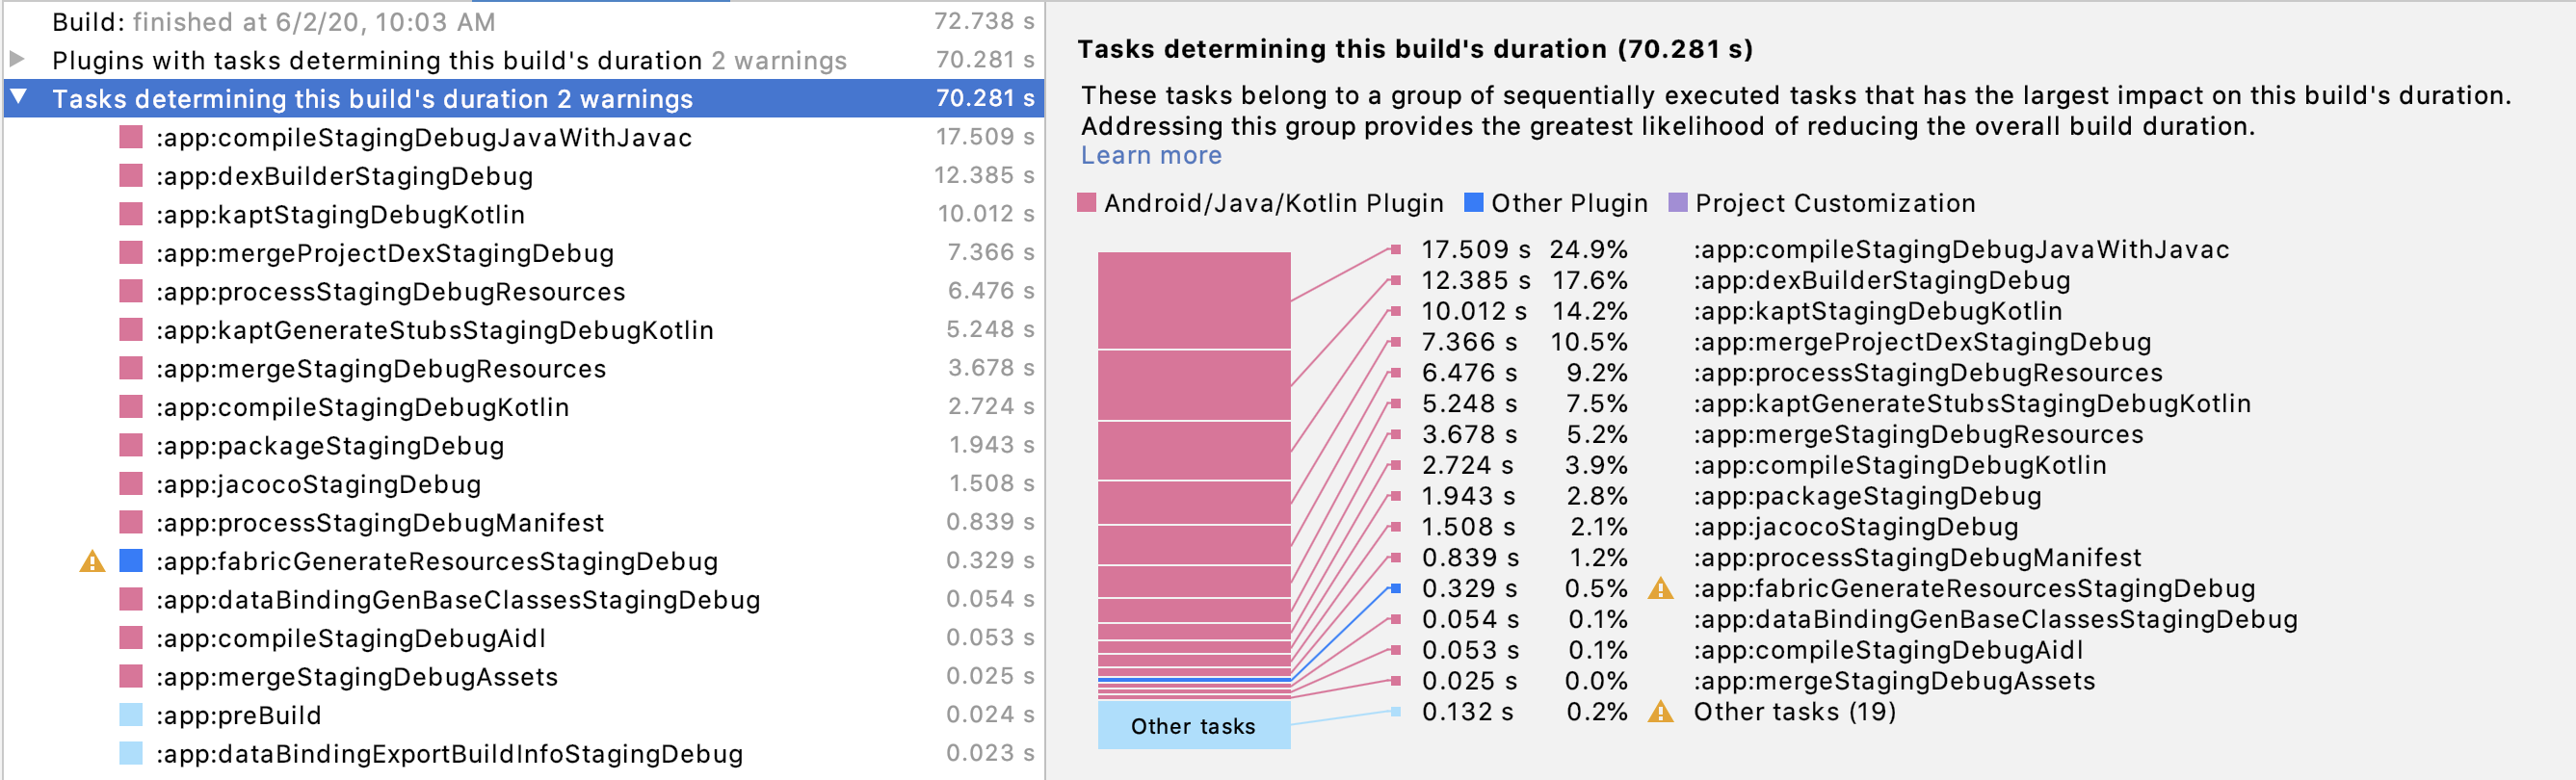
Here, you can see on the right side the task is divided based on which one has the most impact on the build. Each of the tasks is divided into different colors. Let's understand one by one,
- Pink: These tasks are of the Android Gradle plugin or Java Gradle plugin, or it can also be Kotlin Gradle plugin.
- Blue: These tasks are of a third party or custom plugins like retrofit or any other library.
-
Purple:
These tasks don’t belong to any plugin but is used to dynamically modify our project properties at runtime. For example, these are tasks that you might define within your
build.gradlefiles to be run. - Light blue: These tasks compared to other tasks highlighted by the analyzer, do not have a high impact on the build's duration(in our case other tasks).
Warnings
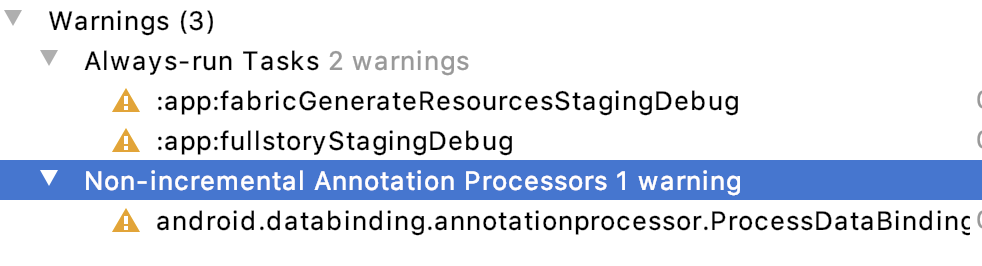
When analyzing the build, we also get some set of warnings from the android studio which do not run in an efficient manner. You can get the list of warnings when you expand the warning in the left side.
In our case the warnings are,
When we check the individual warning, it provides a detailed description of the warning and also suggests a potential solution to fix it. When we click the first warning we get,

Here, you can see it gives the issue and a recommendation on how to fix the issue.
Let's say if the issue is of the third party library try to generate the report from the right panel and submit it to the developer to help them fix it the newer release of the library.
This is how the build analyzer can help us to inspect the build of our project. If you want to learn how to speed up the gradle's build time, click here.
Happy learning.
Team MindOrks :)